Translate

Showing posts with label Heat Embossing. Show all posts

Thursday, April 28, 2022

Pop Fizz Clink Cheers!


Welcome back!  I've got some more fun with the Pop Fizz Clink set!

I started this one with a panel I created using the Bubbly stencil and watercolors using some Distress Oxide Inks.


I stamped and embossed the glass directly onto the background and then used the coordinating die to cut the bubbles from some iridescent paper and then glued them over the stamped bubbles.


I stamped and heat embossed all of the sentiments.. the Pop Fizz Clink on pink cardstock with white embossing powder and then stamped the Cheers on white with Raspberry ink and embossed with clear powder.  I fussy cut the Cheers and popped it up onto the two circles from the Pinked Slimline set and trimmed the Pop Fizz Clink to strips and popped them up onto the background.

That's me for today!  I hope you enjoyed it and you'll come again soon!


Saturday, April 16, 2022

Hello Friend Part 2!


Welcome back!  Today I'm using the 2nd foiled background that I created when I made the one from last time.  You can see that post here if you'd like!  And here's how I made the two backgrounds in case you missed it last time:


Both so different and I love both of them!


The lines from the Flowery Background are pretty fine and when I used the negative sheet on this already colorful background, it was hard to see the flowers, so I decided to heat emboss it in silver.  I didn't try to get a solid impression to stay with a more distressed look.


And I used the pinked circle from the Pinked Slimline set again along with a sentiment using a stamped image and the Friend word die from the Sweet Friend Dies.

That's me for today!  Hope you enjoyed it and come again soon!


Sunday, October 24, 2021

You Make My Heart Smile!


Welcome back!  I've got some watercoloring for you today!  I've used some liquid watercolor this time.

I started by die cutting a panel using the stitched die from the Slimline Pinked set.  I heat embossed the beautiful Flowery Background onto it in gold.  The background covers a regular card base panel so was short for the slimline, but I decided instead of stamping it again, I'd leave it blank and do something different with it.  Then I dropped a couple drops of the yellow and orange watercolors into wells of a paint pallete and water in a couple of the wells.  I started with a yellow wash and then started adding the two colors to the flowers sometimes heavier on the yellow and others the orange.


I love the variations I got and it reminds me of the Fall Mums I'd always plant in the fall in NY.

When that was dry, I blended some yellow and orange Distress Oxides onto the blank end of the panel and then added some texture paste through the Falling Leaves stencil and added gold embossing powder over it and heated that up.

I used some gold Glitter Tape across the area where the two designs came together and then added the sentiment with the word die and sentiment from the Sassy Smiles Duo at the bottom.


Finally, I cut the pinked panel in white and layered the watercolored panel over a yellow; then layered that over the white pinked panel and finally an orange base and a few sequins to finish it off!

That's me for today!  I hope you enjoyed it and I hope you've been enjoying all of the birthday inspiration we've been having here lately!

Come back again soon!


Sunday, August 8, 2021

You Got Rescued


Welcome back!  I can't believe it's August already!  This month I'm going to be sharing cards using the Pawesome Stencil and Nate and Friday Stamp Set!

For this one, I started by using some black gloss embossing paste and the heart with the paw in the center and applied it to a scrap piece of card stock.  Then I added some Black Glitter Embossing Powder and heated it.  Finally I fussy cut around the heart and set it aside.


Next I grabbed a base panel and used the stencil again with some Distress Oxide Inks in Yellow, Pink and Orange, blending each over the ones next to them just a bit.  Then I wiped off the stencil and applied some clear embossing past through the same stencil to give it some shine and dimension.  I set it aside to dry and stamped the sentiment onto black paper with Versamark and heat embossed it in white.  Finally I cut the sentiment into a strip. 


I matted the panel onto black and then white with a 1/16" border and added a white border to the sentiment strip.  Finally, I popped the black outlined heart over the center of the rainbow paw heart and popped the sentiment up below it.  A few sequins and done!

That's me for today!  These two pet themed products are perfect together!  I'll be back again with more of these two!  Next time we'll be playing with foil!


Saturday, July 3, 2021

Time To Celebrate!


Hello!  I hope you are able to enjoy some fun this holiday weekend!  I'm spending time with family and thought I'd make a red, white and blue card to honor the 4th.  I thought the Jacks Stencil would make a perfect background for this one!


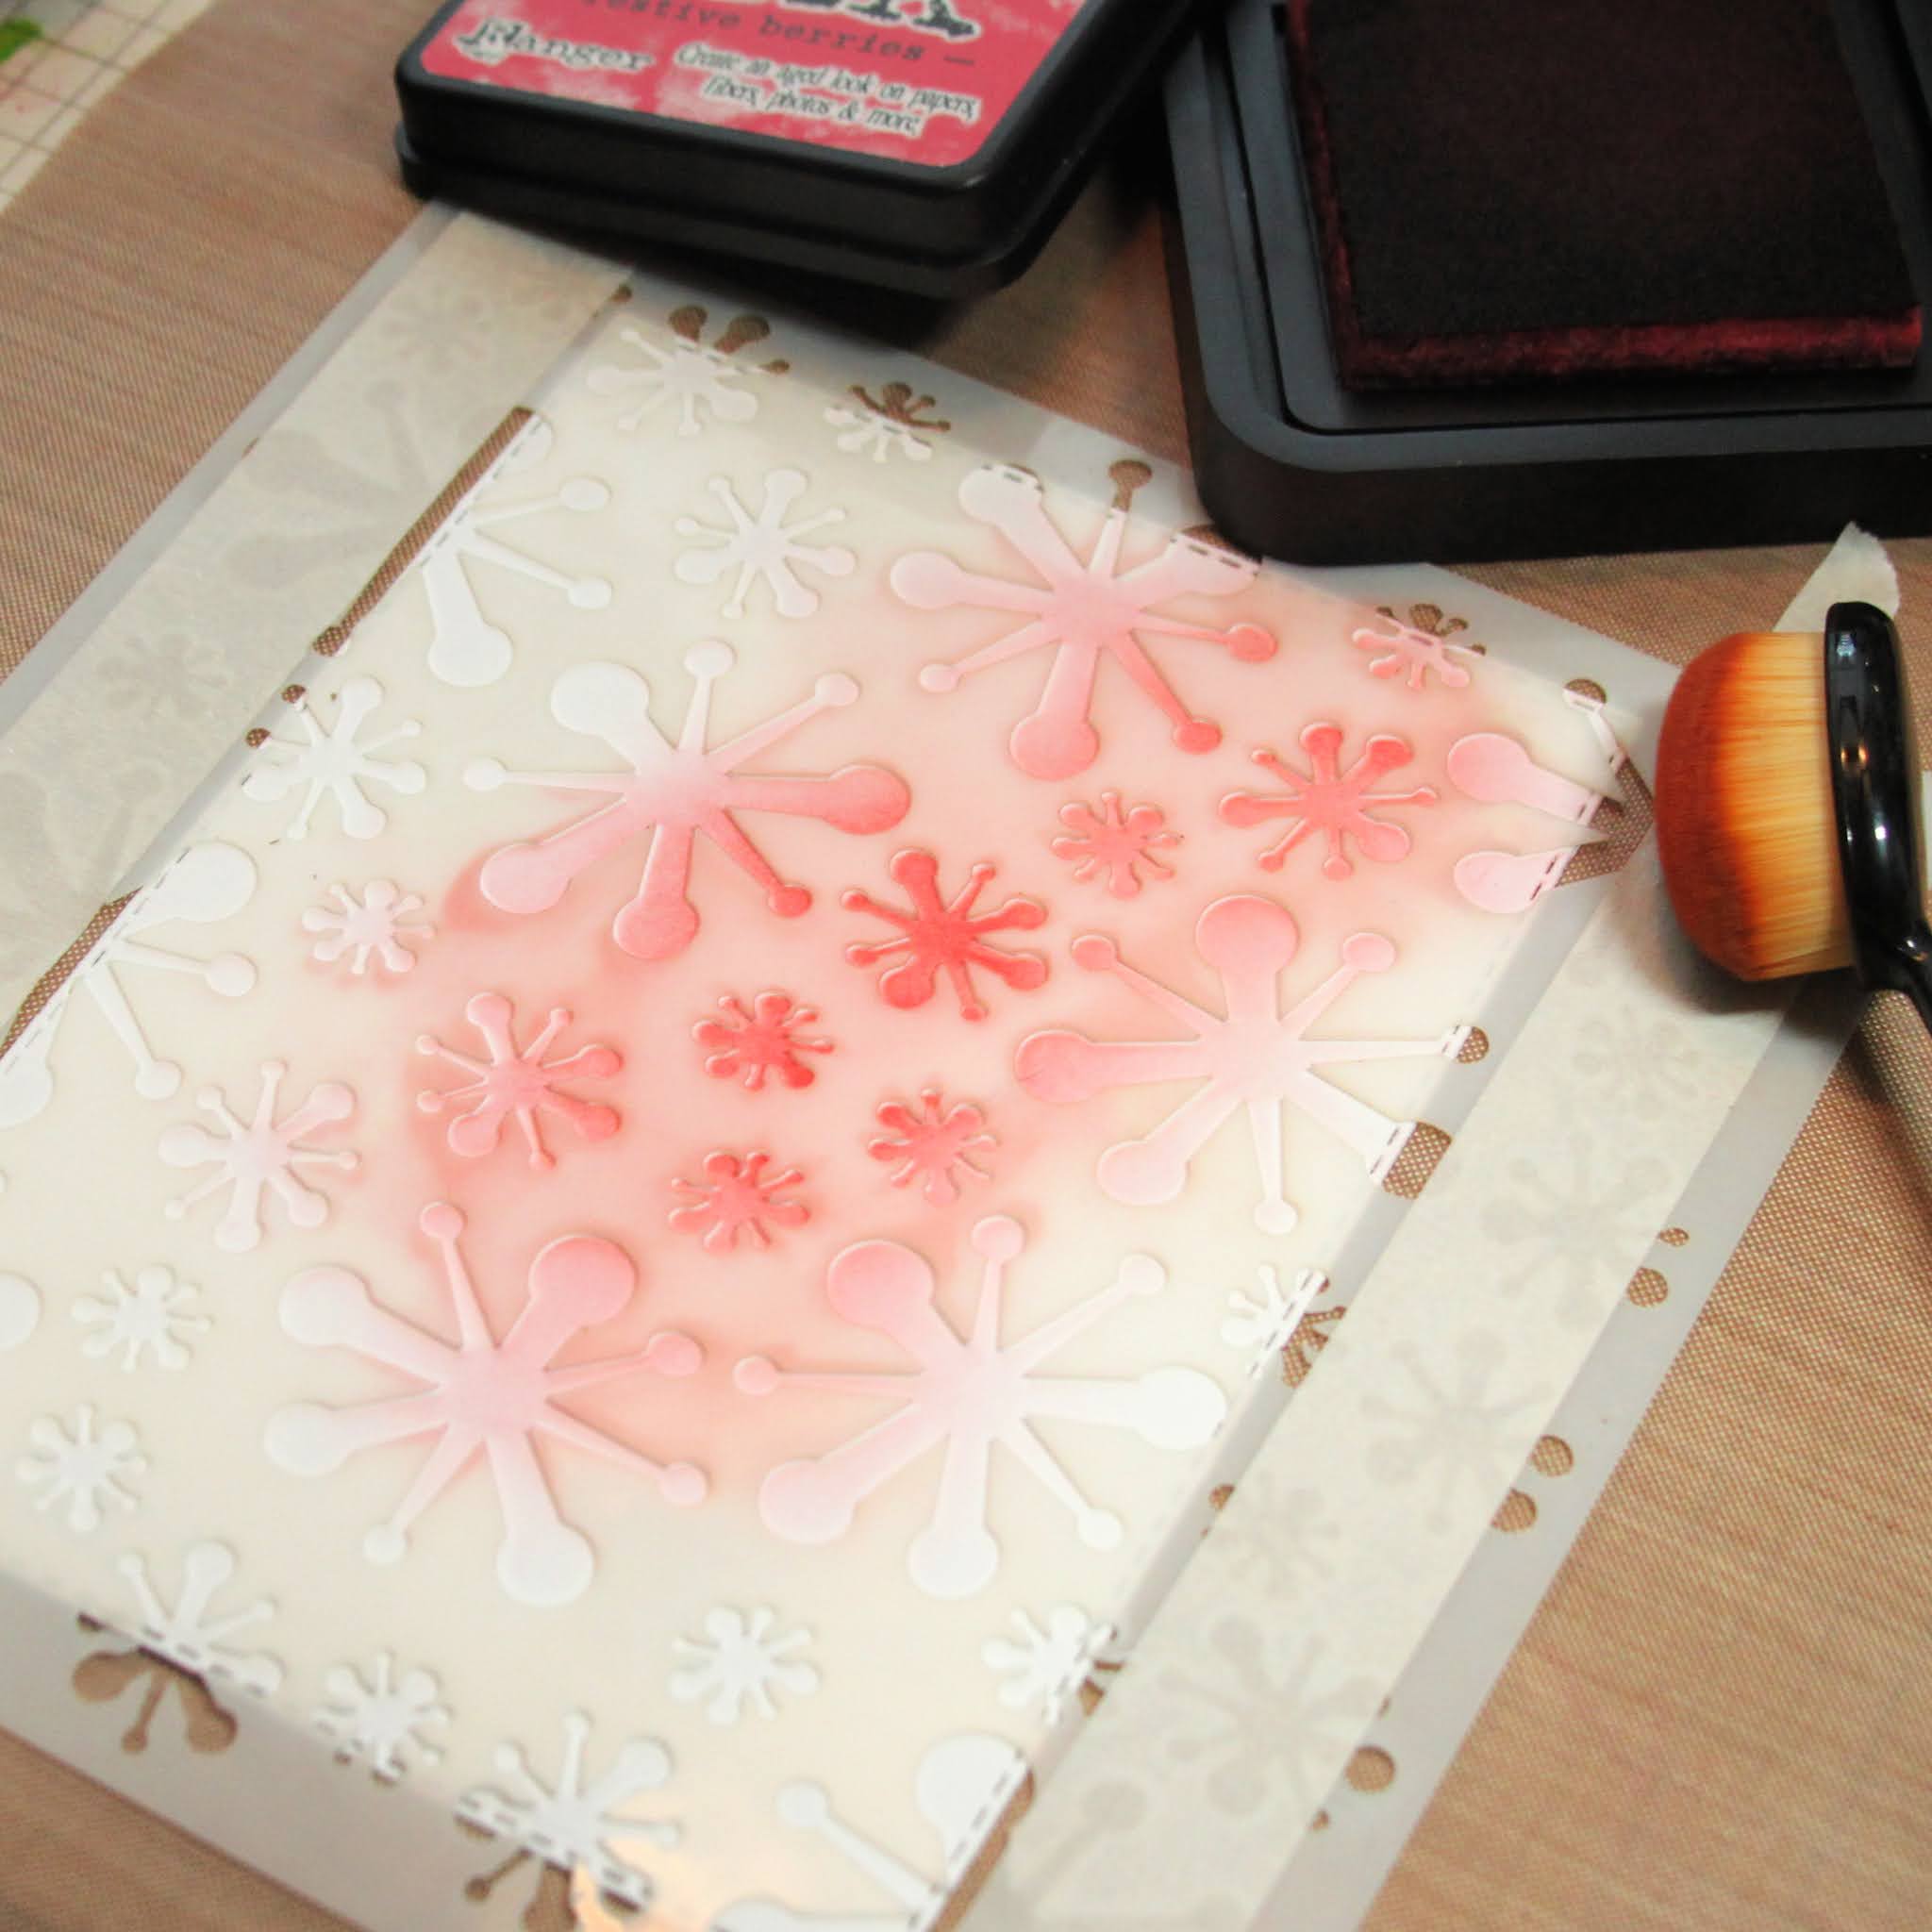
I placed the Jacks stencil over a die cut panel and blended in some Festive Berries Distress Ink to just a section of the panel.


I wiped off the stencil and then blended some Tumbled Glass in other areas careful to leave a bit of white space.


I wiped off the stencil again and then used a spatula to apply some Glitz Glitter Gel through the entire stencil.


Voila!  So pretty, right??  I set this aside to dry.


While the background was drying, I stamped the Celebrate from the Sassy Celebration stamp set onto white cardstock using Catherine Pooler Suede Shoes ink.  Before removing it from my Misti, I stamped it again with some Versamark and heat embossed it with Wow Clear Gloss Embossing Powder.  Then I did the same with the rest of the sentiment in Samba.  I fussy cut the Celebrate and trimmed the rest down into a rectangle and added a blue layer to outline it.

Next I cut the glass from the Champagne Flute from white glitter paper and the star from the Slimline Pinked set from blue foiled paper.


When the stenciled layer was dry, I arranged everything using various thicknesses of foam tape and adhesive and layered it onto a blue and red base.

That's me for today!  I hope you enjoyed it and that you'll come again soon for some more CAS-ual Fridays Inspiration!

In case you feel like shopping, there is a special going on this weekend!  Head on over to the CAS-ual Fridays Shop to take advantage Free Shipping and this cool Stars & Stripes Stencil with a $50 purchase!  Happy shopping!


Come again soon!


Thursday, December 17, 2020

Happy Chanukah!

Hello everyone!! 
Nora on the blog today with a Chanukah card to celebrate the last night of this holiday.


I began this card by stamping the stars with WOW! Clear Embossing Ink from the Star of David stamp set over a white, A2 card front. I then heat embossed the stars using WOW! Clear Superfine Embossing powder.


Next I covered the panel with Blueprint Sketch Distress Ink. I splattered watered down Chipped Sapphire Distress Ink and some clear glitter pen across the front and set it aside to dry.


While the card front dried, I stamped the sentiment with the Chanukah stamp set with clear embossing ink and heat embossed it using WOW! Superfine Silver Embossing Powder. I then die cut the sentiment with an oval die cut.


I used some adhesive foam to adhere the sentiment to the card front and then added some silver pearls randomly over the blue background.

I have to say that I LOVE how this card came out. This has been the first time in forever where I just sat down and played. I didn't have a plan on what I was going to do but just figured it out as I went along. I encourage you to use this process sometime if you just want to play with your supplies.

The Chanukah sets are on sale right in the CAS-Friday Store. Use my code NORASENTME to get an extra 15% off your total order!!!


I thank you for taking the time to stop by. Be sure to stop by again this week to check out some more FABULOUS projects created by the Design Team!!!


Supplies used from the CAS-ual Fridays Store:


Monday, August 24, 2020

Hello Wow Changers!


Hello all!  Lisa here and today I'm sharing a card using a couple of the fantastic new Wow products now available in the CAS-ual Fridays shop! 


I started with one of the beautiful florals from the Mon Ami Stamp Set.  I stamped a bunch on some Copic friendly paper and colored them in with V01, V05, and V15 Copic Markers.  Then I used the Wow Mixed Media Embossing Brush and brushed some onto the base of the florals.  You want to be sure to get a lot of the liquid off of the brush and back into the jar using the lip of the jar because some will still be on the base of the brush and will drip down.  You can always dip it in and add some back.


The awesome new Wow Changers Lightening Effects Kit is a great way to use some of the embossing powders in your stash and add a little Wow to them!  The kit is so cool!  It comes with three Changers; Glisten, Texture, and Sheen and three empty jars all in an adorable little handled carrying case.   I took some purple that I had in my stash and added a little of it and a little of the Glisten Changer into one of the empty jars that comes in the kit and shook it up and I love the effect!  I sprinkled that onto the painted flowers and heat embossed them.


I love the shimmery look it gave me otherwise solid purple powder!  So cool.  For this mixture I probably used about 3/4 purple and 1/4 of the Glisten.  In hind site I'd have used a little less of the purple.  I still have some of the mixture left and will use it again and maybe add some more Glisten Changer or maybe one of the others!  Or maybe something else! SO fun!


I created a simple background with some texture paste and the Modern Petals Stencil.  I cut out and arranged all of my flowers into a wreath form around a circle die cut.  Attached them using foam tape and then cut some of those pretty die cuts using the Casual Trees dies and some glitter paper and added those with glue around the wreath.  Finally I used the Hello die from the Sweet Friend Fri-Dies.. cut it once from glitter paper and twice more from white cardstock-stacked them together and then added them across the wreath


Had so much fun experimenting with these new products!  I'll be using them frequently for sure!

Thanks so much for stopping and hope you enjoyed it! Should you see something you need from the shop today, I have this for you:


Come again soon for more CAS-ual Fridays Inspiration!


Monday, July 27, 2020

A Background With A Bang!


Hi all!  Lisa here and today I'm sharing a project with some of my very favorite things!

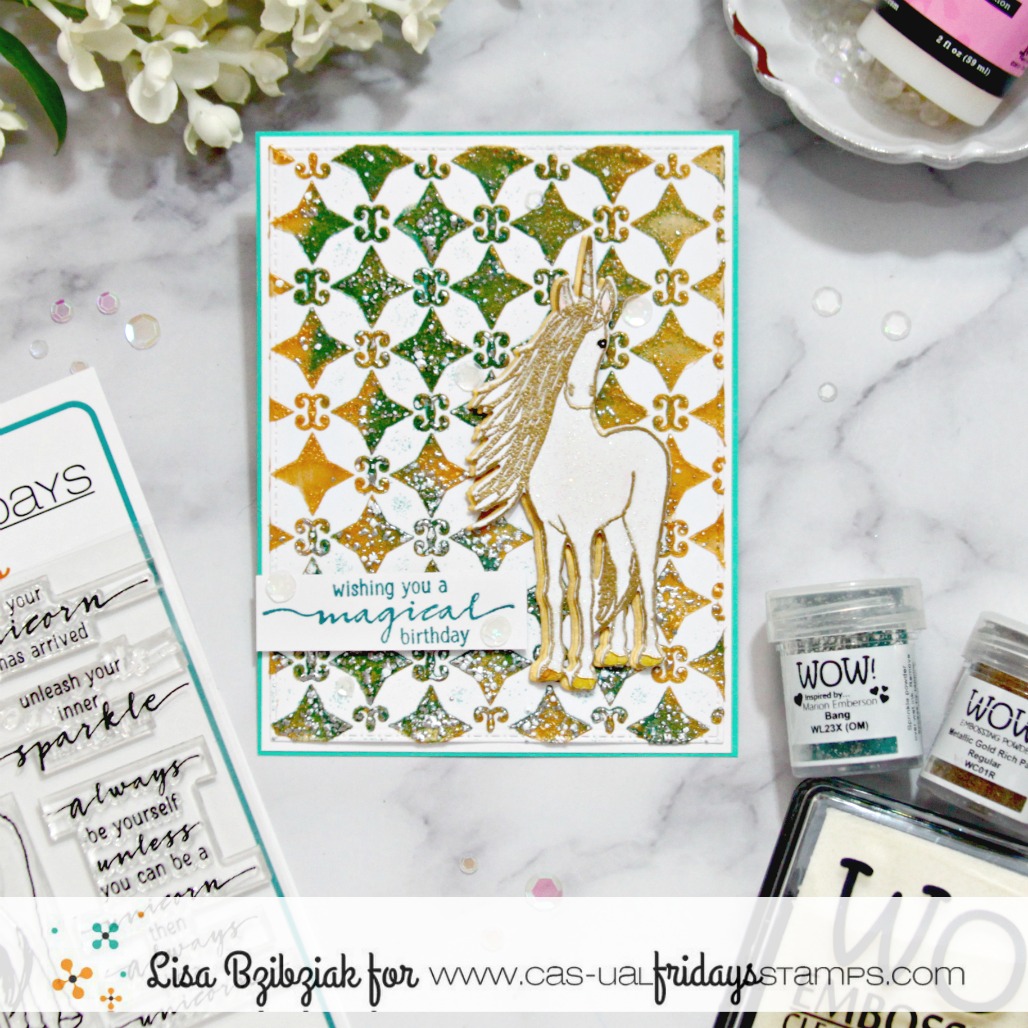
I started with my favorite stencil... the Starlequin Stencil!  I am not sure what it is about this stencil but it's my go to... if I had it in the picture you'd be able to tell it's my most used...lol!  (Which is why it's not in the picture...lol!)  I applied some gold texture paste through the stencil and while it was wet, I sprinkled on some of my favorite Wow Embossing Powder, Bang Colour Blend.  I didn't cover the entire texture paste area but instead randomly sprinkled it on.  I heated it up... when you use texture paste to emboss you are looking for the "bubble"... it is so cool and fun to watch the powders transform!


I set that aside to be sure the texture paste that was exposed was completely dry and worked on the unicorn from the Be A Unicorn stamp set.  I stamped it using the Wow Clear Ultra Slow Drying Embossing Pad and then heat embossed it using another favorite, Metallic Gold Rich Pale.  I die cut it with the coordinating die and then I mixed up some white glitter and Glossy Accents and painted the unicorn inside the lines with the glitter mixture.  I darkened his eye using a black alcohol marker and colored in his hooves with a gold gel pen.  I die cut another unicorn in gold and popped up my glittery embossed unicorn onto the solid gold die cut piece, but offset it for a shadow effect.


Finally I stamped one of the sentiments from the Be A Unicorn set in a coordinating color and trimmed it down and popped it up and then scattered a few sequins around.

Should you see something that you need to purchase, I have this for you:


That's me for today!   Thanks so much for stopping and I hope you enjoyed it!  Come again soon for more CAS-ual Fridays inspiration!