Translate

Showing posts with label Pop Fizz Clink. Show all posts

Thursday, April 28, 2022

Pop Fizz Clink Cheers!


Welcome back!  I've got some more fun with the Pop Fizz Clink set!

I started this one with a panel I created using the Bubbly stencil and watercolors using some Distress Oxide Inks.


I stamped and embossed the glass directly onto the background and then used the coordinating die to cut the bubbles from some iridescent paper and then glued them over the stamped bubbles.


I stamped and heat embossed all of the sentiments.. the Pop Fizz Clink on pink cardstock with white embossing powder and then stamped the Cheers on white with Raspberry ink and embossed with clear powder.  I fussy cut the Cheers and popped it up onto the two circles from the Pinked Slimline set and trimmed the Pop Fizz Clink to strips and popped them up onto the background.

That's me for today!  I hope you enjoyed it and you'll come again soon!


Monday, November 22, 2021

The Most Wonderful Time of the Year

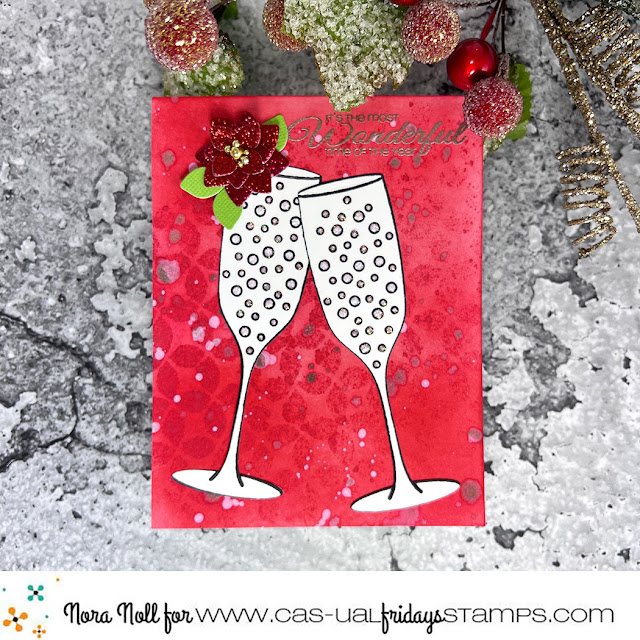
Hello my Crafty Friends!!! Nora here today from A Creative Touch with a simple Christmas card created with CAS-Fridays Modern Petals Stencil, Snowy Sayings Stamp, Pop Fizz Clink Stamp Set and Champagne Flute dies.


I started off this card by inking up an A2 sized, white card front with two different colors of red ink. I then used the Modern Petals Stencil with red ink across the front.


Next I used a variety of spray stains and mica mists over the stenciled background.


While my card front was drying, I used the Pop Fizz Clink Stamp Set to stamp two champagne glasses with black ink. I then die cut them out using the Champagne Flute dies. 


To give the card some sparkle,  I used glitter glue inside the champagne bubbles.


While the bubbles were drying, I adhered my dried card front to an A2, white card base. I stamped and  heat embossed a sentiment from the Snowy Sayings stamp set in the top, right hand corner. I then added my champagne flutes as shown. 

I was going to stop here but my card was missing something. I pulled out the CAS-Fridays 4 Petal Die Set. I decided that I was going to try to make a poinsettia using these flower dies.

 I die cut two large flowers and two small flowers out of red glitter paper. I then die cut a large flower out of green paper.


To create my poinsettia, I adhered the two large flower die cuts together first. Then I adhered one of the small glitter flowers on top. For the last small flower, I used foam adhesive with some liquid glue to adhere it over the top flower. The glue helps to keep the foam adhered as I had trouble getting it to stick to the glitter paper without it. I then cut apart the green flower and adhered my "leaves" under the poinsettia. To complete the flower, I adhered gold gems to the center.


When my flower was completed, I adhered it to the top left of my card.


I hope you like my card as it was a lot of fun to create. CAS-ual Fridays is having a HUGE sale!!!! Please hop on over to the CAS-Fridays Shop.


Use my code NORASENTME to get an extra 15% off your total order-including sale items!!!


I want to thank you for taking the time to stop by today. Please be sure to check back to the blog this week to see some other FABULOUS projects by the CAS-Fridays Design Team.

Have a FABULOUS day!!


Thursday, January 7, 2021

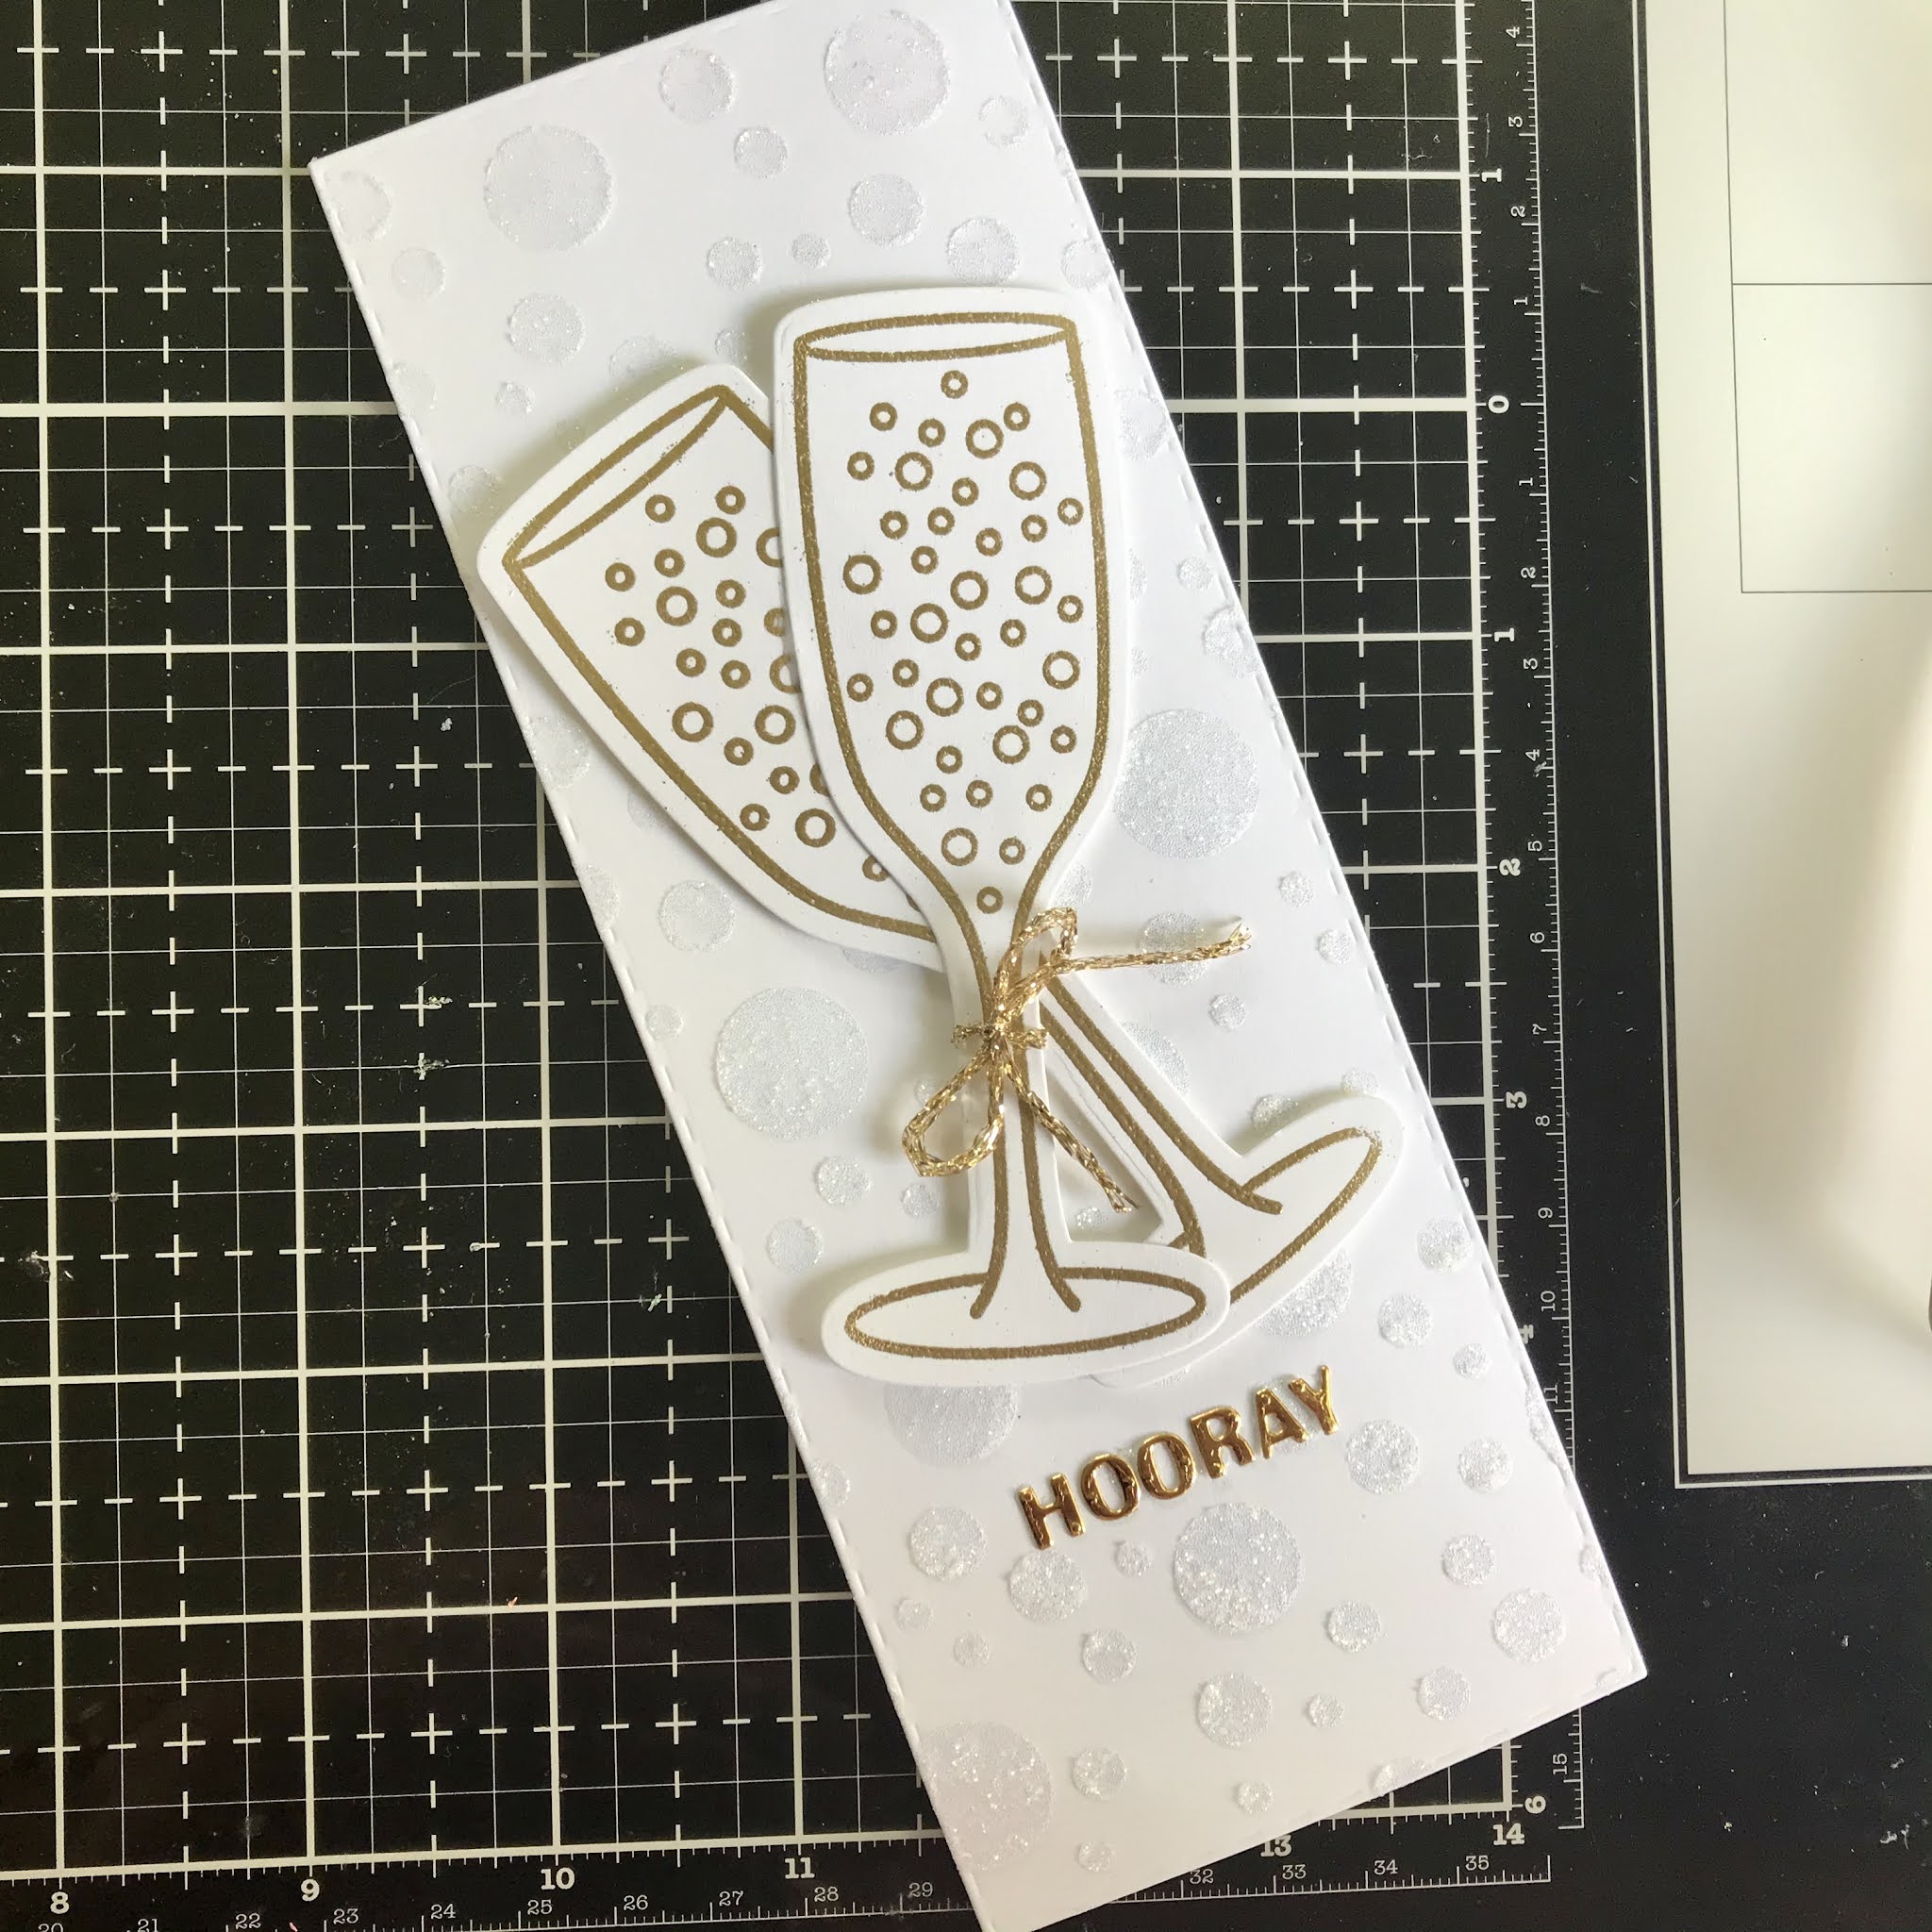
HOORAY - Slimline Wedding or Engagement card


Hello, it’s Michelle here today with a slimline card I made using some of the new release products.
I think you could use this for an Engagement or Wedding card.
This is gorgeous and sparkly in real life but you will just have to believe me as I found photographing it a nightmare! 


I started by die cutting a card panel using the stitched die from the Pinked Slimline Dies.  Next I used the Bubbly stencil with some shimmer paste.


I stamped two of the champagne flutes from the Pop Fizz Clink stamp set and heat embossed them with WOW Gold EP.  I die cut the glasses using the coordinating die from 


Next I die cut the Hooray from the pinked slimline dies using some gold mirror card stock and adhered that directly onto the stenciled panel with liquid glue.


I tied a bow with some gold twine around the stem of one of the glasses and adhered them with some foam tape.  I added the panel to a side folding slim line card base with foam tape.


Thanks for visiting today and don't forget you can use my special discount code below in the shop for a 15% discount.


Thursday, December 31, 2020

Happy New Year Release!

It's time for our Happy New Year Release!

I know we are all ready for 2020 to be in our rear view mirror. Bring on 2021! PLEASE! 
To help ring in this New Year in style, we are releasing really fun new stamps, dies and stencils. 
While today's sets certainly lend themselves to NYE festivities, I assure you, they will be fun to use ALL year long.

We will be showing you great inspiration projects for the next couple of days, but the products are in the shop NOW. We have waited long enough for 2021, I just couldn't make you wait for the new product too. *wink*

Today we are introducing Pop Fizz Clink stamps and Champagne Flute dies. 
Whimsical with a touch of sass, this stamp set is fun for just about any type of celebration


Check out what the Ink Squad created with these super new sets.

From Vicki 


From Michelle 


From Nora 


From Maria 


From Lisa 


From Larissa 


The Girl Fridays and I wish you a very Happy New Years Eve! 

I'd like to give a Pop Fizz Clink and Champagne Flute die to one lucky winner.
For your chance, leave a comment here telling me one of your favorite New Year traditions.

We'll be back tomorrow with a Margarita theme!