Translate

Showing posts with label Snowy Sayings. Show all posts

Wednesday, December 15, 2021

Joy to the World

Hello Crafty Friends!! It is Nora here from A Creative Touch with a Christmas card.
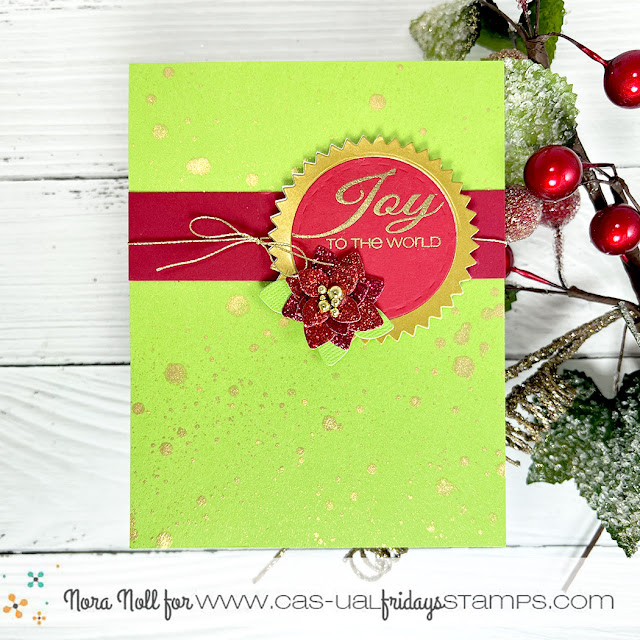

I began my card by flicking gold watercolor over a bright green card base. While that was drying, I used the Pinked Slimline dies to die cut a large pinked circle out of white and gold cardstock. 


I used the large stitched circle die from the same die set to die cut a red circle and a circle out of the middle of the gold, pinked circle.


I stamped and heat embossed a sentiment in gold from the Snowy Sayings stamp set onto the red cardstock circle. 


I then adhered both the gold frame and the red sentiment circle over the white pinked die cut.


I adhered a strip of red cardstock with some gold twine that I had tied into a bow over the card front. I used foam adhesive to adhere the sentiment over the cardfront.

On my November post, I had created poinsettia flowers out of the 4 Petal Die Cuts and I had extra. 


I used one of these poinsettias over the bottom left of my sentiment circle and my card was done. 


Have you gotten all your Christmas cards completed? I have to admit, I haven't even started to send them out yet. I have SO MUCH TO DO!!!

If you are interested in any of the products I used today, you can clink on this link or any of the links in this post. Use my code NORASENTME to get an extra 15% your total order!!!


I want to thank you for taking the time to stop by today!! Have a FABULOUS day!!


Friday, December 10, 2021

Alcohol Ink/Shaker Magic


Welcome back!  I've got some more pink and snowflakes for you today!  I just love pink for Christmas/Winter cards!  I've been playing with some alcohol inks and had some fun with a few different techniques for this one.


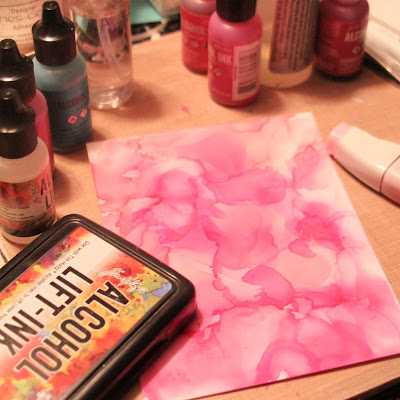
I wanted a lighter alcohol inked background so I combined some Ranger Pearl Alcohol Ink along with some Copic Refill in a light pink.  I applied them and moved them around with Blending Solution.


Did you know you can add a little sparkle to your alcohol inked panels with foil?  The trick is to get it while it's not too wet, but still a little sticky... I keep all of my foil scraps for just such occasions.  Just press the foil over your piece and it stays on the sticky parts.


Then I used alcohol life ink along with the snowflakes from the Snowy Sayings stamp set.  You just stamp on your alcohol inked panel with the alcohol lift and then buff it with a paper towel to make the flakes appear...


Love the light images along with the light inky background.  I finished it off by splattering some acrylic paint over the top.


I cut the Flakey A2 Panel Die from white glitter paper, added a piece of acetate to the back of it and popped it up over some sequins on the alcohol ink panel and added a sentiment from the Snowy Sayings set.

Thanks so much for stopping!  Hope you'll come again soon for more inspiration!


Wednesday, December 8, 2021

Naughty or Nice

Hi All.  It's Vicki here today from All I Do Is Stamp.  Today's post is all about Christmas.

For this card I used the following CFS products; I started with the Snowy Sayings stamp set for the embossed snowflake background, and then using the Naughty dies, I cut [and layered 3 times] the Naughty or Nice words.

I cut out the stocking and the present, and lastly, I embossed a sentiment from the same set.
 

We are getting towards the big day.  Have you gotten all your Christmas cards mailed?  I'm done at this point.  That said, I bet I will need some extras - just in case.... 😀


Thanks for stopping by~
ps - I might have used affiliated links in this post at no additional cost to you.


Tuesday, November 30, 2021

The Most Wonderful Time!


Welcome back!  I've got a quick and easy Christmas card for you today!

I started with a panel cut from a gel print I previously made.  I love spending a whole crafty session with my gel plate and some acrylic paints, stencils, and other household items and just making bunches of prints to use as background!  I'm getting low on these so I think my next session I'll share some of the fun with you!

I used bubble wrap and burlap to texturize this one...


Then I cut some Funky Flakes from pink glitter paper and glued them onto the background panel in a random pattern.  I also used some of the extra circles that were cut... because why wouldn't I?


Finally, I stamped a sentiment from the Snow Sayings stamp set in pink and a few sequins!  Easy peasy to make bunches of these and fairly flat for mailing!  You could even leave off the sequins if you prefer!

That's me for today!  Thanks so much for stopping and hope you come again soon!


Monday, November 22, 2021

The Most Wonderful Time of the Year

Hello my Crafty Friends!!! Nora here today from A Creative Touch with a simple Christmas card created with CAS-Fridays Modern Petals Stencil, Snowy Sayings Stamp, Pop Fizz Clink Stamp Set and Champagne Flute dies.


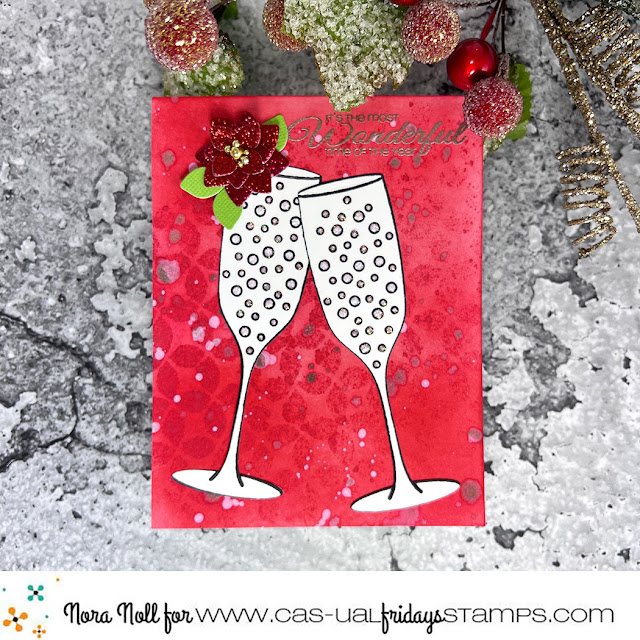
I started off this card by inking up an A2 sized, white card front with two different colors of red ink. I then used the Modern Petals Stencil with red ink across the front.


Next I used a variety of spray stains and mica mists over the stenciled background.


While my card front was drying, I used the Pop Fizz Clink Stamp Set to stamp two champagne glasses with black ink. I then die cut them out using the Champagne Flute dies. 


To give the card some sparkle,  I used glitter glue inside the champagne bubbles.


While the bubbles were drying, I adhered my dried card front to an A2, white card base. I stamped and  heat embossed a sentiment from the Snowy Sayings stamp set in the top, right hand corner. I then added my champagne flutes as shown. 

I was going to stop here but my card was missing something. I pulled out the CAS-Fridays 4 Petal Die Set. I decided that I was going to try to make a poinsettia using these flower dies.

 I die cut two large flowers and two small flowers out of red glitter paper. I then die cut a large flower out of green paper.


To create my poinsettia, I adhered the two large flower die cuts together first. Then I adhered one of the small glitter flowers on top. For the last small flower, I used foam adhesive with some liquid glue to adhere it over the top flower. The glue helps to keep the foam adhered as I had trouble getting it to stick to the glitter paper without it. I then cut apart the green flower and adhered my "leaves" under the poinsettia. To complete the flower, I adhered gold gems to the center.


When my flower was completed, I adhered it to the top left of my card.


I hope you like my card as it was a lot of fun to create. CAS-ual Fridays is having a HUGE sale!!!! Please hop on over to the CAS-Fridays Shop.


Use my code NORASENTME to get an extra 15% off your total order-including sale items!!!


I want to thank you for taking the time to stop by today. Please be sure to check back to the blog this week to see some other FABULOUS projects by the CAS-Fridays Design Team.

Have a FABULOUS day!!


Thursday, October 28, 2021

A Few Christmas Tags

It's time again for my CAS-ual Fridays day here on my blog [and over on the CFS Blog too].  I am starting to get ready for Christmas.  In a few of my to-be-sent Christmas cards, I include tags as a small gift.  Yeah, it costs more in postage, but like I said, a small gift.

I used the To Go Cup Die for the base of my tags.  Using the Snowflake Stencil, I sponged on red ink, and then sponged on green ink using one of the the snowflakes from the same stencil.

I used the sentiments from Snowy Sayings, and lastly, I used the smallest snowflake from Funky Flakes Dies, and die cut with red and green glitter paper.  Once everything was adhered, I punched a hole and put some twine for hanging.  These needed something, so I added some gems from my stash.

That's it for me today.  Do you use tags on your presents?  They are a small personalized addition that I believe recipients like. 😀


Thanks for stopping by~

ps - I have used affiliated links in this post at no additional cost to you. 


Wednesday, September 22, 2021

It's the Most

Hi All, it's Vicki here today from All I Do Is Stamp.  Today I fully utilized the fun Pinked Slimline Dies.  This set has many layers, and miscellaneous shapes to add to your slimline cards.

It's getting close to that time of year where I send out lots of cards.  I need to get my stockpile built up!

So today, you get to see a Christmas card that was inspired from this photo from [my friend] Pinterest.


There are a lot of layers on this fun card, but it still is flat for easy [and normal cost] mailing.  I love that!

I used the Funky Flakes Dies for the snowflakes [2 layers each for dimensions], and used a sentiment from Snowy Sayings.

That's it for me today.  How are your holiday cards coming along?  Are you ahead of the game? ;)

I did use affiliated links in this post.  You can also save 15% off your purchase by using my code below.


Thanks for stopping by~