Translate

Showing posts with label Shaker Card. Show all posts

Monday, July 18, 2022

You Got Rescued - A Pawesome Shaker


Hello!  Welcome back!  I created a shaker for today.  
My background was created with the Chunky Chevron stencil on my gel press with Distress Oxides.


I created a simple shaker using some Hexagon dies and some pretty colorful sequins that coordinated with the colors on the card and added pawprints I created with the Pawesome Stencil, Distress Oxides and Iridescent Glitz Glitter Gel.

Finally a sentiment from Nate & Friday and done!


Wednesday, January 26, 2022

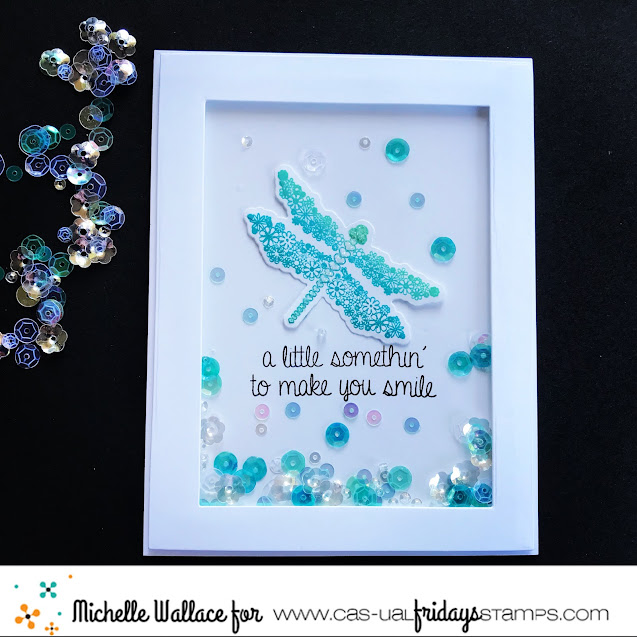
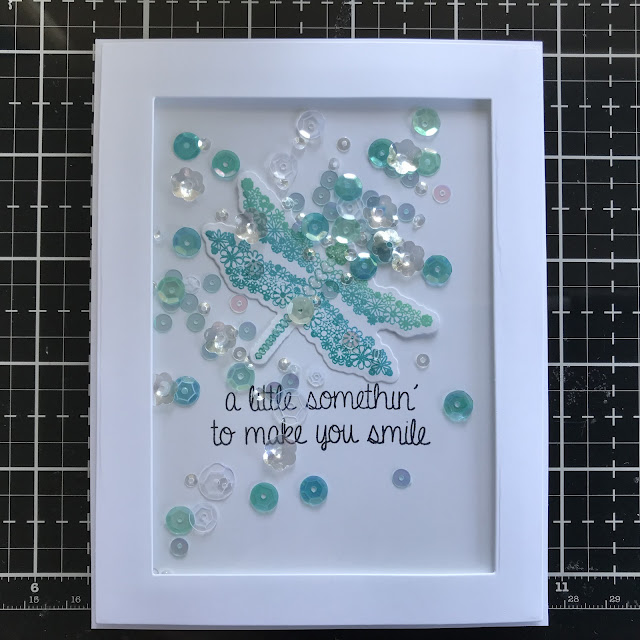
A Shaker Card to make you smile!

Hello, it’s Michelle here today and I have a fun shaker card to share with you.

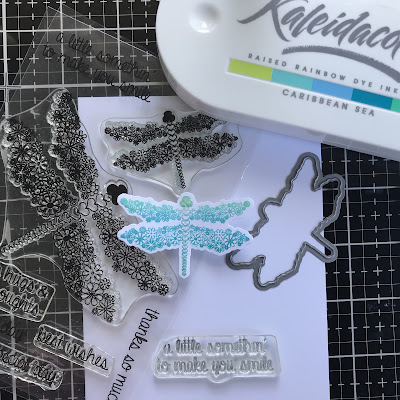
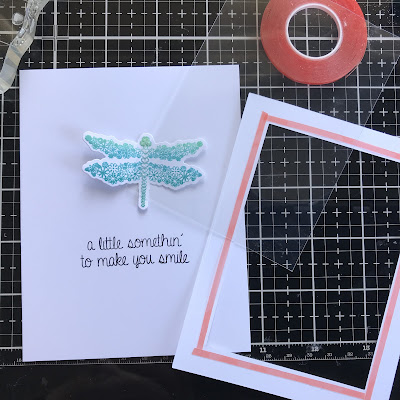
I've used the Everyday Dragonflies stamp set and the coordinating Dragonflies dies.


I started by stamping the smallest dragonfly with a Kaleidacolor ink pad. Then I die cut it using the coordinating die.

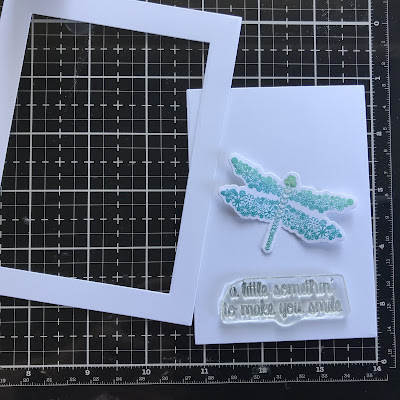
I die cut a frame using some rectangle dies.


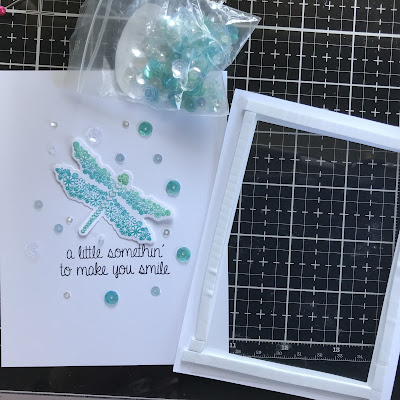
Next I cut a sheet of acetate and adhered it to the inside of the frame with some strong double sided tape.  I stamped the sentiment onto a piece of 4 1/4 x 5 1/2 white card stock  and adhered the dragonfly with some liquid glue.


I added some strips of foam tape to the frame.  Then I added my sequins and adhered some down using liquid glue so they don't all appear at the bottom of the card.


I placed the frame over the top of  the card panel and adhered that to a card base.


Thanks so much for stopping by and if you are interested in purchasing the products I've used today or anything else, you can click the "let's go shopping" link below to take you over to the shop!

I have used my affiliate link which means at no extra cost to you I can make a small commission on any purchase you make.

You can also use my special discount code MICHELLESENTME for an additional 15% discount.


Friday, December 10, 2021

Alcohol Ink/Shaker Magic


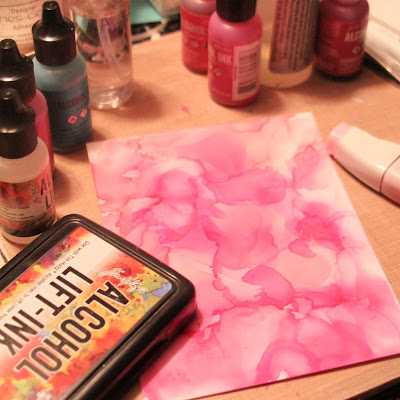
Welcome back!  I've got some more pink and snowflakes for you today!  I just love pink for Christmas/Winter cards!  I've been playing with some alcohol inks and had some fun with a few different techniques for this one.


I wanted a lighter alcohol inked background so I combined some Ranger Pearl Alcohol Ink along with some Copic Refill in a light pink.  I applied them and moved them around with Blending Solution.


Did you know you can add a little sparkle to your alcohol inked panels with foil?  The trick is to get it while it's not too wet, but still a little sticky... I keep all of my foil scraps for just such occasions.  Just press the foil over your piece and it stays on the sticky parts.


Then I used alcohol life ink along with the snowflakes from the Snowy Sayings stamp set.  You just stamp on your alcohol inked panel with the alcohol lift and then buff it with a paper towel to make the flakes appear...


Love the light images along with the light inky background.  I finished it off by splattering some acrylic paint over the top.


I cut the Flakey A2 Panel Die from white glitter paper, added a piece of acetate to the back of it and popped it up over some sequins on the alcohol ink panel and added a sentiment from the Snowy Sayings set.

Thanks so much for stopping!  Hope you'll come again soon for more inspiration!


Thursday, December 2, 2021

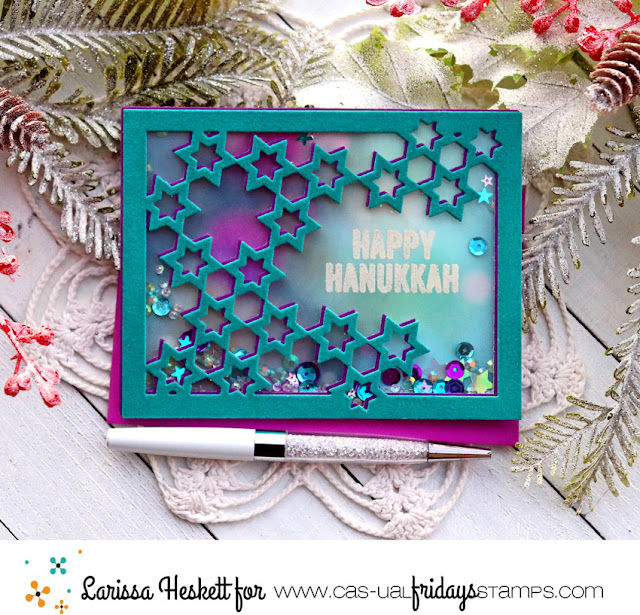
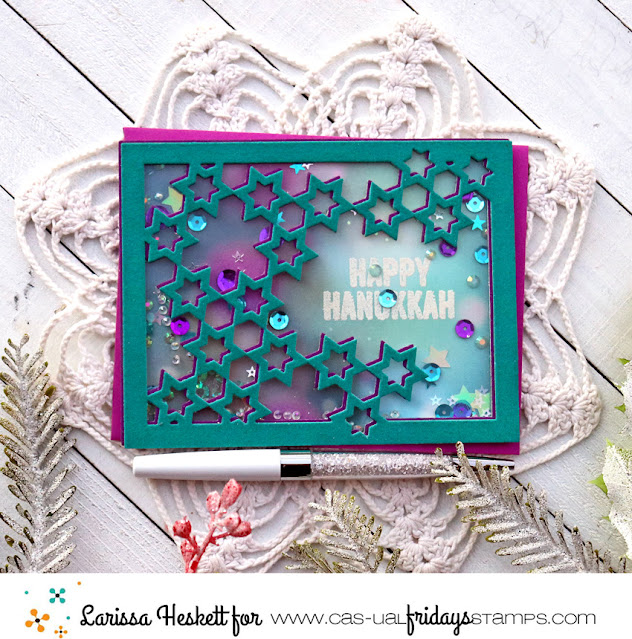
Layered Regal Flocked Happy Hanukkah Shaker Card!!


Hello Crafty Friends!! 
Larissa here today with a Layered Regal Flocked Happy Hanukkah Shaker Card!! I'm NOT ready for Winter yet, but I am in the mood for using my Products to create some of the Winter Cards I'm going to need!!

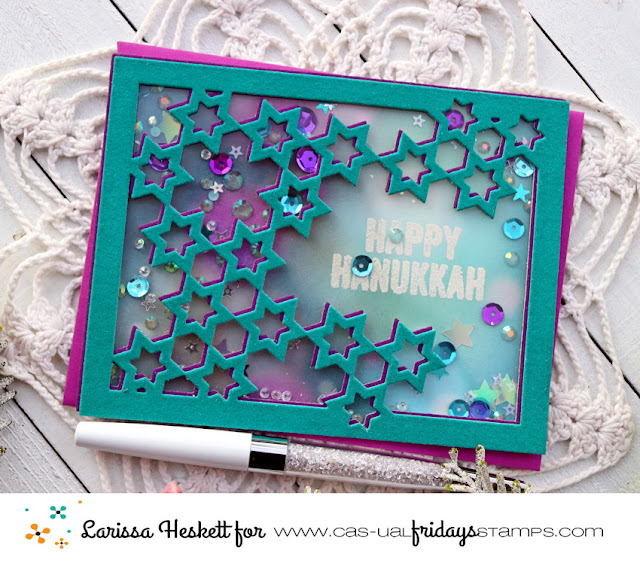
SWOON!! Doesn't this SCREAM Regal!!?? I LOVE the Color Combo and with the Flocked Texture and the Sparkle and Shine from the Sequins reminds me of the Gems and Gold!! PERFECT for the feeling I'm going for, Made for a King!! 


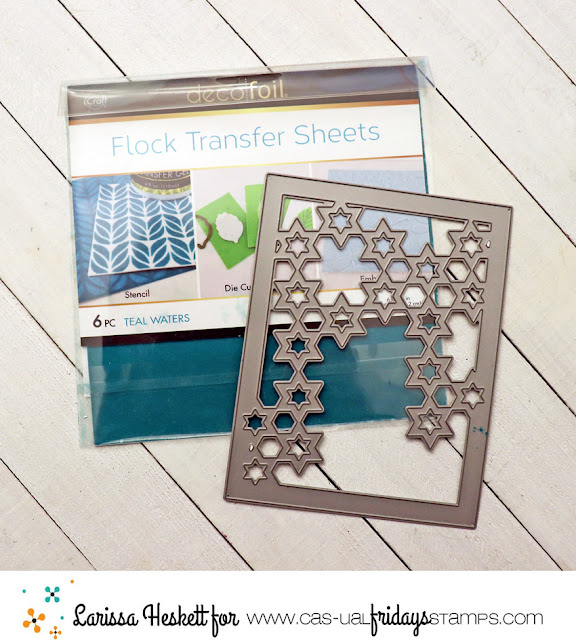
So when I think of the Star of David it makes me think Regal so I decided to use the Deco Foil Flock Sheets in Purple Punch along with the Double Sided Foam Adhesive Sheets to create the STUNNING Stars A2 Panel!! 

I then repeated the same process only this time I used the Deco Foil Flock Sheets in Teal Waters!! 
I like to leave the Die Cut Panel in the Die as it makes it alot easier to add the Acetate onto the back of it without distorting it in anyway!! As soon as the Acetate is adhered to the back I cut down some Foam Tape into strips and added it to the outer frame of the Card to build my Shaker Window!! 
I found this Bokeh Patterned Paper in my stash and wanted to use it for the background of my Shaker Card, but first I needed to Stamp and Emboss the Sentiment!! I used the Star of David Stamp Set and some Ranger Vintage Pearl Embossing Powder!! It matches perfectly with the Bokeh Design of the Paper and adds a touch of Sparkle too!! 
I added a mixture of Sequins and Jewels and then adhered the Stars A2 Panel and the Background Paper together creating the Shaker Card!! I adhered it onto and Top folding Cardbase and I LOVE the way it turned out!! Full of Texture with the Deco Foil Flocking Sheet and then the addition of the Sparkle and Shine from the Shaker Elements just makes this Card SPECIAL!! 
THANKS SO MUCH for stopping by today and I hope you'll give Deco Foil Flock a try with your Intricate Dies!! I ASSURE you, you'll LOVE it too!! Have a FABULOUS WEEKEND!! 

LARISSA   =) 

 Use my discount code LARISSASENTME, to save 15% off on all of the goodies in the 
CFS Shop!!


Monday, August 30, 2021

Everybunny Needs Somebunny Sometimes!!


HELLO CRAFTY FRIENDS!! 

Larissa here today with a SWEET Shaker Card!! I LOVE creating Shaker Cards and the Somebunny Images are a PERFECT match!!
I started by Stamping and Embossing the CAS-ual Fridays Stamps Somebunny Stamp Set Bunny Image and colored it with Copic Markers!! 
Bunny: N0, N3 & N5    Moon: Y11, Y15 & YR23  
Then I used the coordinating CAS-ual Fridays Bunny Fri-Dies!! Then I added some Tonic Studios Aqua Shimmer Pen and Morning Dew Nuvo Drops finishes off the Moon and Stars for Shimmer and Dimension!! 

 I Die Cut the Lawn Fawn Outside In Stitched Star Stackables Die Set to create the Window for the Shaker into my Card Base!! I added some Black Soot Distress Paint Splatters, and some Tonic Studios Aqua Shimmer Pen Splatters!! In person its so BEAUTIFUL!! Some Studio Katia Iridescent Stars and some Mini Star Confetti were added for even more Sparkle!!

 To make the shaker Window, I backed it with some Acetate, Fun Foam and some of the Lawn Fawn Perfectly Plaid Spring Paper!! I Stamped and Embossed the Sentiment and filled the Window with a mixture of Jewels, Sequins and Mini Star Confetti!! 
THANKS SO MUCH for stopping by today!! I hope I've BRIGHTENED your Day with this SWEET Shaker Card!! I hope you have a FABULOUS WEEK!! 

For TONS of AMAZING Inspiration make sure to visit the CAS-ual Fridays Stamps Blog and shop the NEW, Old and Sale Products in the CFS Shop!! You can also use my discount code LARISSASENTME to SAVE 15% off anything in the Shop!! WHOOP WHOOP!! 

Larissa Heskett 💛


Wednesday, February 17, 2021

Birthday Shaker Card

Hello everyone! Maria here with you today and I am back to share yet another shaker card, showcasing the Somebunny Stamp set.  This is probably one of my all-time favorites from Cas-ual Fridays Stamps.


I started by stamping the image on some Neenah solar white card stock and colored it in with my Spectrum Noir alcohol markers.  I used my precision snips to fussy-cut the image.

I wanted to use this super cute patterned paper that I have from my stash as my background.  This was cut measuring 5 1/2 by 4 1/4.  I adhered this panel on some A2-size notecard.


Next, I die-cut the starburst background panel using a die from my collection.  I adhered some acetate sheet on the back and added some foam tape to create my shaker well.  I added my iridescent sequins on top and adhered the sunburst panel to close my shaker.

I finished my design by adhering my focal image and adding the sentiment that was stamped and embossed with some white embossing powder.  Easy peasy!  Here's another look:


Please don't forget to use my coupon code below for 15% off your order.  Thanks for stopping by and happy stamping!


Friday, February 5, 2021

Would You Like Some Bubbly?

Hello my crafty peeps!  Maria here back on the blog with you today to share this cute shaker card, showcasing some of my favorites from the last release called Pop, Fizz Clink stamp set with the Champagne Flute dies and the Bubbly Stencil.  Incidentally, all stencils are on sale right now so grab your faves!

    
To make the card, I temporarily adhered the Bubbly Stencil on some  Neenah Solar white card stock and added some color with dye inks using some blending brushes.   I adhered this piece on an A2 size card base.

Next, I die-cut the Champagne Flutes a couple of times using some gold and white card stock, as well as some acetate sheets.  Instead of using foam adhesives, I adhered the pieces together to create my shaker well.  I also added the acetate sheet on one end, then added my shaker element to the well.  I closed my shaker by adding another piece of acetate sheet on top, making my champagne flute see-through.


I stamped my sentiment on my focal panel with some Versafine Onyx black ink.  I finished my design by adhering both champagne flutes on my card.  Here's another look:


I absolutely LOVE how this card turned out!  Here are the supplies if you're interested:


All stencils are currently on SALE at the shopUse my coupon code below for 15% off your order!  Thanks for stopping by and have a great weekend!