Translate

Showing posts with label SomeBunny Stamp set. Show all posts

Wednesday, June 8, 2022


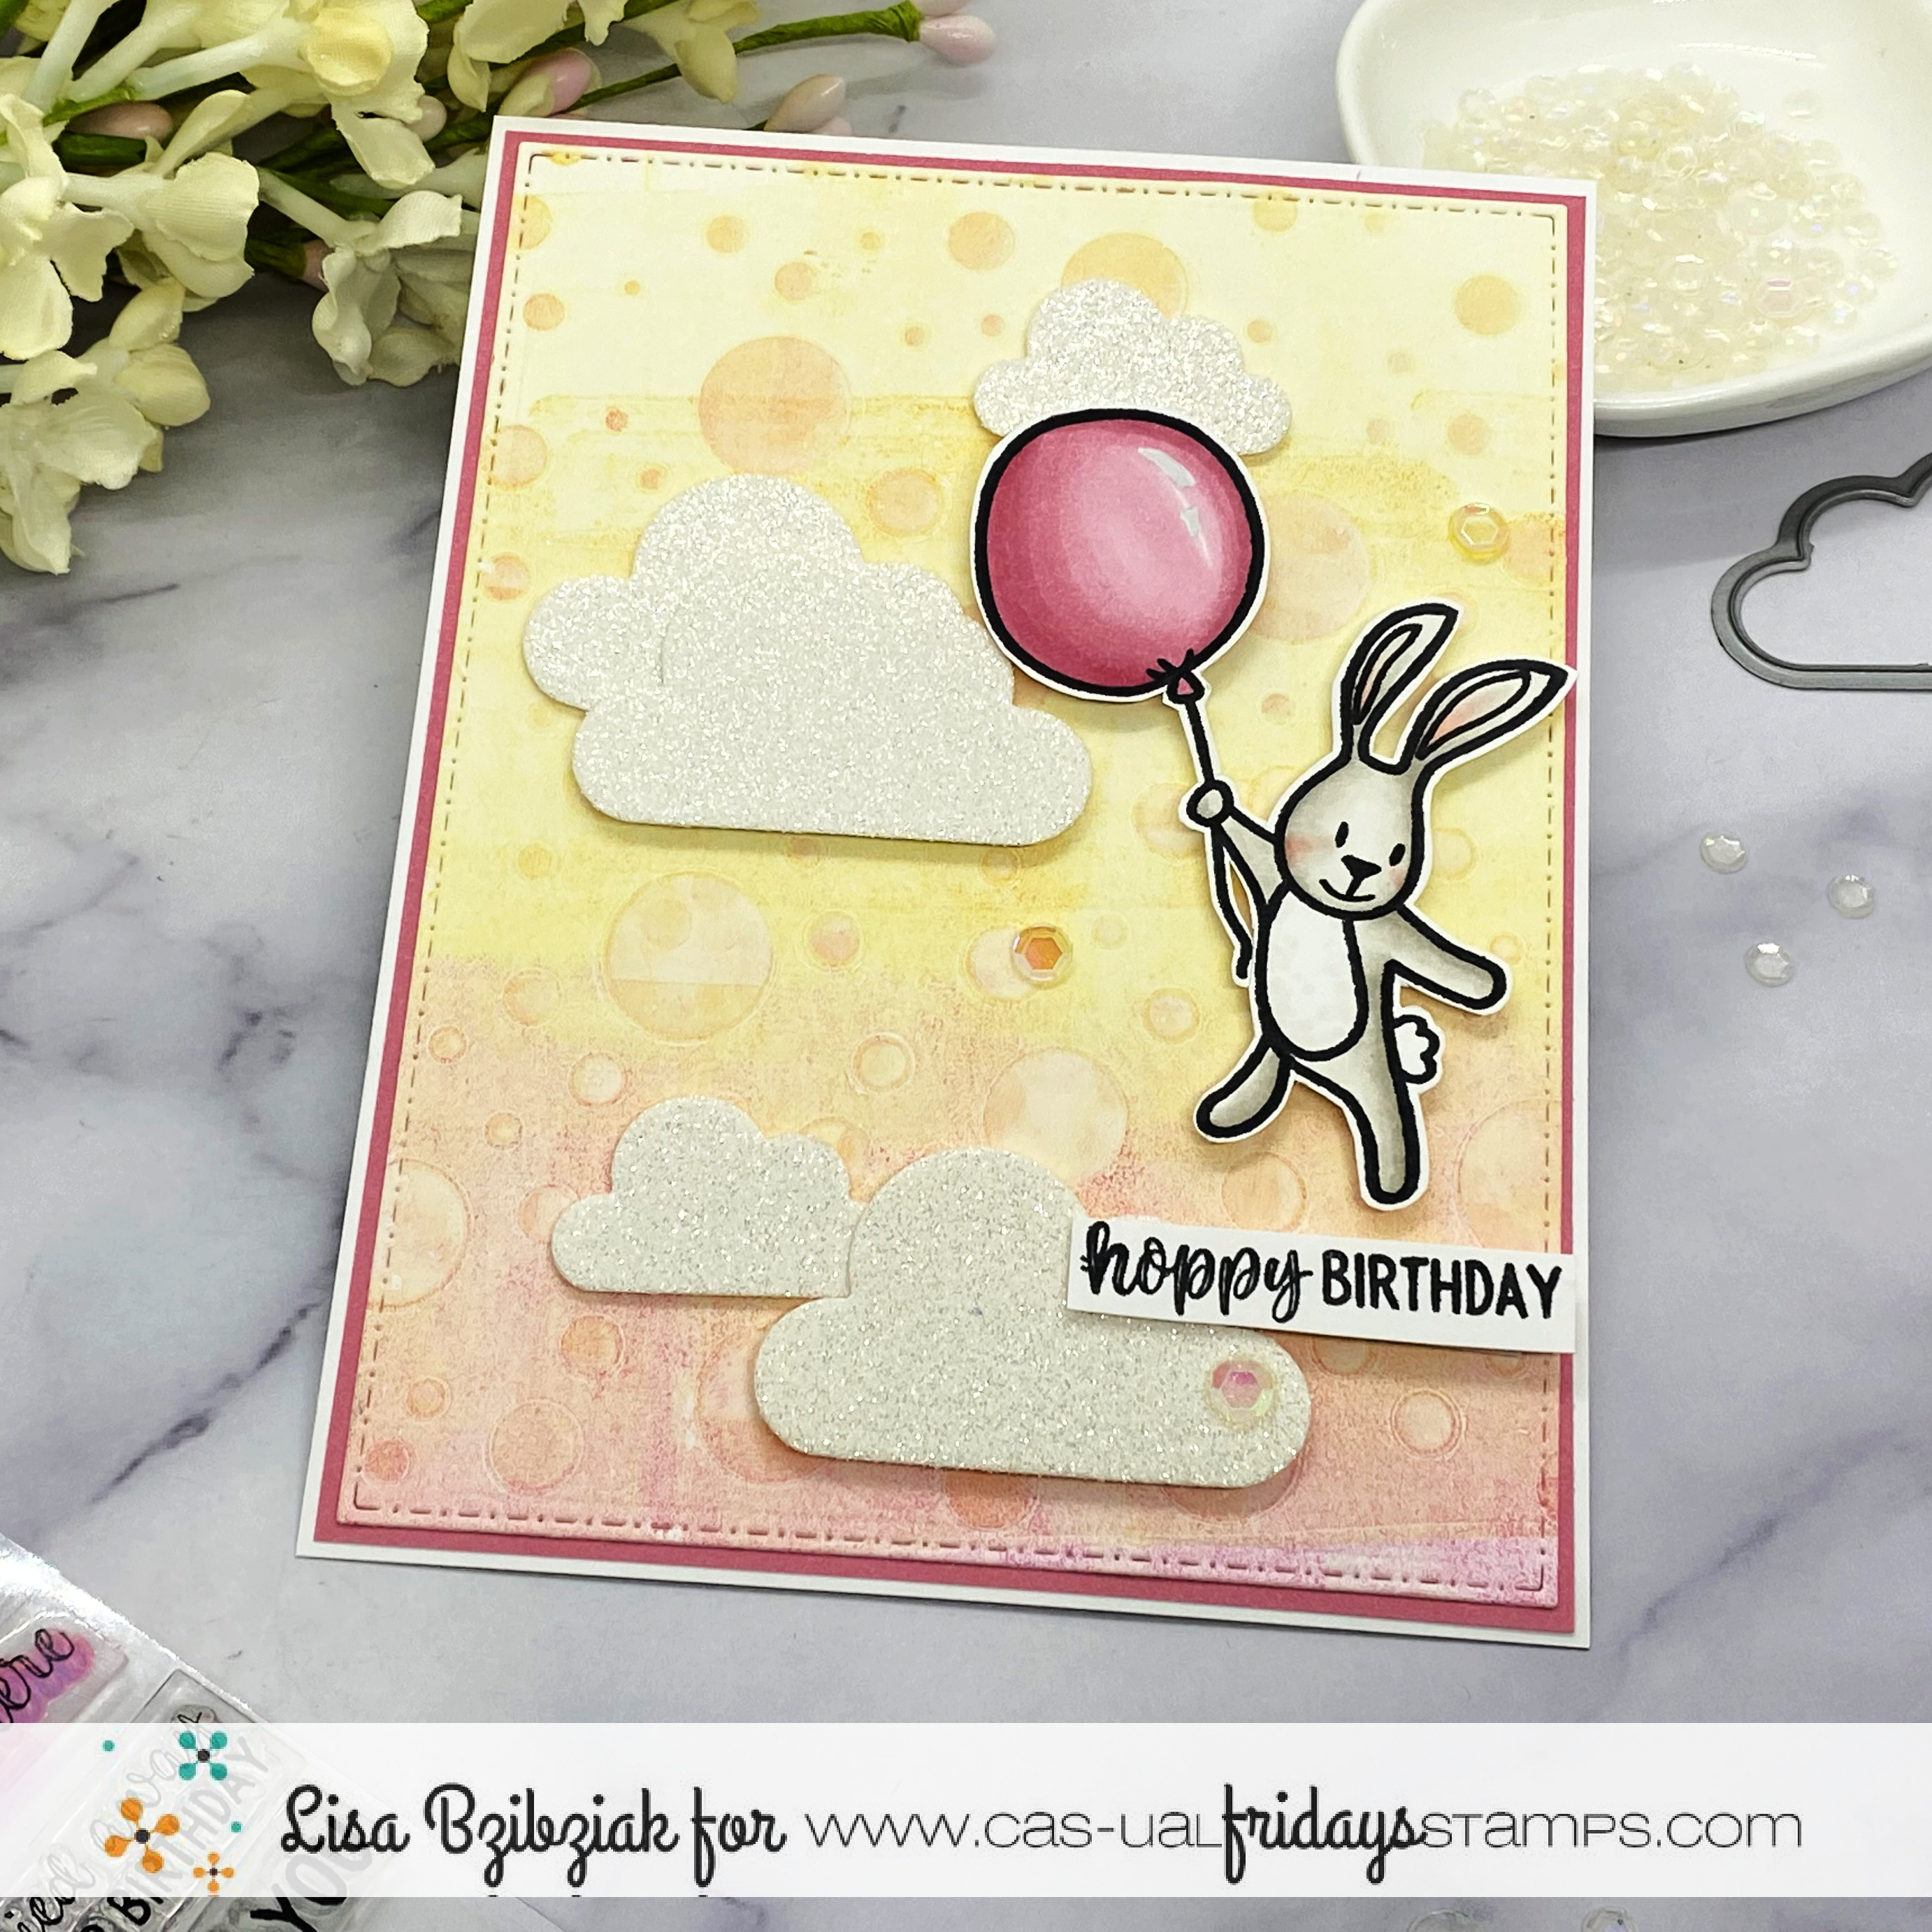
Hello!  I've got one today with a watercolored background I created on my Gel Press using some Distress Oxides and water along with the Bubbly Stencil.


I cut a few clouds from the Raindrops Duo out of white glitter paper and stamped and cut the bunny and sentiment from Somebunny.


Finally I popped everything up onto the watercolored background.

That's me for today!  I hope you enjoyed it and you'll come again soon!


Monday, May 2, 2022

Celebrate

Happy May everyone! It's Vicki from All I Do Is Stamp. Today I made a fun birthday card for my friend's husband.

I hand cut a mini slimline card base [6x3.5] and stamped the fun images from Somebunny Stamp Set. Using the Bunny Dies, I cut him and the balloons out.

Before I adhered the images, I stipple brushed on some ink along the edge, stamped the hearts [from the same stamp set], colored them in and then hand drew on some framing lines.

Using the Shenanigans Stamp Set, I stamped and clear embossed the celebrate.  I just adore the font of this word!  It's perfect for the masculine [and colors] card I needed.  I bet he loves it!

I'll be back in a couple of weeks with another CFS Day.  Meanwhile, should you choose, you can use my code to save 15% off your purchase.  Yes, that also includes the Clearance and Sale Items! [Well worth checking out!]


Thanks for stopping by~

ps - I have used affiliated links in this post at no additional cost to you. 


Friday, April 1, 2022

Hoppy Birthday


Hello, it's Michelle here today sharing a quick birthday card.

I've used the Somebunny Stamp Set along with the Partly Cloudy Stencil.
I started by stamping the bunny with the balloon onto some Neenah Solar White card stock and did some quick coloring with Copics. I made a mask to cover up the bunny and stenciled the clouds with some Catherine Pooler ink.  I added the card panel onto a top folding card with some foam tape.


Thanks so much for stopping by and if you are interested in purchasing any of the products   I've used today or anything else, you can click the "let's go shopping" link below to take you over to the shop! 

I have used my affiliate link which means at no extra cost to you I can make a small commission on any purchase you make.

You can also use my special discount code MICHELLESENTME for an additional 15% discount.


Saturday, January 22, 2022

Somebunny Told Me-Box Card


Welcome back!  I've been wanting to do this for a while... that sweet bunny from the Somebunny Stamp Set has been begging to be floating high in the sky!


I used the Party Cloudy Stencil to create the rainbow.  I adhered a small scrap piece of paper to the back of the stencil using some great new tape from Thermoweb!


I blended a light pink and yellow through the stencil to create the rainbow.


Before removing the stencil, I added some Glitz Glitter Gel through the stencil and set it aside to dry before I fussy cut it out.


I used the dies from the Raindrops Duo stamp and die set to cut out a bunch of clouds in pink, white and blue to match the colors in the papers I was using.  I attached them to my box card using some clear packaging from an embossing folder I had.  I love to use packaging because it's sturdy and I can add heavier items to it like those butterfly embellishments!


I finished it up by adding a sentiment from the set to one of the flaps.  As you can see when my card closes, that balloon sticks up over the edge...lol!  But that's not unusual to me... I'll just have to use a bigger envelope...

Thanks so much for stopping!  I hope you'll come again soon!


Tuesday, November 2, 2021

Stenciling and Stamping

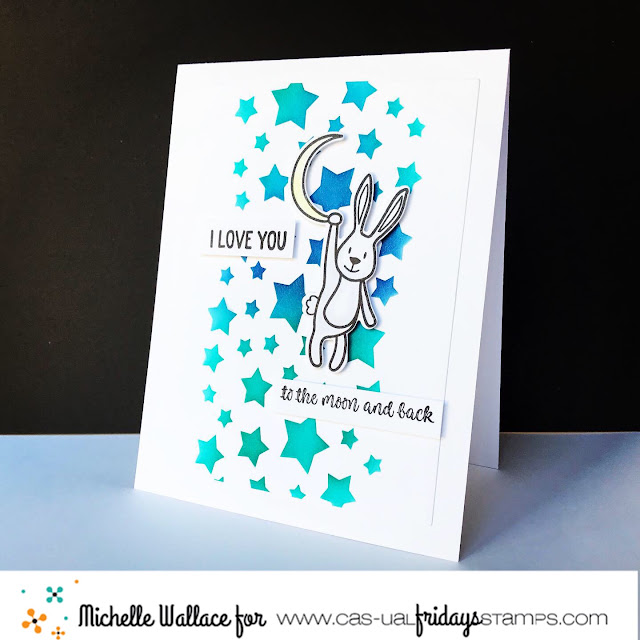
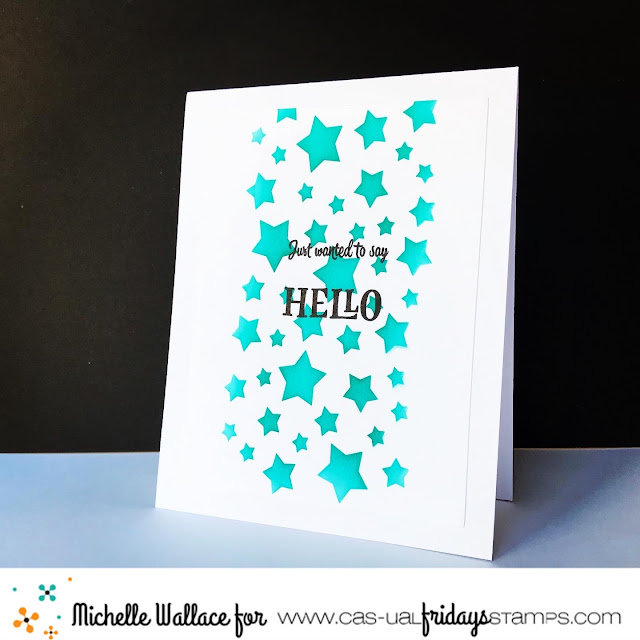
Hello,  it's Michelle here today with a couple of fun stenciled and stamped cards for you.

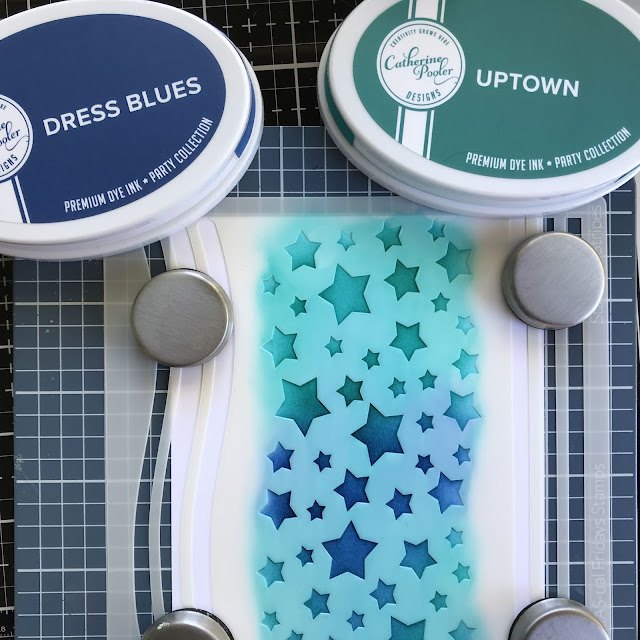
I created my backgrounds using some of the new colors of Catherine Pooler inks with the Stars and Stripes Stencil.  I blended the two colors together using a blending brush and used that piece as a background for the bunny from the Somebunny Stamp Set.
I stamped and die cut the bunny and adhered it to the stenciled piece with some dimensional tape.


For my second card I stuck to the one color ink and stamped the sentiment from Hello Stamps directly onto my stenciled piece.


Thanks so much for stopping by and if you are interested in purchasing any of the products I've used today or anything else, you can click the "let's go shopping" link below to take you over to the shop!
I have used my affiliate link which means at no extra cost to you I can make a small commission on any purchase you make.

You can also use my special discount code MICHELLESENTME for an additional 15% discount.


Monday, August 30, 2021

Everybunny Needs Somebunny Sometimes!!


HELLO CRAFTY FRIENDS!! 

Larissa here today with a SWEET Shaker Card!! I LOVE creating Shaker Cards and the Somebunny Images are a PERFECT match!!
I started by Stamping and Embossing the CAS-ual Fridays Stamps Somebunny Stamp Set Bunny Image and colored it with Copic Markers!! 
Bunny: N0, N3 & N5    Moon: Y11, Y15 & YR23  
Then I used the coordinating CAS-ual Fridays Bunny Fri-Dies!! Then I added some Tonic Studios Aqua Shimmer Pen and Morning Dew Nuvo Drops finishes off the Moon and Stars for Shimmer and Dimension!! 

 I Die Cut the Lawn Fawn Outside In Stitched Star Stackables Die Set to create the Window for the Shaker into my Card Base!! I added some Black Soot Distress Paint Splatters, and some Tonic Studios Aqua Shimmer Pen Splatters!! In person its so BEAUTIFUL!! Some Studio Katia Iridescent Stars and some Mini Star Confetti were added for even more Sparkle!!

 To make the shaker Window, I backed it with some Acetate, Fun Foam and some of the Lawn Fawn Perfectly Plaid Spring Paper!! I Stamped and Embossed the Sentiment and filled the Window with a mixture of Jewels, Sequins and Mini Star Confetti!! 
THANKS SO MUCH for stopping by today!! I hope I've BRIGHTENED your Day with this SWEET Shaker Card!! I hope you have a FABULOUS WEEK!! 

For TONS of AMAZING Inspiration make sure to visit the CAS-ual Fridays Stamps Blog and shop the NEW, Old and Sale Products in the CFS Shop!! You can also use my discount code LARISSASENTME to SAVE 15% off anything in the Shop!! WHOOP WHOOP!! 

Larissa Heskett 💛


Tuesday, May 4, 2021

To The Moon and Back - A Bokeh-ish Background


Hello!  Lisa here and today I'm sharing with you a fun background that is a little bokeh-ish!  I had fun using the Bubbly Stencil to create it and here's how I did it:


I started by cutting a slimline panel using the second largest die from the Pinked Slimline die set.  I used the Bubbly Stencil and started with the lightest color of Distress Oxide that I planned on using.  The stencil is not slimline sized so I did part of the slimline and then moved the stencil to the end of that being careful not to get ink over the edge by using a piece of paper as a mask.


I let that layer dry a bit and washed off my stencil and then went on with the next darkest color, positioning the stencil at a different angle so that the circles were overlapping in some areas but not completely covering the previous orbs.


Finally, the blue.  I was careful also to choose colors that would blend ok should the colors mix.  These three colors blend nicely with each other and didn't get muddy looking.


So fun, right??  I used a couple of the circles from the slimline die set and blended one of each of the colors onto them and popped them up onto the background.  Also added a few layers to the panel including my favorite... the largest pinked die cut from the set.


This bunny from the Somebunny stamp set was perfect for this one!  Perfect for a baby card or a birthday cared for your favorite little one!  I added some glossy accents to the stars and moon.


I just love how this background turned out and you can bet I'll be doing this again!

Thanks so much for stopping and hope you'll come again!

Oh!  And here is this for anyone keeping track:


And should you decide there is something you must have, here's this for you:


AND don't forget we've got some really great stuff still in the Retiring Section at some really great prices!

Come back again soon for some more CAS-ual Fridays Stamps inspiration!