Translate

Showing posts with label Stars and Stripes Stencil. Show all posts

Thursday, December 23, 2021

Decisions... Decisions...


So what's it gonna be??  Naughty or Nice?  I think it's up in the air for me this year.

I love this fun stamp and die set from the shop.  I decided to try to make a kind of a plaid background on my slimline using the Stars and Stripes stencil:


I started by placing red stripes down the length of the slimline.  I masked off the stars so I didn't have to be quite so careful and did two lines at a time, laying the first line on the stencil over the last line I had already inked.  This went pretty quickly and I've got some more ideas for this stencil!


I decided to do the horizontal lines in black.  I knew I was going to be layering over the panel so I only worried about the two ends in the center.  I went the length of the slimline by inking as far as the stencil would go and then sliding it over and lining it up again to do the rest.  Again, lots more ideas for this one!

After my lines were done I added some gold stars using Decofoil Metallix to the corners and set it aside to dry.


As you can see, by the time I got my other layers on you really couldn't see the plaid pattern or much of the stars...lol!  But I do love the little bit peeking out.

I cut the Naughty or Nice word dies three times.. once from black glitter paper and twice more from cardstock and stacked and adhered them together for dimension.  Then I cut the circles from the Pinked Slimline set in red and adhered them to a white slimline panel in a random pattern for some fun on the front.  I adhered the word die cut over the top leaving room for one of the sassy sentiments from the Naughty or Nice stamp set.


Just a few sequins and done!

Merry Christmas!  Happy Holidays!  Whatever you are celebrating this Holiday Season I'm wishing you Peace and Love whether you've decided to be Naughty or Nice!

Here's a little treat for you:

Thanks so much for stopping and come again soon!


Tuesday, November 2, 2021

Stenciling and Stamping

Hello,  it's Michelle here today with a couple of fun stenciled and stamped cards for you.

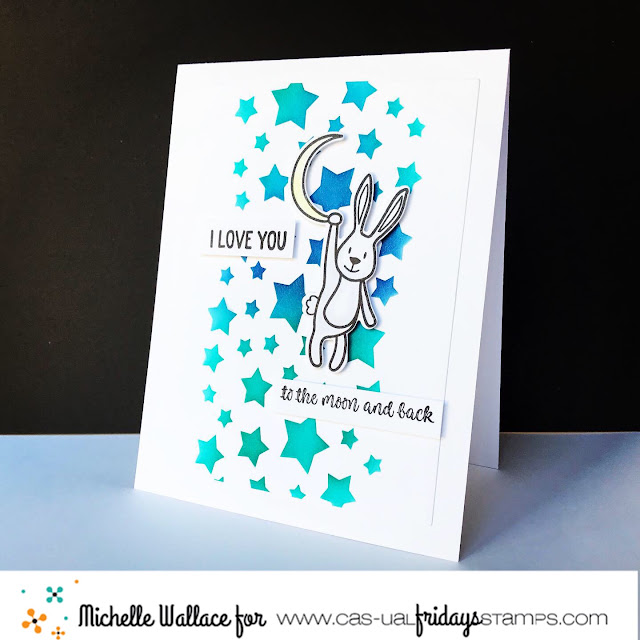
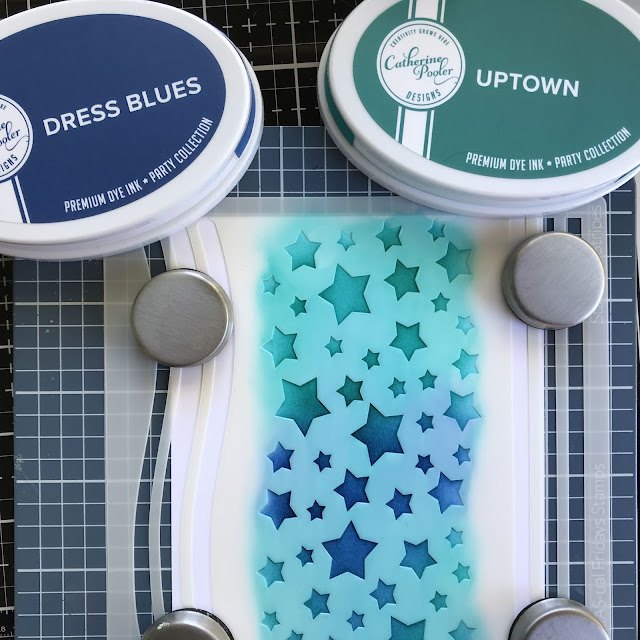
I created my backgrounds using some of the new colors of Catherine Pooler inks with the Stars and Stripes Stencil.  I blended the two colors together using a blending brush and used that piece as a background for the bunny from the Somebunny Stamp Set.
I stamped and die cut the bunny and adhered it to the stenciled piece with some dimensional tape.


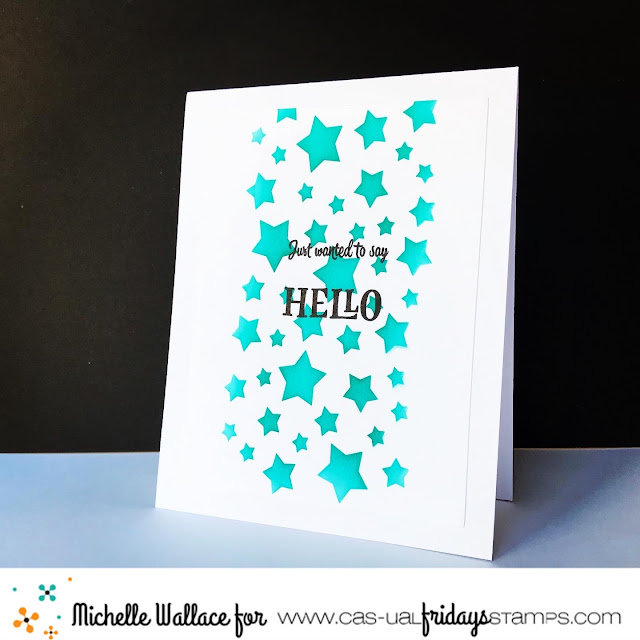
For my second card I stuck to the one color ink and stamped the sentiment from Hello Stamps directly onto my stenciled piece.


Thanks so much for stopping by and if you are interested in purchasing any of the products I've used today or anything else, you can click the "let's go shopping" link below to take you over to the shop!
I have used my affiliate link which means at no extra cost to you I can make a small commission on any purchase you make.

You can also use my special discount code MICHELLESENTME for an additional 15% discount.


Saturday, October 30, 2021

Hang in There!!


Hello Crafty Friends!! 

Larissa here today to share a FUN "Hang In There" Card today using a Combination of CAS-ual Fridays Products!! 
SQUEAL!! I LOVE how this Card turned out!! PERFECT for sending someone some a CHEERFUL Pick me up, even if you're not a Spider Lover!! How can you not SMILE when you see that Sparkly Purple Spider with Wiggly Eyes!! 
I Started by Inking with Faded Jeans Distress Oxide Ink and Black Soot Distress Ink on the retired Tag Buddies Die Cut Tag!! Then I Stamped and Embossed the Spider Web Image from the "Spooky" Stamp Set onto the Inked Tag, using Versa Fine Black Onyx Ink and WoW Ultra Shimmer Embossing Glitter!! Then I Stamped the CUTE Spider Image using Wilted Violet Distress Oxide Ink and Embossed with WoW Shrinking Violet Embossing Glitter!! Then I added the 3mm Wiggly Eyes to the Spider and some Trinity Stamps Fairy Rocks Rhinestones and a Black Seam Binding Ribbon Bow!! 
For the Card Panel, I Inked the Top of the Panel with some Faded Jeans Distress Oxide Ink and Black Soot Distress Ink!! Then I added some Water Splatters!! Next I inked with some Milled Lavender Distress Oxide Ink and then placed the Stars and Stripes Stencil over the Milled Lavender Ink and Inked the Stars with Wilted Violet Distress Oxide Ink!! Then I Embossed the Stars with WoW Shrinking Violet Embossing Glitter!! I Stamped and Embossed the Sentiment from the "Doing Great" Stamp Set!! I Stamped with Versa Fine Black Onyx Ink and Embossed with WoW Ultra Shimmer Embossing Glitter!! I adhered the Tag to the center of the Card Panel with some Foam Tape and then adhered some more Trinity Stamps Fairy Rocks Rhinestones!! 
For TONS of AMAZING Inspiration make sure to visit the CAS-ual Fridays Stamps Blog and shop the NEW, Old and Sale Products in the CFS Shop!! You can also use my discount code LARISSASENTME to SAVE 15% off anything in the Shop!! 

THANKS SO MUCH for stopping by today and I hope you have a FABULOUS HALLOWEEN WEEKEND!!  

COUNTRY HUGS-N-KISSES
LARISSA  🕷

Friday, August 20, 2021

Feel Better Soon!!

Hello Crafty Friends!! 

Larissa here today to share this SWEET Feel Better Soon Card using the NEW Stars and Stripes Stencil along with the Flower Duo Set and the Pretty Posies Stamp Set!! 
SWOON!! I LOVE the combination of the Plaid with the Flowers!! 
Let's get Started!!
 

I Started by Inking up the NEW Stars and Stripes Stencil with Picked Raspberry Distress Oxide Ink to create a FUN Plaid Design!! I think this Technique would also be FUN with Different Colored Inks!! I can't wait to try it for another Card!! 
I Stamped and Embossed the Flower Duo Image with Versa Fine Black Onyx Ink and Embossed with WoW Clear Gloss Embossing Powder!! 
Then I Colored with Copic Markers!! 
Flower: RV00, RV52 & RV55   N0 & N3     Leaves: YG61, YG63 & YG67
Then I used the coordinating Dies to Die Cut them out!! I Adhered them to a Circle Die Cut that I inked with Salvaged Patina Distress Oxide Ink using Foam Tape for some Dimension!!  
I Stamped and Embossed the "Feel Better Soon" Sentiment and then added the Circle to the Card using Foam Tape!! I adhered some Trinity Stamps Fairy Rock Rhinestones for an extra touch of Sparkle!! I LOVE the way this Card turned out and I hope I've INSPIRED you on a FUN way to use the NEW Stars and Stripes Stencil!! 

THANKS SO MUCH for stopping by today!! I hope you have a FABULOUS WEEKEND!! 

Larissa Heskett


Wednesday, July 21, 2021

Using Dies to Create a Stencil

Hello Crafty Friends!! Nora here from A Creative Touch with a card I created by making my own flower stencil using dies.


Sometimes I like to make easy cards, other times I like to try new things. 


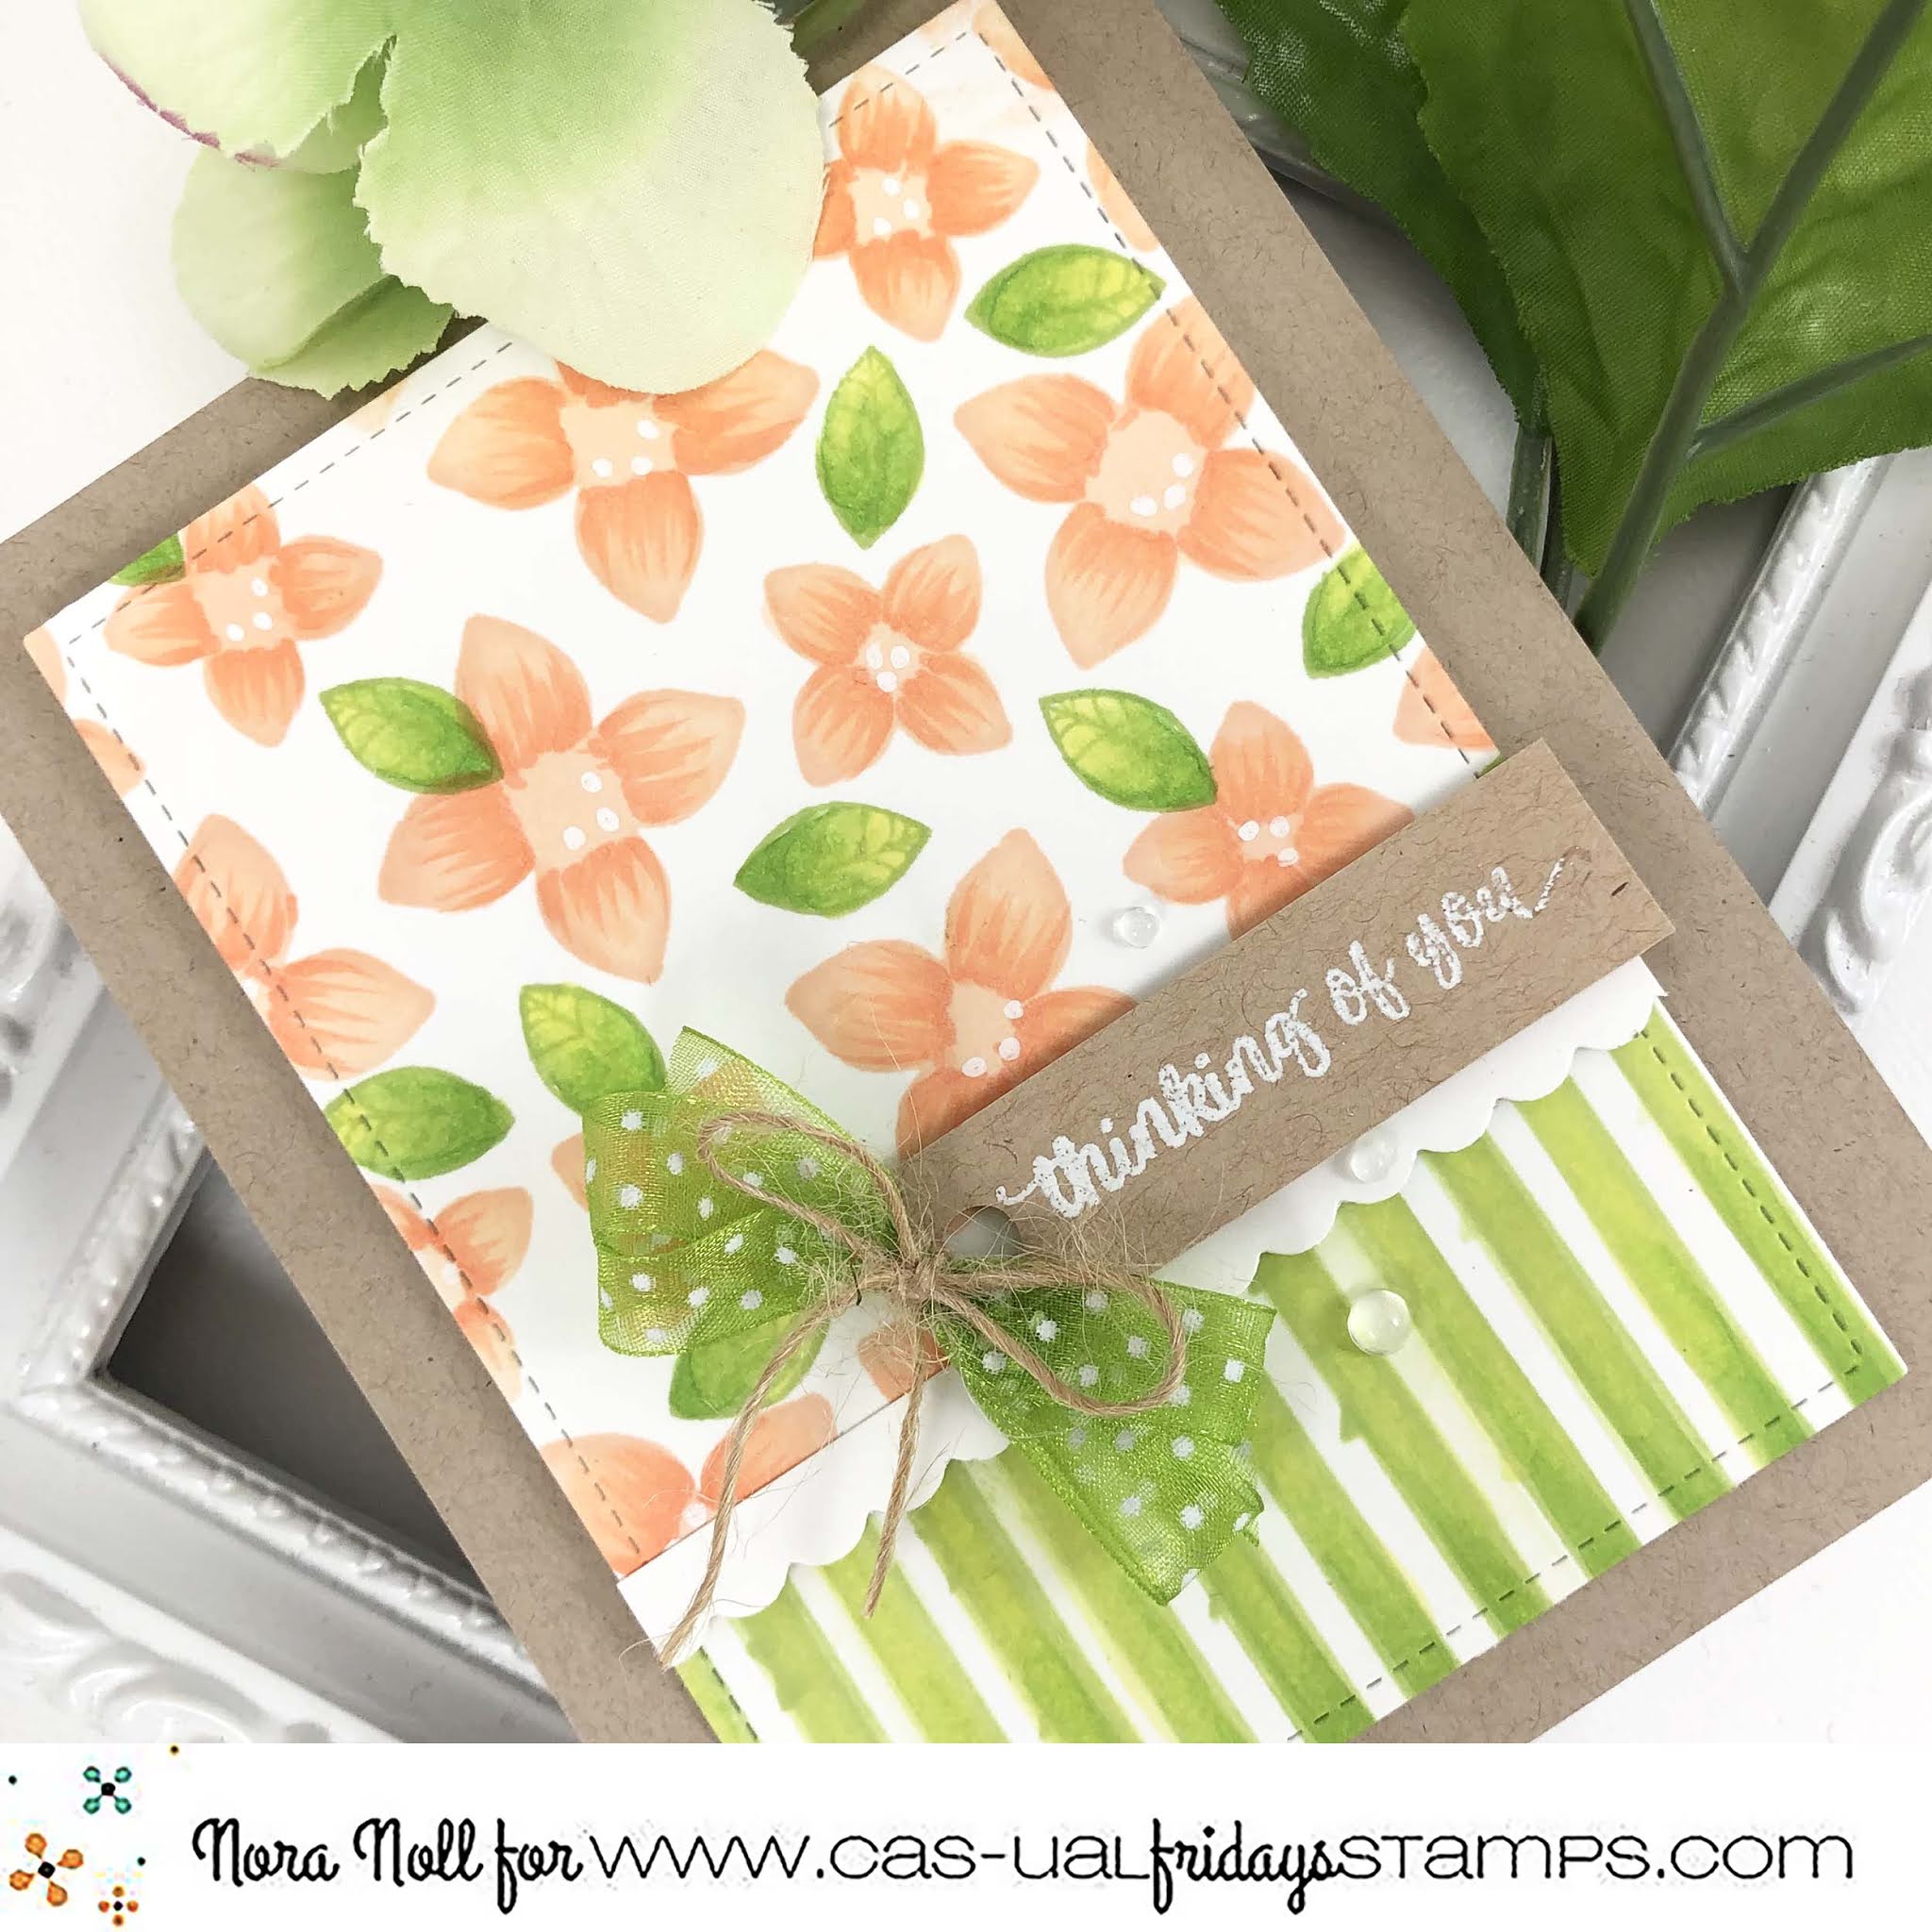
I decided that I wanted to make a flower stencil using the 4 Petal Die set and a piece of plastic sheet. 


The plastic sheet was 6" by 6" and I randomly die cut flowers out of the whole sheet. Don't have a plastic sheet to use? You can use a piece of heavy weight cardstock or a piece of acetate to create the stencil.


After I created my stencil, I used peach dye ink and a stencil brush to blend ink over a white sheet of paper. I then took some Copic Markers to shade in my flowers and added three white dots in the center using a gel pen.


Next I stamped the small leaf from the Flower Duo set with green ink in some of the empty white space. I used Copic Markers in shades of green to give some weight to my leaves.


 I die cut the panel and added a white scallop at the bottom and placed it over a green stenciled stripe that I created using the Stars and Stripes stencil.


 I added this rectangle to an A2, Kraft, card base.


I stamped a sentiment from the Flower Duo set with clear embossing ink and heat embossed it in white. I cut the Kraft paper into a rectangle and punched a hole into the left hand side. I added some ribbon and jute to my make shift tag and adhered it to my card front using foam adhesive.


My last step was to add some clear droplets around the sentiment.

I cannot tell you how much FUN I had creating this card!!! I encourage you to take the time and try this technique. The 4 Petal Dies were the perfect flower to use for making your own stencil.

Hop on over to the CAS-ual Fridays Stamps Shop for a shopping spree!! (Hint: there will be a new release this Friday so you might want to wait.) Use my code NORASENTME to get an extra 15% off your total order, including any sale items you might buy!!!


I want to thank you for taking the time to stop by today. Please come back on Friday for the NEW July release!!! Have a FABULOUS day!