Translate

Showing posts with label Copic Markers. Show all posts

Friday, August 5, 2022

Thanks for Making Me Smile


Welcome back!  Ever have a friend that can always make you smile?  I'm sharing this card that I made for one of those!


I started with a gel print I created using the Chunky Chevron Stencil that I foiled with a used piece of Teal Deco Foil.  I added the flower from Mon Ami which is not available! So sorry, but we do have the awesome Flower Duo that you could easily substitute!


I added a sentiment using the Sassy Smiles Duo!

That's me for today!  Hope you enjoyed it!  And we have a sale going!


Thanks so much for stopping!  Come again soon!


Monday, June 20, 2022

Happy Birthday-Foiled


Welcome back!  Today I'm sharing a card using the Mon Ami stamps and dies along with the Happy Birthday dies.  I created the background using some Yupo paper and alcohol inks and then used the Chunky Chevron stencil and some Deco Foil Transfer Gel Duo and Gold Deco Foil over the top.


The Transfer Gel Duo stays a little sticky so you can use it with foil without heat.  I like to let it sit for a whole day so it's only slightly sticky and the foil transfer isn't solid.

I cut the Happy Birthday dies from some foiled gel print and then cut it twice more from cardstock and stacked them for dimension.


Then I added the stamped images to the front with foam tape and just a few sequins.

Thanks so much for stopping!  Come again soon for more CAS-ual Fridays inspiration!


Wednesday, June 8, 2022


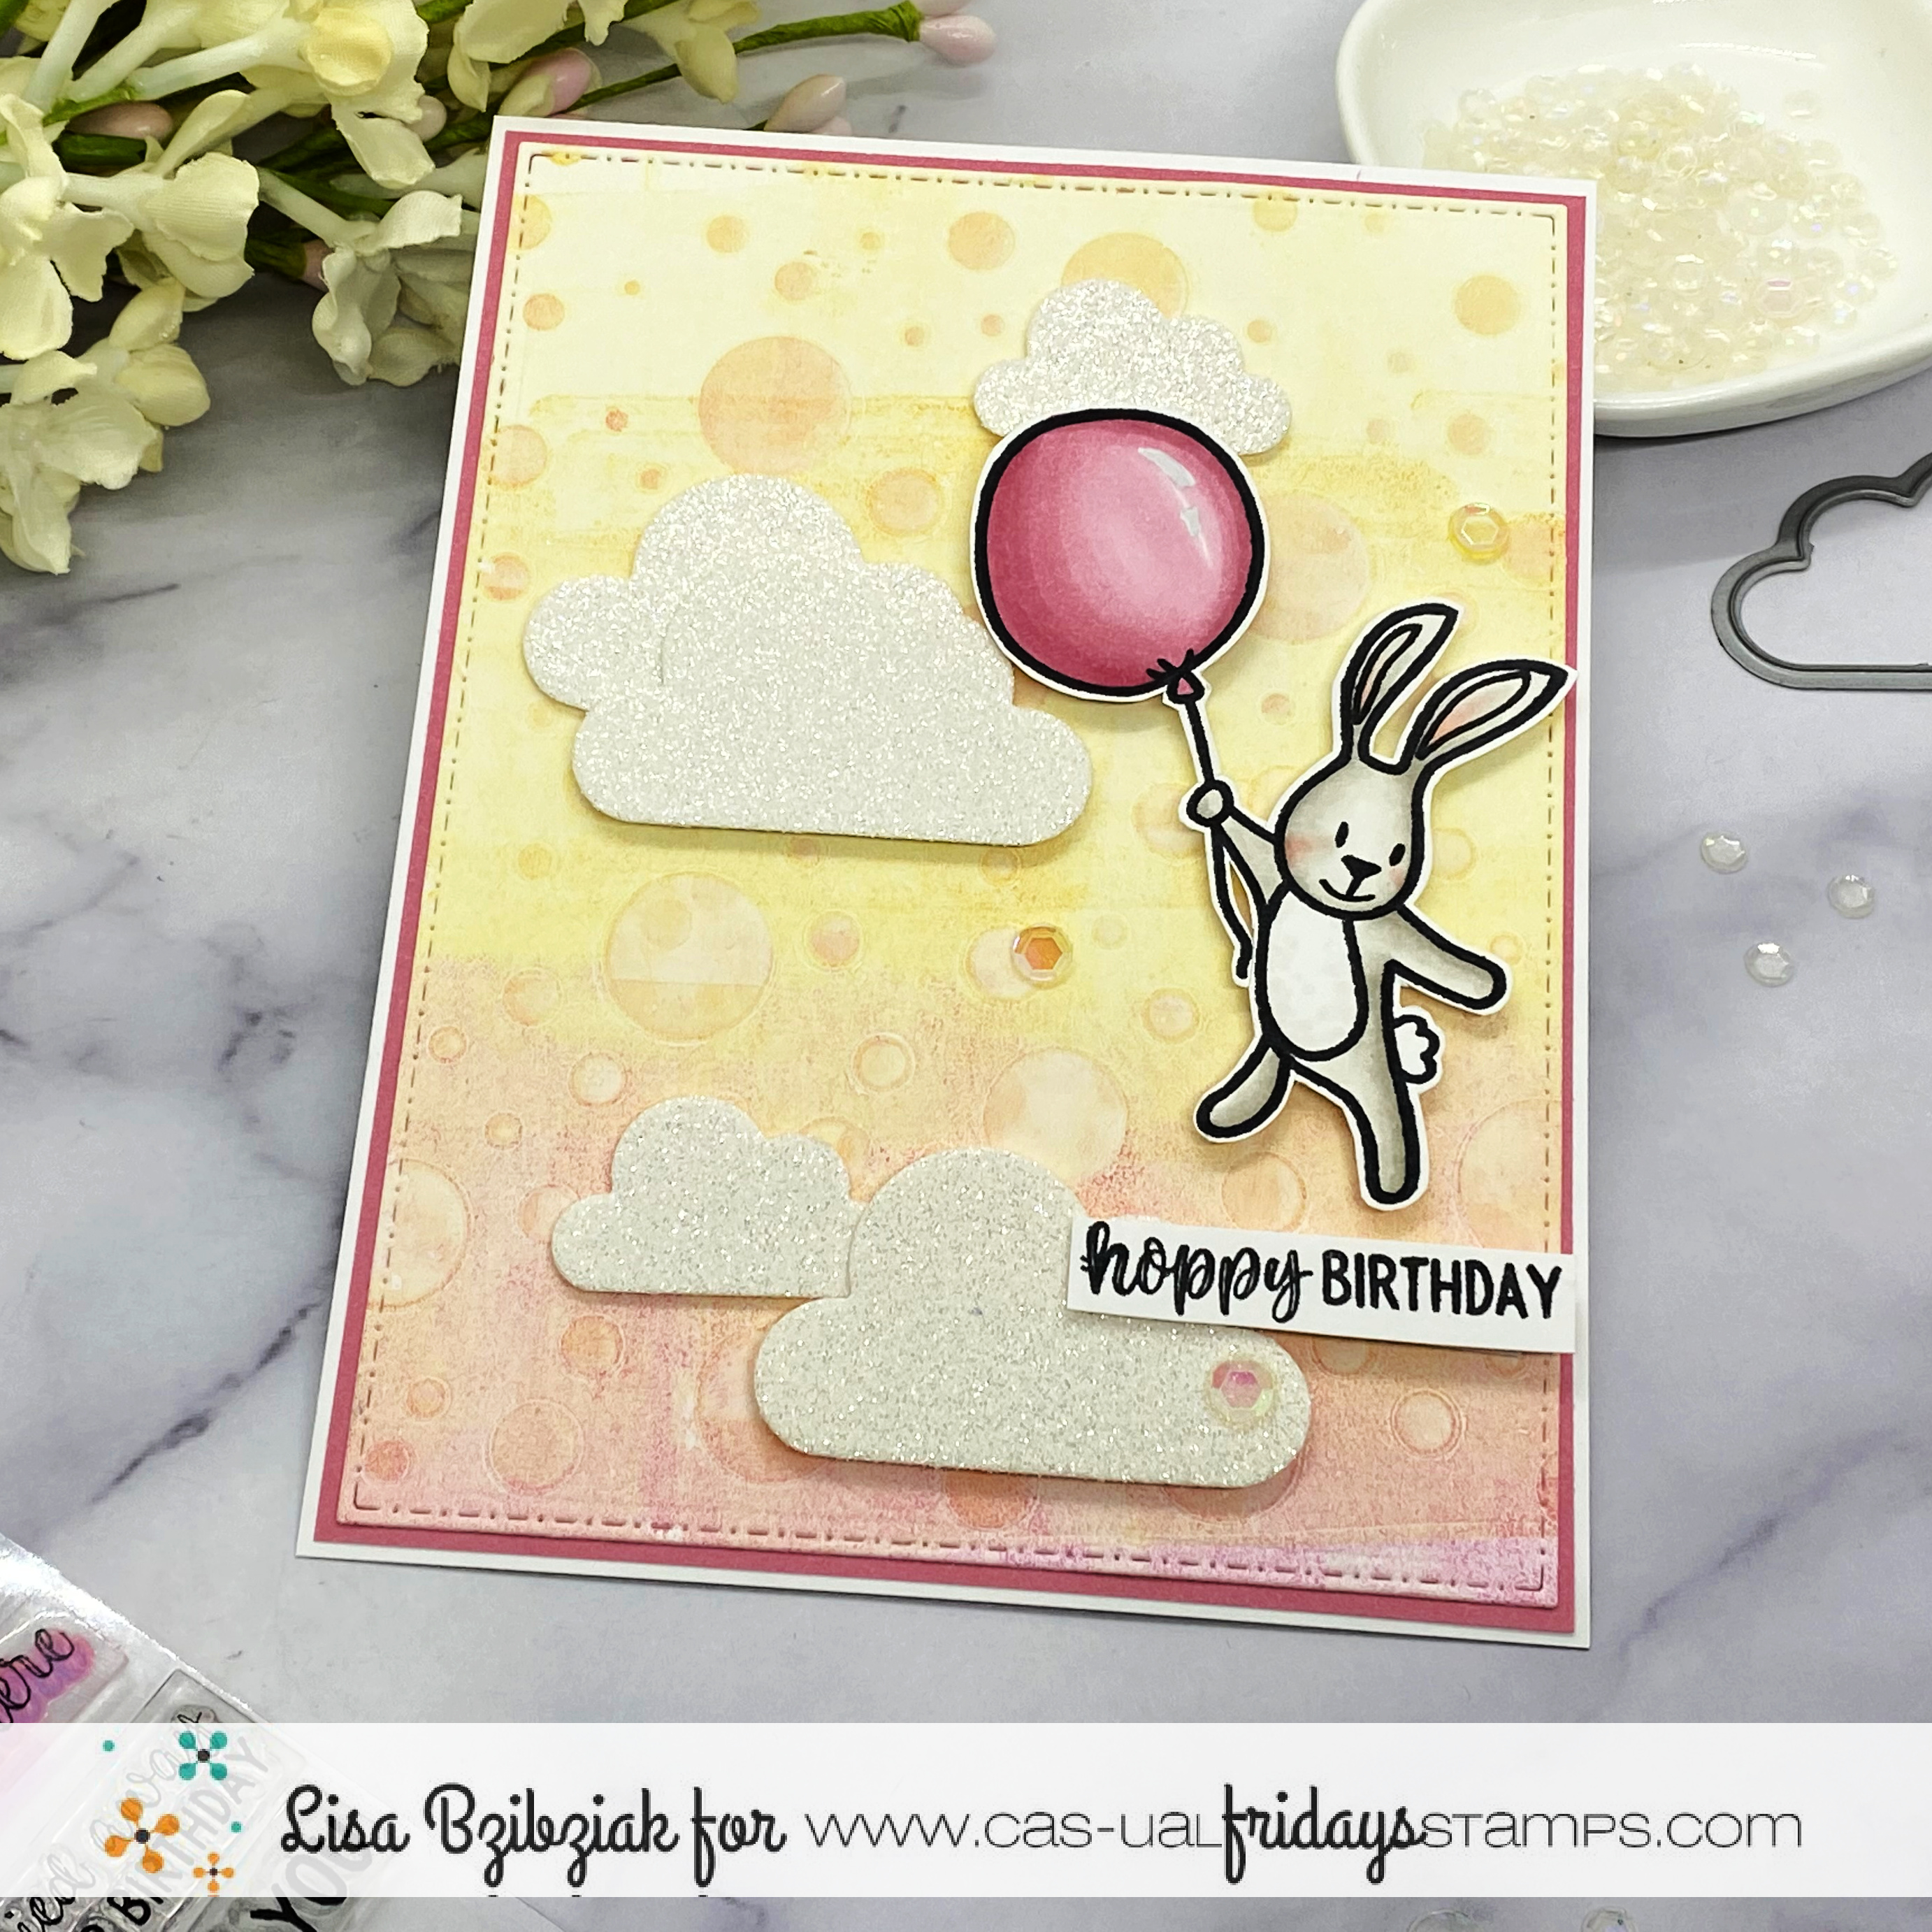
Hello!  I've got one today with a watercolored background I created on my Gel Press using some Distress Oxides and water along with the Bubbly Stencil.


I cut a few clouds from the Raindrops Duo out of white glitter paper and stamped and cut the bunny and sentiment from Somebunny.


Finally I popped everything up onto the watercolored background.

That's me for today!  I hope you enjoyed it and you'll come again soon!


Wednesday, May 18, 2022

Silent Scream


Welcome Back!  Today I'm sharing another coffee card with a watercolored background using the Falling Leaves stencil!


I stamped, cut and colored the pretty flowers from the Flowers Duo and tucked them inside the Coffee Cup after stamping the sentiment from Coffee talk.  Then I cut the Coffee word die from green glitter paper and then popped it up at the bottom to complete the sentiment!


That's me for today!  I hope you enjoyed your visit and you'll come back again soon!


Sunday, March 20, 2022

Thinking of You!!


HELLO CRAFTY FRIENDS!! 

Larissa here today to share this Bright and Cheerful Thinking of You Card using the BEAUTIFUL Flower Duo Stamp Set!!  
Here's what I've created!! 
I Started by Cutting my Card Panel!! Then Inking the top portion of my Panel with Tumbled Glass Distress Oxide Ink!! 
Next I Stamped and Embossed the NEW Flower Duo Stamp Set Images!! I Stamped with Versa Fine Black Onyx Ink and Embossed with WoW Clear Gloss Embossing Powder!! Then I used Copic Markers to Color the Images in!! 
I used: Flowers: RV00, RV52 & RV55  N0 & N2 
Greenery: YG61, YG63 & YG67 
Then I Die Cut the Images out using the coordinating Die Set!! I added some White Gel Pen Details for some added Highlights!! 
Next I Stamped and Embossed the Sentiment onto my Card Panel using Versa Fine Black Onyx Ink and WoW Clear Gloss Embossing Powder!! I adhered the Images to the Top part of my Card and used a combination of Ultra Bond Liquid Adhesive and Gina K Designs Foam Squares for some variation in dimension!! 
I added some Trinity Stamps Fairy Rocks Rhinestones to finish off the Card Card with a little SPARKLE and I just LOVE the way it turned out!! I paired it with a TE Salt Water Taffy A2 Envelope and it's ready to be Mailed to someone SPECIAL!! 

For TONS of AMAZING Inspiration make sure to visit the CAS-ual Fridays Stamps Blog and shop the NEW, Old and Sale Products in the CFS Shop!! You can also use my discount code LARISSASENTME to SAVE 15% off anything in the Shop!! WHOOP WHOOP!! 
THANKS SO MUCH for stopping by and I hope you have a FABULOUS WEEK!! 

COUNTRY HUGS-N-KISSES
LARISSA ðŸ’—


Sunday, March 6, 2022

Thanks So Much!!

HELLO CRAFTY FRIENDS!! 

 Larissa here today sharing this Card using the Everyday Dragonflies Stamp Set & Dragonflies Fri-Dies Set!! This Set is on SALE!! I'm SAD to see it GO as I LOVE this Set and have create SEVERAL of my FAVORITE Designs using it!! 
SWOON!! I LOVE how Elegant this Set is and that it's so versatile!! Here's what I've created for today!! 
I Started by Stamping and Embossing the Dragonfly Image onto my Card Panel using some WoW Embossing Powder in British Summer with my WoW Dual Speed Heat Tool!! !! Then I heat set it and Colored it in using Copic Markers!! I used: R11, R22 & R17 
Next I created a Mask to place over the Image and I Inked with some Tumbled Glass & Broken China Ink to match the Blue that is in the MFT Plaid Patterned Paper I used for the NND Scalloped Frame!! 
I finished the Design by Stamping and Embossing the Sentiment in WoW Bright White Embossing Powder and then I added some White Gel Pen Details to the Butterfly to help add some Highlights!! I also added a Few Studio Katia Pearls to add some Sparkle and finishes off the Card!! 

I mentioned other Cards I've created using this Set and here's a look at them!!


GET THIS SET Before it GONE, I PROMISE you'll LOVE Creating with it!! 

For TONS of AMAZING Inspiration make sure to visit the CAS-ual Fridays Stamps Blog and shop the NEW, Old and Sale Products in the CFS Shop!! You can also use my discount code LARISSASENTME to SAVE 15% off anything in the Shop!! WHOOP WHOOP!! 

THANKS SO MUCH for stopping by today and I hope you have a FABULOUS WEEK!! 

COUNTRY HUGS-N-KISSES
LARISSA ðŸ’—


Friday, February 4, 2022

Smile-Today is Your Day


Lisa here and I'm back with another cool gel press print.  I love the colors in this one and decided some pretty purple flowers would be perfect!  I used one of my favorite purple Copic combos, and you can see those below!  I used some Nuvo Drops for the center of the flower.  I like to apply them in dots and add a few so their edges don't touch and let them dry and then add a few more so that they keep their shape and don't all blend together in one clump.


I just love all of the sassy sentiments in the shop and the Sassy Smiles Duo is the perfect combo of a word die and coordinating sentiments


Thanks so much for stopping today!  Come again soon for more CAS-ual Fridays Stamps inspiration!


Saturday, January 22, 2022

Somebunny Told Me-Box Card


Welcome back!  I've been wanting to do this for a while... that sweet bunny from the Somebunny Stamp Set has been begging to be floating high in the sky!


I used the Party Cloudy Stencil to create the rainbow.  I adhered a small scrap piece of paper to the back of the stencil using some great new tape from Thermoweb!


I blended a light pink and yellow through the stencil to create the rainbow.


Before removing the stencil, I added some Glitz Glitter Gel through the stencil and set it aside to dry before I fussy cut it out.


I used the dies from the Raindrops Duo stamp and die set to cut out a bunch of clouds in pink, white and blue to match the colors in the papers I was using.  I attached them to my box card using some clear packaging from an embossing folder I had.  I love to use packaging because it's sturdy and I can add heavier items to it like those butterfly embellishments!


I finished it up by adding a sentiment from the set to one of the flaps.  As you can see when my card closes, that balloon sticks up over the edge...lol!  But that's not unusual to me... I'll just have to use a bigger envelope...

Thanks so much for stopping!  I hope you'll come again soon!