Translate

Showing posts with label Sassy Smiles Duo. Show all posts

Friday, August 5, 2022

Thanks for Making Me Smile


Welcome back!  Ever have a friend that can always make you smile?  I'm sharing this card that I made for one of those!


I started with a gel print I created using the Chunky Chevron Stencil that I foiled with a used piece of Teal Deco Foil.  I added the flower from Mon Ami which is not available! So sorry, but we do have the awesome Flower Duo that you could easily substitute!


I added a sentiment using the Sassy Smiles Duo!

That's me for today!  Hope you enjoyed it!  And we have a sale going!


Thanks so much for stopping!  Come again soon!


Friday, May 27, 2022

Nothing You Can Do


Well hello!  Lisa here and today I've got a fun one for you using a couple stencils and some dies!


I created the background with my gel press and some inks using both the Chunky Chevron and Falling Leaves Stencil.

I cut a bunch of the 4 Petals die cuts from some shimmery paper and glued the smaller ones over the larger ones and then added a center.


I cut the smile word from green glitter and the base using the same yellow for my border, stamped the sentiment from the Sassy Smiles Duo stamp set and then arranged everything over the top of the background and adhered it in place.

That's me for today!  I hope you enjoyed it and you'll come again soon!


Friday, May 20, 2022

Make a Wish

Hi All it's Vicki here, from All I Do Is Stamp, today. I am happy to share my card. I had so much fun making this card, and, I used a few stamps sets to do it!

I started with a [self made] mini slimline card base, and put it in my MISTI.  Being careful to line it up against the edge, I stamped the first make a wish from ShenanigansI moved the base down by 1" [in my MISTI] and re-stamped the rest of the line up.

Once that was done, I had a little to much space in between the stamping so I grabbed the heart from Sassy Smiles Duo, and stamped that the same way. I still felt I had to much open space, so I grabbed the its your birthday... sentiment from Whole Shebang, and stamped that down the card.

Using WTF2, I used the [cut it apart] HB and stamped that on a separate card strip and adhered it in the center, after drawing a self frame. 

 I enjoyed making this card - I hope you enjoyed seeing it!

If interested, you can use my code to save 15% off any purchase over at the store.


Thanks for stopping by~

ps - I have used affiliated links in this post at no additional cost to you. 


Friday, February 4, 2022

Smile-Today is Your Day


Lisa here and I'm back with another cool gel press print.  I love the colors in this one and decided some pretty purple flowers would be perfect!  I used one of my favorite purple Copic combos, and you can see those below!  I used some Nuvo Drops for the center of the flower.  I like to apply them in dots and add a few so their edges don't touch and let them dry and then add a few more so that they keep their shape and don't all blend together in one clump.


I just love all of the sassy sentiments in the shop and the Sassy Smiles Duo is the perfect combo of a word die and coordinating sentiments


Thanks so much for stopping today!  Come again soon for more CAS-ual Fridays Stamps inspiration!


Sunday, October 24, 2021

You Make My Heart Smile!


Welcome back!  I've got some watercoloring for you today!  I've used some liquid watercolor this time.

I started by die cutting a panel using the stitched die from the Slimline Pinked set.  I heat embossed the beautiful Flowery Background onto it in gold.  The background covers a regular card base panel so was short for the slimline, but I decided instead of stamping it again, I'd leave it blank and do something different with it.  Then I dropped a couple drops of the yellow and orange watercolors into wells of a paint pallete and water in a couple of the wells.  I started with a yellow wash and then started adding the two colors to the flowers sometimes heavier on the yellow and others the orange.


I love the variations I got and it reminds me of the Fall Mums I'd always plant in the fall in NY.

When that was dry, I blended some yellow and orange Distress Oxides onto the blank end of the panel and then added some texture paste through the Falling Leaves stencil and added gold embossing powder over it and heated that up.

I used some gold Glitter Tape across the area where the two designs came together and then added the sentiment with the word die and sentiment from the Sassy Smiles Duo at the bottom.


Finally, I cut the pinked panel in white and layered the watercolored panel over a yellow; then layered that over the white pinked panel and finally an orange base and a few sequins to finish it off!

That's me for today!  I hope you enjoyed it and I hope you've been enjoying all of the birthday inspiration we've been having here lately!

Come back again soon!


Monday, September 20, 2021

Just a Little Something to make you Smile!!

Hello Crafty Friends!! 
 Today I'm showcasing the NEW Falling Leaves Stencil!! SWOON!! I'm a LOVER of FALL, it's my FAVORITE Season!! So every year I look forward to designing with ALL of the Fall Products!! This is NEW Stencil has SO MANY possibilities!! 
Here's a Look at the NEW Falling Leaves Stencil!! 

Here's the Project I've made for today!! 
LOVE the Colors of Fall, they make me SO HAPPY!! I Started with a Piece of Black Text Patterned Paper for my Card Panel!! Then I Sprayed the back side of the Stencil with Therm O Web Pixie Spray!! I Placed it over my Card Panel and Inked the Stencil Design using Wilted VioletFossilized Amber, Rusty Hinge and Peeled Paint Distress Oxide Inks using my Blending Brushes!! Then I removed the Stencil and Some WoW Embossing Powder in Pearl Gold Glitter Embossing Powder!! i placed it over the Leaves LIGHTLY using a light hand and I OVE how it turned out!!

I added some Water Splatters to activate some of and let that Dry!! I Stamped and Embossed the Sentiment "Just a Litte Something to make you" Ink and WoW Clear Gloss Embossing Powder!! 
LOVE how it turned out and how FUN it is to mix and match Stamped, Die Cut and Stenciled Elements to create and SPECIAL Card to send this Fall!! 

THANKS SO MUCH for stopping by today 
I hope I've INSPIRED You!!??  
Don't forget to visit the CAS-ual Fridays Stamps Blog for even MORE AMAZING Inspiration!! 

Have a FABULOUS WEEK!!
 

COUNTRY HUGS-N-KISSES
LARISSA  💗


Wednesday, August 4, 2021

Something to make you Smile!

Hello, it's Michelle here today sharing a card I made using the beautiful Flowery Background Stamp and some Karin Brush Markers.
I love using this stamp with white embossing powder!  I chose two colors of  Karin Markers and just scribbled onto my card panel and took to it with a water brush. 
I die cut the Smile from the Sassy Smiles Duo using white and black card stock and adhered them together to give it a shadow effect.  The sentiment is from the same Sassy Smiles Duo set.


Thanks for stopping by and if you're interested in purchasing any of the products I've used you can click the "let's go shopping" link below to take you over to the shop!
I have used my affiliate link which means at no extra cost to you I can make a small commission on any purchase you make.

You can also use my special discount code MICHELLESENTME for an additional 15% discount.


Monday, August 2, 2021

You Make My Heart Smile!!

Hello my Crafty Friends!!

Nora here from A Creative Touch with a card for you. I have decided to bring back the "grunge" look and created a mixed media card using some of the fun stencils in the CAS-Fridays Store


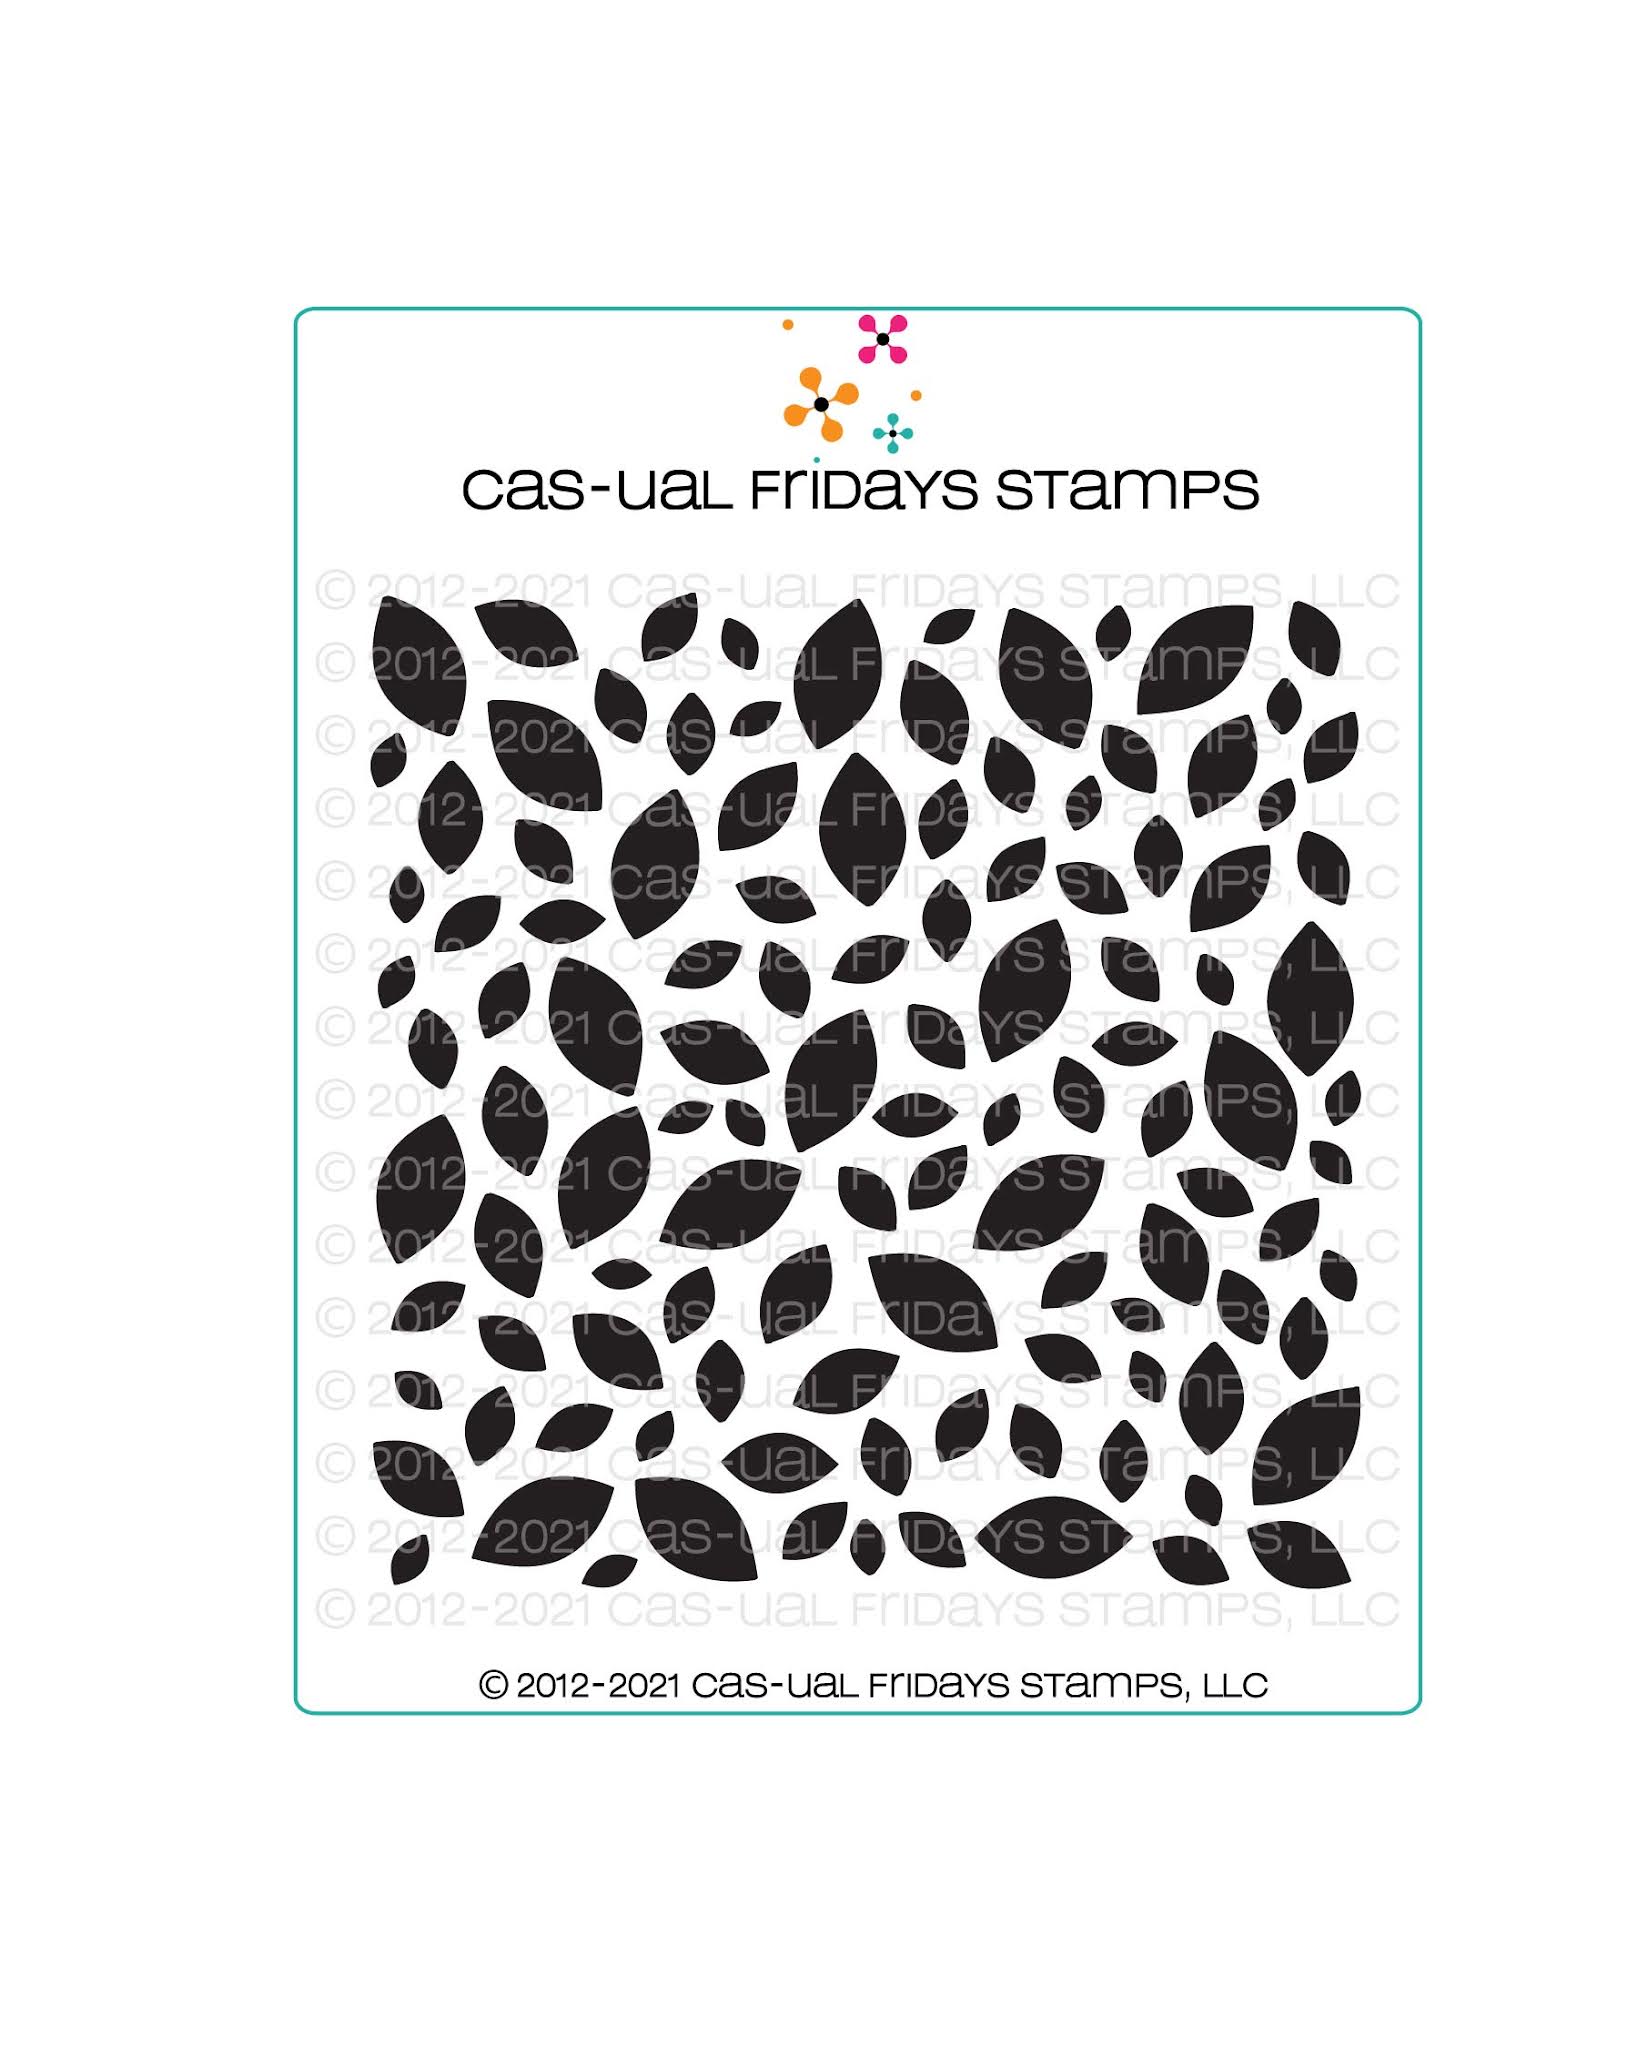
I started off my card by using Oxide ink on gel plate with the Falling Leaves Stencil. Two prints were created from this technique-one with a positive print and one with a negative print. The negative print  I created by using the left over ink from the top of the stencil and some water.


For todays card, I decided to use the positive print for my background, which is in the one in the back. 


I took the print, stamped some green hearts from the Sassy Smiles Duo stamp set and used Nuvo Drops in white with the Swirls Stencil to get the funky dots on my background. I then covered the hearts with Glossy Accents.


While the hearts were drying, I stamped the Smile sentiment from Sassy Smiles Duo with green ink and a coordinating sentiment in black on a piece of white cardstock. I die cut the "thinking of you" part of the sentiment using the large, pinked circle from the Pinked Slimline Dies.  I popped the "smile" portion of the sentiment up on the pinked circle and covered it with a glitter pen and Glossy Accents. I then added some yellow drops around the edges.


When all of my pieces were dry, I grunged up the edges using brown Distress ink and a paper distressor. I even used Distress ink on my card base. Everything was ready to put together!


I added the background to my distressed card base and then popped up the sentiment circle using foam adhesive.


This card was so much fun to make! I even have an extra piece of paper to use on my next project.


I hope you will give this fun technique a try!!! 

For some more inspiration, please be sure to visit the CAS-ual Fridays Stamps Blog and have fun shopping the CFS Shop. Be sure to use my code NORASENTME for an extra 15% off your total purchase! This includes new items too!!


I want to thank you for taking the time to stop by. Have a FABULOUS day!!


CAS-Fridays Supplie: