Translate

Showing posts with label Dragonflies Dies. Show all posts

Thursday, April 7, 2022

Thanks

Hi All, it's Vicki from All I Do Is Stamp.  Today, I went with a round card - just for fun.

I started by water coloring a panel - I used the smooshing technique.  Separately, I stamped, embossed,  water colored, and cut out the fun dragonflies from Everyday Dragonflies using the matching dies.

I then cut [and layered 3 times] the Thanks from Thanks Duo.

This card is going into my stash for a future use, or [fingers crossed] a sale!  Do you sell your cards?  I love selling mine if anything, for the space.  Yes, I have a few back stashed cards~

I'll be back in a couple of weeks for another CFS card.  Meanwhile, have you checked out the Sale Section?  Wow - with adding my code VICKISENTME, pick them up for cheap, cheap, cheap!!


Thanks for stopping by~
ps - I have used affiliated links in this post at no additional cost to you. 


Wednesday, January 26, 2022

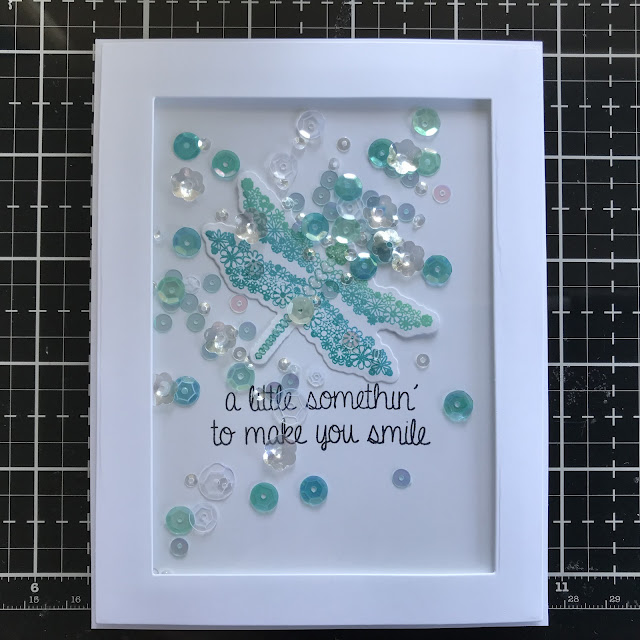
A Shaker Card to make you smile!

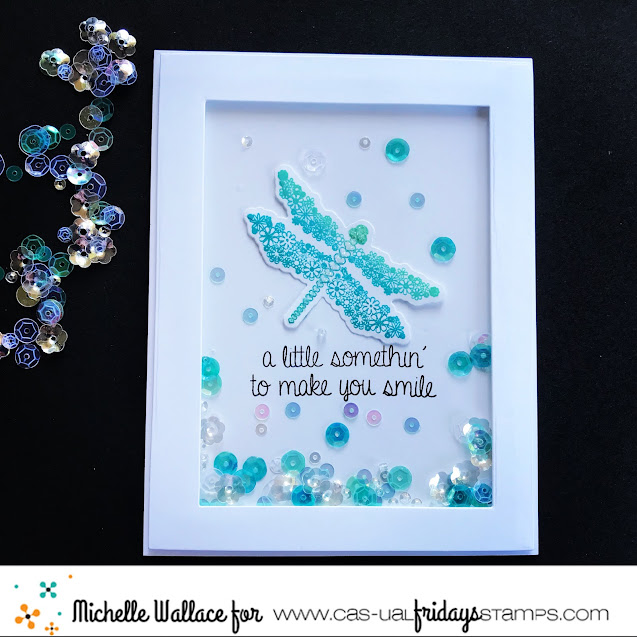
Hello, it’s Michelle here today and I have a fun shaker card to share with you.

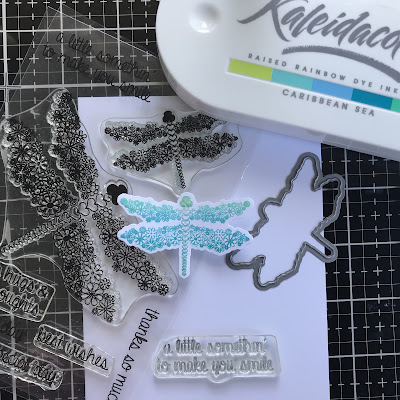
I've used the Everyday Dragonflies stamp set and the coordinating Dragonflies dies.


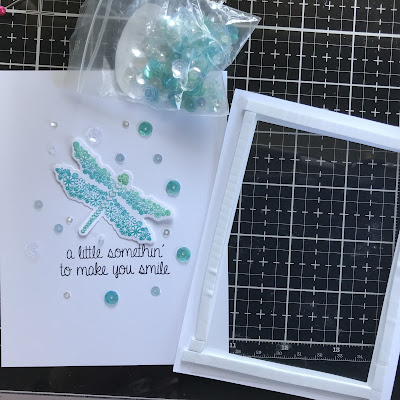
I started by stamping the smallest dragonfly with a Kaleidacolor ink pad. Then I die cut it using the coordinating die.

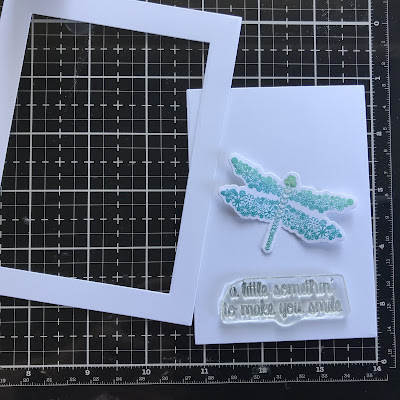
I die cut a frame using some rectangle dies.


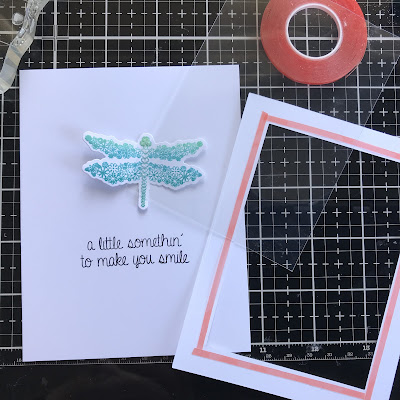
Next I cut a sheet of acetate and adhered it to the inside of the frame with some strong double sided tape.  I stamped the sentiment onto a piece of 4 1/4 x 5 1/2 white card stock  and adhered the dragonfly with some liquid glue.


I added some strips of foam tape to the frame.  Then I added my sequins and adhered some down using liquid glue so they don't all appear at the bottom of the card.


I placed the frame over the top of  the card panel and adhered that to a card base.


Thanks so much for stopping by and if you are interested in purchasing the products I've used today or anything else, you can click the "let's go shopping" link below to take you over to the shop!

I have used my affiliate link which means at no extra cost to you I can make a small commission on any purchase you make.

You can also use my special discount code MICHELLESENTME for an additional 15% discount.


Monday, January 24, 2022

Thanks So Much

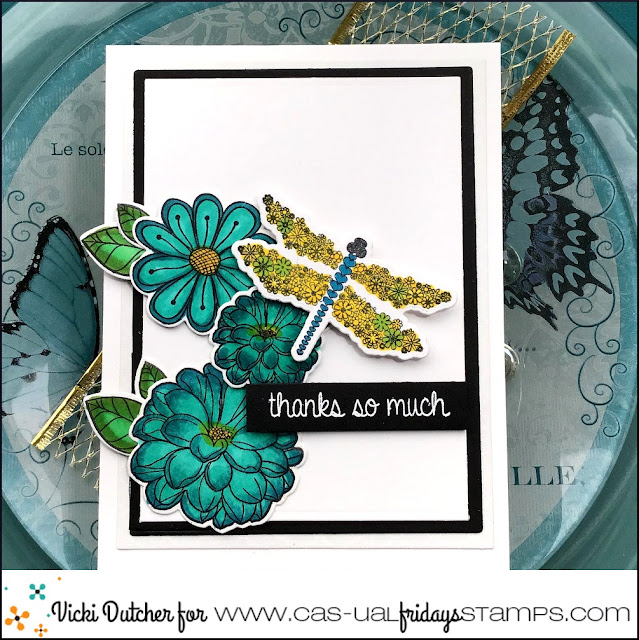
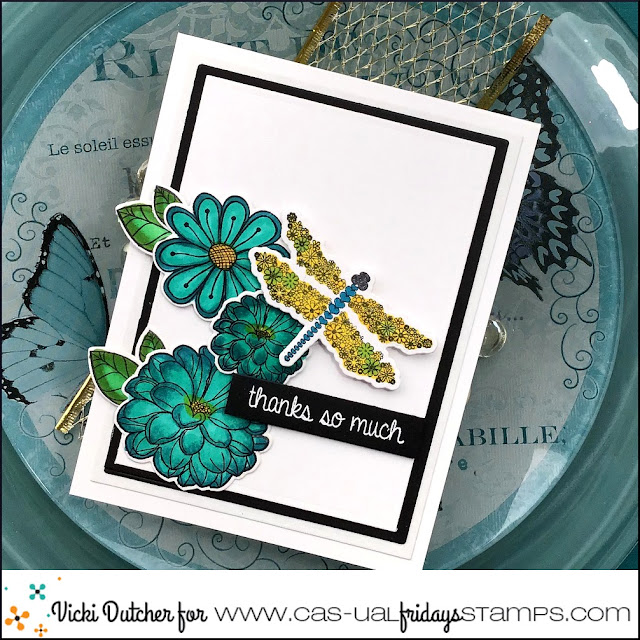
Hi All, it's Vicki from All I Do Is Stamp.  I needed a Thank You card, and was in the mood to color up some flowers!  Here is what I came up with~

I used a couple of products for today's card; Flowery Duo [comes with the dies!], Pretty Posies [with matching dies], and Everyday Dragonflies [with matching dies]. [All of these are on sale, and yes, my code works too!]

I colored the images with my Copics, and the sentiment is from Everyday Dragonflies.

That's it for my card.  I'll be back next month with more CFS cards.


Thanks for stopping by~
ps - I have used affiliated links in this post at no additional cost to you. 


Sunday, July 11, 2021

Thinking of You Makes my Heart.......

Hello Crafty Friends!!

Today I'm showcasing this SWEET "Thinking of You Makes my Heart...Smile" Card!! I'm using the NEW Swirls Stencil along with the Everyday Dragonflies Stamp Set and the Sassy Smiles Duo Stamp Set!! 
I Started by Spraying the back side of the Swirls Stencil with Pixie Spray and then adhered it over a Grey Brick Patterned Paper Card Panel and and Inked with Kitsch Flamingo Distress Oxide Ink!! I LOVE the way it resembles the flight path of the Dragon Flight!!  
I wanted to add a Sentiment and a SWEET Dragonfly Image in the center of the Swirls Stencil Designs!! So I Embossed the Dragon Fly Image from Everyday Dragonflies Stamp Set using WoW Ultra Shimmer Embossing Powder!! I Colored with Copic Markers C0, C2  & R81 & R85!! Then Die Cut the Dragon Fly out using the coordinating Drangonflies Die Set!! Then I Stamped and Embossed the Sentient using the Sassy Smiles Duo Stamp Set and Embossing with the same WoW Ultra Shimmer Embossing Powder!!
For the Inside of the Card to finish off the Sentiment, I Stamped the "Smile" Sentiment!! I Stamped with Kitsch Flamingo Distress Oxide Ink and then Embossed with WoW Ultra Shimmer Embossing Powder!! Then I also Stamped and Embossed the Tiny Heart Also included in the Set with Versa Fine Black Onyx Ink and WoW Ultra Shimmer Embossing Powder!! I LOVE how the Iridescent Sparkle carries into the inside of the card and keeps everything cohesive and SPARKLY!! It REALLY does make me SMILE!! 
 I adhered the Dragonfly to the Card Panel with a thin strip of Foam Adhesive to flip up the Dragonflies Wings!! Then finished off the design by adding some Trinity Stamps Fairy Rocks Rhinestone Embellishments for even more Iridescent Sparkle!! SWOON!! This Card is Simple in its Design, but it sure does pack a PUNCH and I KNOW it'll make the Recipient SMILE!! 

For TONS of AMAZING Inspiration make sure to visit the CAS-ual Fridays Stamps Blog and shop the NEW, Old and Sale Products in the CFS Shop!! You can also use my discount code LARISSASENTME to SAVE 15% off anything in the Shop!! WHOOP WHOOP!! 

SHOP the Retirement SALE and HUGE SALE!! There's LOTS of AMAZING Deals and you're WELCOME to use my CODE to SAVE even MORE!! WHOOP WHOOP!! 


THANKS SO MUCH for stopping by today!! I hope you have a FABULOUS WEEK!!  

Larissa Heskett ðŸ’—


Shop using my LINK HERE!! Then use my CODE at CHECK OUT to SAVE!! 


Sunday, June 27, 2021

Just Because!!

Hello Crafty Friends!!

Today I'm showcasing the Chunky Chevron Stencil & Bubbly Stencil!! I LOVE these Stencils and ALL of the Possibilities!! 
How FUN are these NEW Designs!!?? So VERSATILE and there are so many ways that you can use them!! 
Here's what I've created for today!!
I Started by Inking the Card Panel with Milled Lavender and Spun Sugar Distress Oxide Inks using my TE Blender Brushes!! Then I Sprayed the back side of both of the Stencils with Therm O Web Pixie Spray!! I adhered the Bubbly Stencil on the top part of the Card Panel and Masked off the Stitched Boarder with some Purple Tape and Inked with WoW Embossing Ink!! My Embossing Pad was just reinked so when I sponged over the Stencil I got a lot of extra Ink and it distorted the Circle Pattern a little, but I really LOVE the way that it turned out!! Then I coated the Panel with the WoW Sugared Almond Embossing Glitter!! Then I heat set it using my WoW Dual Speed Embossing Tool!! 
I adhered the Chunky Chevron Stencil over the bottom of the Card Panel and Masked it off with Purple Tape and then Inked over it with a Sponge Dauber with the WoW Embossing Ink!! Then I applied the Pink Sherbert Embossing Glitter!! I heat set it with my WoW Dual Speed Embossing Tool!! I LOVE how STUNNING it looks in the light!! Both Embossing Glitters are FULL of Iridescent Glitter!!

I wanted to add a Sentiment and a SWEET Dragonfly Image!! So I Die Cut a Circle and Stamped and Embossed the "Just Because" Sentiment from the Terrific Flowers Stamp Set!! I Embossed with WoW Clear Gloss Embossing Powder!! Then I also Embossed the Dragon Fly Image from Everyday Dragonflies Stamp Set using WoW Ultra Shimmer Embossing Powder!! I Colored with Copic Markers C0, C2  & R81 & R85  Then Die Cut the Dragon Fly out using the coordinating Drangonflies Die Set!! I adhered them to the Card Panel and then finished it off by adding some Trinity Stamps Fairy Rocks Rhinestone Embellishments for even more Sparkle!! 
For TONS of AMAZING Inspiration make sure to visit the CAS-ual Fridays Stamps Blog and shop the NEW, Old and Sale Products in the CFS Shop!! You can also use my discount code LARISSASENTME to SAVE 15% off anything in the Shop!! WHOOP WHOOP!! 

SHOP the Retirement SALE and HUGE SALE!! There's LOTS of AMAZING Deals and you're WELCOME to use my CODE to SAVE even MORE!! WHOOP WHOOP!! 


THANKS SO MUCH for stopping by today!! I hope you have a FABULOUS WEEK!!  

Larissa Heskett ðŸ’—


Shop using my LINK HERE!! Then use my CODE at CHECK OUT to SAVE!! 


Friday, June 11, 2021

A Clean and Simple Thank You Card

Hello everyone!! Nora here from A Creative Touch with a simple thank you card that was inspired by a hike I took last weekend. The trees and wild flowers were so beautiful but what I really liked seeing was the dragonflies buzzing by. I decided to use the Everyday Dragonflies stamp set as the focus for my card.


I started off my card by cutting a piece of white cardstock into a 4" by 5 1/4" panel. I then used some Distress Ink and the Chunky Chevron die to partially stencil the turquoise ink onto the cardstock.


I adhered this panel over a top folding, A2, turquoise card panel. A circle was die cut using the  large stitched circle from the Pinked Slimline Die set. I used a scrap of pattern paper that was similar to the ink color and the card base.


I adhered the circle over the card front, slightly over lapping the stenciled ink. I set aside the card and stamped the small dragonfly and sentiment from the Everyday Dragonflies using Catherine Pooler Midnight ink.


I used the matching Dragonflies die set to die cut the dragonfly out and colored it in using Copic Markers.


I used foam adhesive to adhere my monochromatic 
dragonfly over the circle to give the card some dimension.


I added the sentiment strip and a trio of sequins around the sentiment to draw the eye in. My card was complete!!!


I loved how this project came out. I checked off a ton of boxes creating this. I stenciled, used some scrap pattern paper and then relaxed at my desk coloring in the dragonfly. This would be a simple card to recreate using different colors and sentiments.

For more amazing inspiration, be sure to stop by the CAS-ual Fridays Stamps Blog this week. If you decide to treat yourself to a shopping spree, use THIS LINK and my code NORASENTME to get an extra 15% off your total order!!! This includes sale items too!!


I want to thank you for taking the time to stop by today. Have a FABULOUS Friday!!