Translate

Showing posts with label Pretty Posies Fri-Dies. Show all posts

Monday, January 24, 2022

Thanks So Much

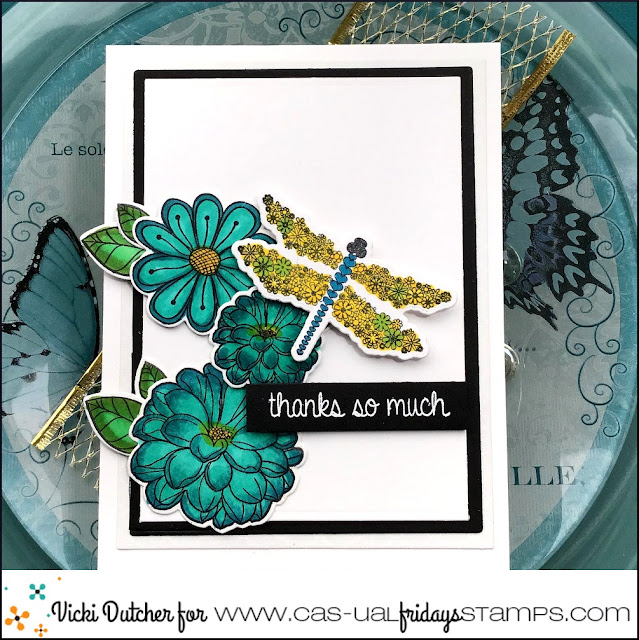
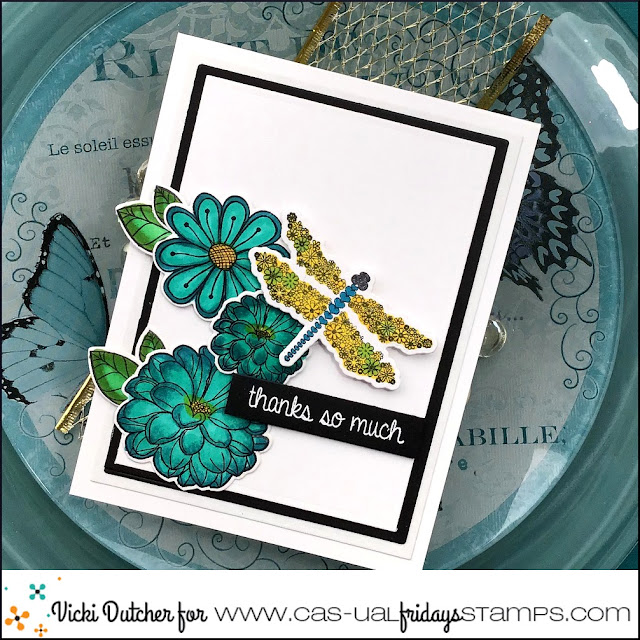
Hi All, it's Vicki from All I Do Is Stamp.  I needed a Thank You card, and was in the mood to color up some flowers!  Here is what I came up with~

I used a couple of products for today's card; Flowery Duo [comes with the dies!], Pretty Posies [with matching dies], and Everyday Dragonflies [with matching dies]. [All of these are on sale, and yes, my code works too!]

I colored the images with my Copics, and the sentiment is from Everyday Dragonflies.

That's it for my card.  I'll be back next month with more CFS cards.


Thanks for stopping by~
ps - I have used affiliated links in this post at no additional cost to you. 


Thursday, June 3, 2021

Trust Me


Welcome back!  Today I'm sharing a fun foiled background.


I used the Bubbly stencil for the background.  Normally with clear transfer gel, the opal foil has a translucent effect, but this time I decided to try it on a colored cardstock with the Blanco transfer gel.


The gel goes on and dries opaque so it's great for using lighter colors on a darker background!


And you can still see the cool shimmer and colors that the opal finish leaves.


And the fun Salty stamp and Margarita Glass die sets make even more fun!  I made this a frozen margarita... I used my blender to add tiny circles for a crushed ice feel.  I cut the salt from white cardstock and added some glitter.


And the sentiments on the Salty set... so fun and sassy!


And I added flowers from the Pretty Posies stamps and die set.. because ... why wouldn't I?


These are the colors I used...


And I have this for you!

Thanks so much for stopping and hope you come again soon!


Saturday, March 27, 2021

Poured With Love


Welcome!  The Coffee Lovers Hop ended yesterday and I've got a hangover!  I decided the only way to get over it was a little hair of the dog so I've got a caffeinated birthday card for you today!


I started with the Modern Petals Stencil and blended some Squeezed Lemonade, Lucky Clover and Twisted Citron through it.

Then I cut the large cup from the Coffee Cup die set out of Copic Friendly Paper.  The largest flower from the Pretty Posies stamp set was stamped onto the cup and colored in with Copics.  I stamped, die cut and colored the two smaller flowers and a leaf and colored them as well.  I cut the middle flower in half so I could tuck each one under the sentiment piece.  Finally that sentiment from Cup Refills was stamped on the label strip which was popped up to allow the tucking!


That's me for today!  Thanks for stopping and I hope you enjoyed your visit!  Come again soon for more CAS-ual Fridays Stamps inspiration!

And if you played along over at the Coffee Hop, be sure to check the CLC blog tomorrow (Sunday the 28th) to see if you were a winner!


Saturday, October 17, 2020

Rectangle Card in a Box.


Hello, its's Michelle from Seashell Creations here today with a fun box card filled with Pretty Posies flowers.
I have made the square box cards before but this is the first rectangle one I have made.  It just gives you that little bit more room to play with.  They are pretty quick and easy to make and there are plenty of tutorials on you tube on how to make the box.  This one was made from one piece of 8 1/2" x 11" card stock.  I added some patterned paper that I have been hoarding and matched the colors with Catherine Pooler inks for the flowers and leaves. 


 I started by stamping a heap of flowers from the Pretty Posies stamp set with versamark ink and heat embossing with WOW white embossing powder.  Then I grabbed some Catherine Pooler inks that I thought were a good match with the patterned paper.  I ink blended all the images and die cut them using the matching Posies dies.  After ink blending I went over the images with a paper towel to remove any ink on top of the heat embossing. You could also add some shading with colored pencils but I didn't think they needed it and I wanted to keep it quick and simple.


I hope you like my box of flowers and I have inspired you to make one.  Make sure you tag us on Instagram if you do so we can admire it!
Also don't forget you can use my special discount code below.


Monday, September 7, 2020

Thinking of you with Pretty Posies


Hello everyone!! Nora here from A Creative Touch with a fall card using ink blending. 

Once again I used my FAVORITE leaf from the Pretty Posies stamp set. I love to see how many cards I can make from the same stamp set and I decided that I wanted to create a fall card this month. 


I started off this card by stamping the leaf from Pretty Posies with Wow! Ultra Slow Drying Embossing Ink and using Wow! Opaque Super Fine White embossing powder to heat emboss the leaves onto 
white cardstock.


Next I used Distress Ink to blend red, orange and two different yellows onto the card front. 

I die cut the card front using a rectangle die and wrapped a piece of red twine around the card panel. I adhered the card front onto an A2, top folding card base. 


I then stamped and heat embossed the leaf using Wow! Gold Rich Pale Superfine embossing powder. 


I used the coordinating Posies Fri-Dies to die cut the leaf.


I blended the same red and orange Distress Ink that I used on the background on these die cut leaves.


I adhered the leaves underneath the red twine, using foam adhesive.


My final step was to stamp and heat emboss the sentiment, also from Pretty Posies, onto a white cardstock strip. I adhered it onto the card front, overlapping the white background.


This card took no time at all and I LOVE how it came out!!!

Here are the supplies that I used on today's card:


Don't forget to use my code, NORASENTME when shopping at CAS-ual Fridays for 15% off 
your total order!!


I thank you for taking the time to stop by. Please be sure to pop in again for more inspiration from the FABULOUS design team!!!

Wednesday, August 12, 2020

Pretty Posies - You Are Terrific!


Hello all!  Lisa here and I have a quick and simple card for you today!  I love the neutral background with a pop of color in those pretty floral images from Pretty Posies!


I cut two panels from white and kraft, embossed the kraft piece and then trimmed them down to fit on one card and placed a strip over the seam to hide it.  Then I just stamped, die cut and colored those pretty posies.  I used my Misti to stamp one of the sentiments from Pretty Posies onto the white piece and then popped up my flower pieces.  And then I added some of those pretty chipboard hearts from the Coffee Chips Chipboard... perfect with the kraft paper just the way they are!  Easy peasy.. done!


I just love these pretty posies and love that this set makes it so easy to make a quick and pretty card.

Should you decide you need something from the shop, here's this:


And thanks for stopping today!  Hope you enjoyed it and you come again soon for more CAS-ual Fridays Inspiration!


Tuesday, July 21, 2020

Thinking of You!!

HELLO CRAFTY FRIENDS!! 

Larissa here today to share a Thinking of You Card!! I've got a few friends who are battling Cancer and I like to send Cards just to let them know I'm thinking of them!! Especillay during these unusual times when no visitors are allowed in the treatment centers or around those with already compromised immune systems!! I LOVE that CAS-ual Fridays Stamps has these AMAZING Products to help create Cards!! Here's what I've create for today!! 
I Started by Stamping and Embossing the Word Ribbon onto some Distress Watercolor Paper and the Pretty Posies Flower!! I used Distress Oxide Ink in Worn Lipstick to Ink over the entire Ribbon and then add some Water Splatters for some Texture!! I used Copic Markers to Color the Pretty Posie in RV00, RV04 & RV09!! I Die Cut the Pretty Posie out using the coordinating Posies Fr-Dies Then I added a Flower Die Cut from the   Die Set and added a Sparkling Clear Sequin and a Pearl in the center!! I Die Cut the Word Ribbon Image out using the Ruffled Ribbon Die and I wanted to the Word Ribbon to POP up off the Card Panel so I layered 5 Cardstock Ruffled Ribbon Die Cuts from some Pink Cardstock and glued them all together!! 

For the Background I Inked with Hickory Smoke Distress Oxide Ink and then I added some Water splatters and some Distress Black Soot Paint Splatters!! I also wanted to add some Hickory Smoke Splatters so I used the Splatter Images from the Bomb Diggity Stamp Set!! I like the way that they ground the Ribbon!! A few more Pearls were added around the Ribbon and then I added a Stamped and Embossed a Sentiment on the inside of the Card and wrote my personal message and my Card was done!! I hope you'll remember to keep those going through medical challenges on your list of HAPPY MAIL recipients as I KNOW first hand those are some of the most meaningful Cards to receive!! 

For TONS of AMAZING Inspiration make sure to visit the CAS-ual Fridays Stamps Blog and shop the NEW, Old and Sale Products in the CFS Shop!! You can also use my discount code LARISSASENTME to SAVE 15% off anything in the Shop!! SAVE 20% on ALL In Stock Christmas and Hanukkah Sets + use my Code and that's 35% off!! 
WHOOP WHOOP!! 

THANKS SO MUCH for stopping by today and I hope you have a FABULOUS WEEK!!

Larissa 💗

Word RibbonRuffled Ribbon Fri-DiesPretty PosiesPosies Fri-DiesBomb Diggity