Translate

Showing posts with label Therm O Web. Show all posts

Thursday, January 20, 2022

CELEBRATE You Did It!!

HELLO CRAFTY FRIENDS!! 

 Today I'm sharing this Card I've made using the 
Sassy Celebration Stamp Set & Hooray Fri-Dies!! 
Here's a close up look of the Card!! 
Today I've created a Slimline Card using the Slimline Pinked Fri-Die Set!! SWOON!! I LOVE ALL of the possibilities with this Set alone, but add it along with a Die and a Stamp Set and you have a whole new set of possibilities!! 
I Started by creating my Embossed Cardstock in order to create my Die Cut Word "Celebrate" which is the Focal point of my Card!! I added the WoW Embossing Mixed Media Ink to the Cardstock and then added the WoW Embossing Serene Powder to the Cardstock!! I Heat Set it to the Cardstock from the bottom side of the Cardstock using the WoW Dual Speed Heat Tool!! Then I Die Cut the Hooray Fri-Dies from the Embossed Cardstock using the Celebrate Word!! 
Next I Die Cut the Slimline Stitched Rectangle Die from some White Cardstock and then I Stamped and Embossed the "You Did It.." Sentiment from the Sassy Celebration Stamp Set with Versa Fine Black Onyx Ink and Embossed with WoW Clear Gloss Embossing Powder!! Next I inked the Background with some Spun Sugar Distress Oxide Ink using an Ink Blender Brush!! Then I added some Black Soot Distress Paint!! 
I Die Cut 3 of the Stars from the Embossed Cardstock I created using the Star Die from the Slimline Pinked Fri-Die Set!! Added them to the Card Panel using some Ultra Bond Adhesive!! Then I added a 3-D Iridescent Star Jewel from Studio Katia to the center of the Die Cut Stars using Ultra Bond Adhesive!! Iridescent Star Confetti were added too for even more Sparkle!! I LOVE the way the Colors Dance in the light on the Card!! 
I Die Cut the Slimline Pinked Die from some Black Cardstock and then added the Card Panel to it adhering the entire Panel to a White Slimline Cardbase!! I've paired my Card with a SSS Aubrey Blue Slimline Envelope!! I hope I've INSPIRED you today!!?? 

For TONS of AMAZING Inspiration make sure to visit the CAS-ual Fridays Stamps Blog and shop the NEW, Old and Sale Products in the CFS Shop!! You can also use my discount code LARISSASENTME to SAVE 15% off anything in the Shop!! WHOOP WHOOP!! 

THANKS SO MUCH for stopping by today and have a FABULOUS WEEK!! 

COUNTRY HUGS-N-KISSES
LARISSA 💗


Wednesday, November 24, 2021

Pop, Fizz, Clink!! Cheers to Thanksgiving 2021!!

Hello Crafty Friends!! 

I'm here today to share a Cheers Card I thought woud be PERFECT for the "Cheering" to Thanksgiving Day and the Weekend!!
Today I'm combining the Pop Fizz Clink Stamp Set and Champagne Flute Dies!! I LOVE these Sets and ALL of the Possibilities, especially with the upcoming Holidays and Weddings Celebrated this time of Year!! 
Here's a look at the Sets, just incase you've MISSED them!!  

So FUN right!!?? 
Here's what I've created for today!!

I LOVE using Therm O Web Deco Foils on my Cards!! Especially for Special Occasion Cards!! Have you ever tried Foiling over your Stamped and Embossed Images!!??
Today I'm showing how you can add Deco Foils to your Stamped Images for a very Elegant Design!!
I Started by Stamping and Embossing the Champagne Flute Image from the Pop Fizz Clink Stamp Set with Versa Fine Black Onyx Ink and Embossing with WoW Clear Gloss Embossing Powder!! Then I heat set it and then let it cool!! Then I used Copic Markers to Color in the Image!! I was going for a Light Champagne Color!! 
 I used Champagne: Y11 & Y21   Flute Glass: BG00, BG10
Then I Cut a Piece of Therm O Web Deco Foil in Champagne large enough to cover the Image and Ran it through my Laminating Machine on the #1 Setting!! You don't want it too hot when doing this Technique or it will distort the Image some!! Sometimes that's the look you want, but that wasn't the look I was going for on this Card!! 
SWOON!! I LOVE pulling back the Foil Sheet to reveal the Foiled Image!! It NEVER gets old!! PS Save that Negative Foil Piece as I'll be using it for another Card later in the weeks to come!! 😉 I LOVE being able to use ALL of the Foil so there's NO WASTE!! SQUEAL!! I can't wait to share it with you!! I Die Cut the Champagne Flute Image out using the coordinating NEW Champagne Flute Dies!! 
To create my Card Panel I Die Cut the Stitched Rectangle and then Inked the Background with some Tumbled Glass Distress Oxide Ink!! I wanted to add some Text to the Background so I Stamped the Words "Fizz, Pop & Clink" using Tumbled Glass Distress Ink!! It's Subtle, but that's the look I was going for!! In real Life it really adds a neat touch to the Background!! 

I added some Water Splatters and then heat set it!! Then I took the
 Bubbly Stencil with some Therm O Web Pixie Spray on the back to help keep it in place!! Then I adhered it over the Inked Background and applied more of the Tumbled Glass Distress Oxide Ink!! I wanted a random design so I didn't cover the entire Stencil!! Just concentrated on the right hand side of the Card Panel!! 
I wanted to add some more Champagne Deco Foil to my Card, but didn't want it to take away from the Main Focal Image!! So I took the Deco Foil Adhesive Pen and pressed down the Tip of the Pen onto a Plastic Lid repeatedly until I got enough of the Adhesive out in order to Splatter onto my Card Panel with a Paint Brush!! I let it Dry completely!! 
Once it was Dry I took the Negative Foil Piece and rubbed it over the Splatters of Deco Foil Adhesive on my Card Panel!! SWOON!! I LOVE not on the extra touch of Shine, but the adhesive also dries with some Dimension, so it adds a FUN dimension to the Card too!! To finish the Card Panel I added some Black Soot Distress Paint Splatters and I LOVE how it turned out!! 
I Stamped and Embossed the "Cheers" sentiment with Versa Fine Black Onyx Ink and Embossed it with WoW Clear Gloss Embossing Powder!! Then I Fussy Cut around the Sentiment!! I Adhered the Champagne Flute to my Card Panel with some Foam Tape and then I adhered the Sentiment also with Foam Tape just on the ends of the Sentiment to keep it the same dimension as the Champagne Flute!! I added a Few TE Gold Pearls to finish off the Design!!  
I LOVE the way it turned out and I hope it gives you some Ideas on ways to use these Sets!!??
THANKS SO MUCH for stopping by today and I hope you'll all be ENJOYING a few Cheers tomorrow with LOVED ones and Friends!!
If you feel like Shopping please use my CODE: LARISSASENTME for 15% off your Order!! 
I using products from the CAS-ual Fridays Stamps Shop!! 

Have a FABULOUS & BLESSED Thanksgiving Day/Weekend!! 
Stay Safe and Healthy and ENJOY your time with LOVED ones whether it's Family or Friends or a mixture of both!!  

COUNTRY HUGS-N-KISSES
LARISSA   🍷


Thursday, June 3, 2021

Trust Me


Welcome back!  Today I'm sharing a fun foiled background.


I used the Bubbly stencil for the background.  Normally with clear transfer gel, the opal foil has a translucent effect, but this time I decided to try it on a colored cardstock with the Blanco transfer gel.


The gel goes on and dries opaque so it's great for using lighter colors on a darker background!


And you can still see the cool shimmer and colors that the opal finish leaves.


And the fun Salty stamp and Margarita Glass die sets make even more fun!  I made this a frozen margarita... I used my blender to add tiny circles for a crushed ice feel.  I cut the salt from white cardstock and added some glitter.


And the sentiments on the Salty set... so fun and sassy!


And I added flowers from the Pretty Posies stamps and die set.. because ... why wouldn't I?


These are the colors I used...


And I have this for you!

Thanks so much for stopping and hope you come again soon!


Saturday, January 23, 2021

A Blended and Foiled Background With Minc Reactive Mist Spray


Welcome!  I have some more foil goodness for you today!  This time I'm using some Minc Reactive Mist Spray!


I started by blending some Distress Oxides onto a panel of white cardstock.  Then I sprayed some of the Reactive Mist Spray onto the panel.  Mine came out in big droplets and I set it aside to dry.


While the spray was drying, I stamped that beautiful large dragonfly from the Everyday Dragonflies stamp set onto white cardstock using Wow Embossing Ink.  I heat embossed it in gold and cut it out using the coordinating die.  Then I used some pretty gel pens in hot pink, orange and gold to color in some of the areas.  Then I stamped my sentiment onto a strip using Catherine Pooler Inks.


When my panel was dry, I placed a sheet of Gold Shattered Glass foil over it and ran it through my Minc machine.  I think because my splatters were so thick possibly it wasn't completely dry which made the splatters stretch a little... but that was fine with me!  It maybe wasn't what I planned, but I love it all the same!

I layered the foiled panel onto a hot pink panel and those onto a gold cardstock panel.


Finaly, I popped the dragonfly and sentiment up onto the background and done!

Thanks so much for stopping!  I hope you enjoyed it and if you see something you must have, I have this for you:


Come back soon for more CAS-ual Fridays Stamps inspiration!


Wednesday, July 1, 2020

Welcome Fur Babies!!


HELLO CRAFTY FRIENDS!! 

Larissa here today to share a WELCOME Pet Card!! I've had several friends and family members adding Fur Babies to their Families and I needed some QUICK and EASY Welcome Cards!! This design is PERFECT for mass producing and is FUN to create!! 
I Started by spraying the back side of the NEW Pawsome Stencil and then I applied it over my Card Panel and Inked with Walnut Distress Oxide Ink using an Ink Dauber!! Once it was completely Inked I removed the Stencil and added some water splatters for some texture!! I used an anti static bag and ran it over my stenciled design so I could Stamp and Emboss the Sentiment!! 
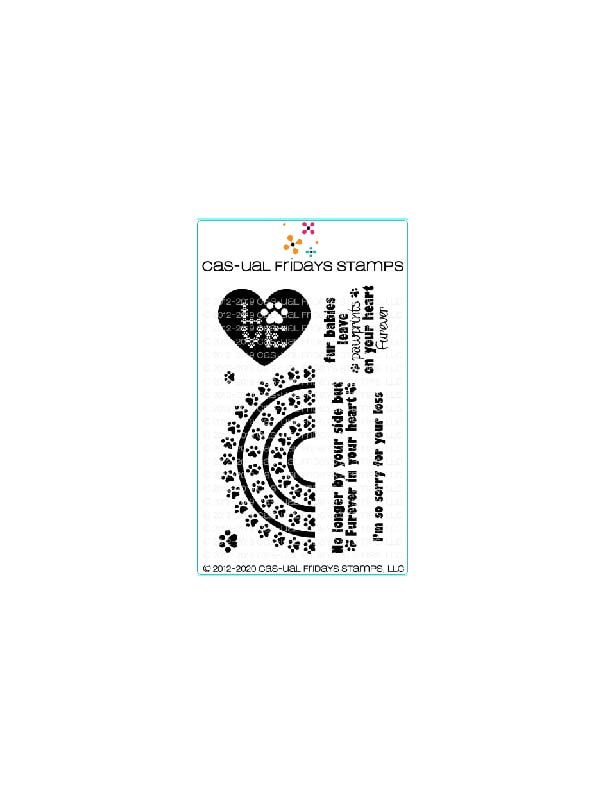
The NEW Rainbow Bridge Stamp Set is FULL of lots of sentiments and this one is PERFECT for a Welcome Card!! I Stamped with Versa Fine Black Onyx Ink and Embossed with WoW Clear Gloss Embossing Powder!! In real life the sentiment really POPS against the Stenciled design!! 
I added some Black Soot Distress Paint Splatters and then added a Mini Clay Heart for a POP of color!! I added some Foam Tape to the back of the Card Panel and added it to my A2 Cardbase!! I LOVE how it turned out and I look forward to SNUGGLING with ALL of the NEW Fur Babies that are sure to leave Pawprints on our Hearts Furever!! 💓

Use my CODE LARISSASENTME and receive another 15% off ALL the NEW, OLD and SALE items!! WHOOP WHOOP!! 

       THANKS SO MUCH for stopping by today and I hope you have a FABULOUS WEEK!! 

LARISSA  💖