Translate

Showing posts with label Stars A2 Panel. Show all posts

Monday, August 29, 2022

It's Your Birthday


Hi All, it's Vicki here today with a fun birthday card. I used a few products [differently], which is always fun - getting more use out of a product!

Let's start with the basics; this is a 5x5 card, and the layered panel is a 4.25x4.25 size.  I used one of the circle dies from the Pinked Slimline Die Set to cut out the center.  [Unfortunately, these are no longer available, so basically any die would work].  I cut a 3x3 piece of card stock, and water colored some stripes, let it dry, and adhered it to the back of the card layer.

Using another die from the Slimline Die Set, I cut a circle, and using the Heart Note Die, I cut off the heart and adhered it on to the circle die cut, along with a pearl from my stash.  I used the Stars A2 Panel Die to get the 2 stars that I adhered onto a tiny strips of white card stock.  Lastly, I used a sentiment from Whole Shebang Stamp Set.

That's it for today's card.  Don't forget, you can save 15% off your purchase - even the sale and clearance sections! [There really are some amazing prices!]


Thanks for stopping by~

ps - I have used affiliated links in this post at no additional cost to you. Thanks for the support! 


Sunday, January 2, 2022

Happy Birthday Birdie

Hi All, its Vicki here from All I Do Is Stamp.

It's my first CFS day of 2022.  [I still am having a hard time wrapping my head around it being 2022! Excuse me, but where did 2021 go? 😀 ]

I am stocking up on my birthday cards for this year.  This card will make someone smile....

I started out with an inked panel with gold foil [love this look] for the background to the Stars A2 Panel Die, layered 3 times for depth.

I went on the stamp and die cut [Birdie Die] the cute birds from Little Birdies Stamp Set (colored with Copics). Lastly, using the Shenanigans Stamp Set, I stamped and embossed a birthday sentiment. These little birds just make me smile!

Hope your year is off to a good start!  2022 is going to be a good year~


Thanks for stopping by~
ps - I have used affiliated links in this post at no additional cost to you. 


Thursday, December 2, 2021

Layered Regal Flocked Happy Hanukkah Shaker Card!!


Hello Crafty Friends!! 
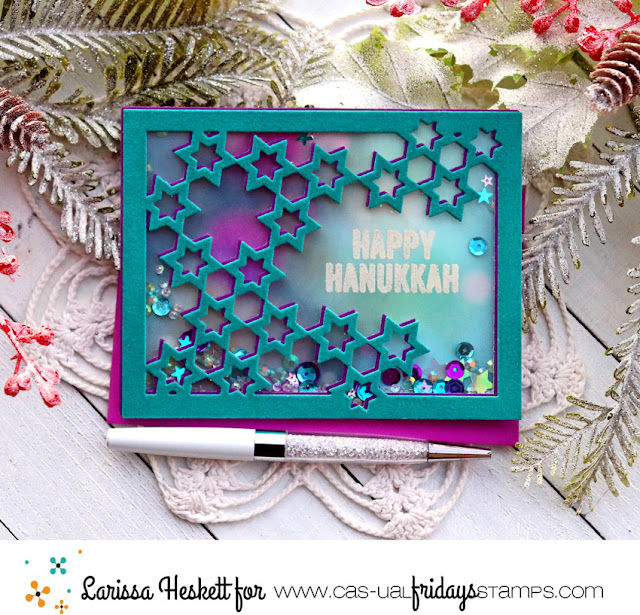
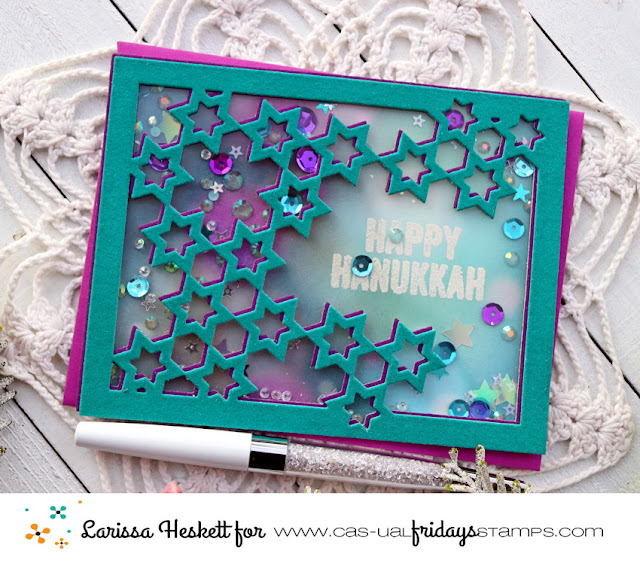
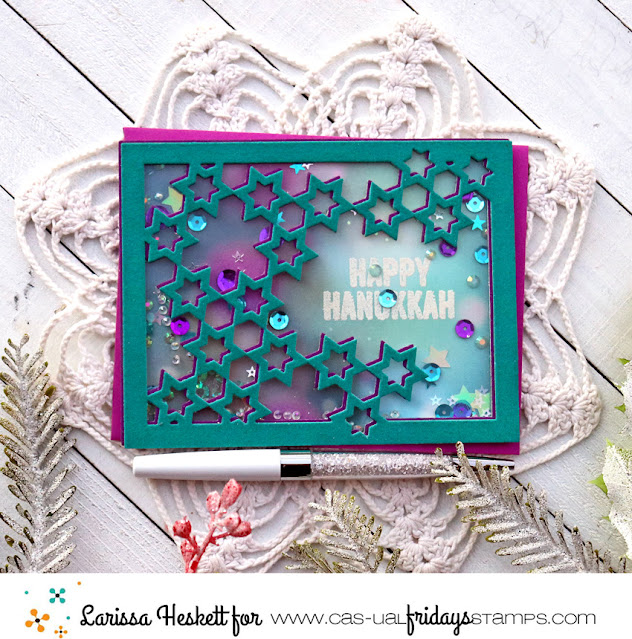
Larissa here today with a Layered Regal Flocked Happy Hanukkah Shaker Card!! I'm NOT ready for Winter yet, but I am in the mood for using my Products to create some of the Winter Cards I'm going to need!!

SWOON!! Doesn't this SCREAM Regal!!?? I LOVE the Color Combo and with the Flocked Texture and the Sparkle and Shine from the Sequins reminds me of the Gems and Gold!! PERFECT for the feeling I'm going for, Made for a King!! 


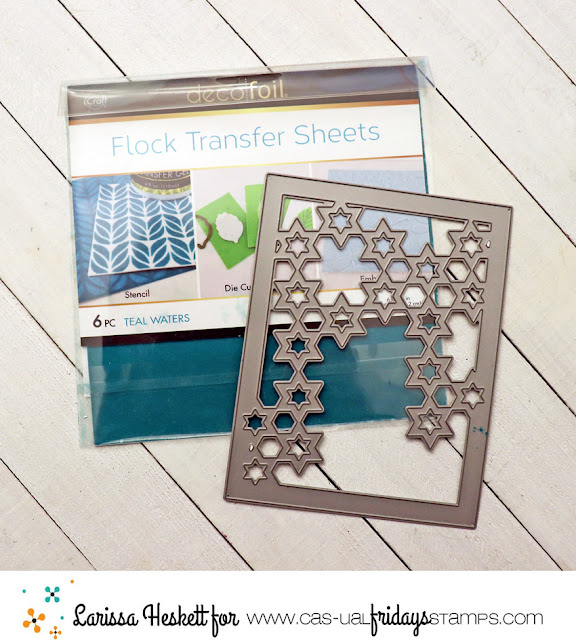
So when I think of the Star of David it makes me think Regal so I decided to use the Deco Foil Flock Sheets in Purple Punch along with the Double Sided Foam Adhesive Sheets to create the STUNNING Stars A2 Panel!! 

I then repeated the same process only this time I used the Deco Foil Flock Sheets in Teal Waters!! 
I like to leave the Die Cut Panel in the Die as it makes it alot easier to add the Acetate onto the back of it without distorting it in anyway!! As soon as the Acetate is adhered to the back I cut down some Foam Tape into strips and added it to the outer frame of the Card to build my Shaker Window!! 
I found this Bokeh Patterned Paper in my stash and wanted to use it for the background of my Shaker Card, but first I needed to Stamp and Emboss the Sentiment!! I used the Star of David Stamp Set and some Ranger Vintage Pearl Embossing Powder!! It matches perfectly with the Bokeh Design of the Paper and adds a touch of Sparkle too!! 
I added a mixture of Sequins and Jewels and then adhered the Stars A2 Panel and the Background Paper together creating the Shaker Card!! I adhered it onto and Top folding Cardbase and I LOVE the way it turned out!! Full of Texture with the Deco Foil Flocking Sheet and then the addition of the Sparkle and Shine from the Shaker Elements just makes this Card SPECIAL!! 
THANKS SO MUCH for stopping by today and I hope you'll give Deco Foil Flock a try with your Intricate Dies!! I ASSURE you, you'll LOVE it too!! Have a FABULOUS WEEKEND!! 

LARISSA   =) 

 Use my discount code LARISSASENTME, to save 15% off on all of the goodies in the 
CFS Shop!!


Friday, December 11, 2020

Happy Hanukkah 3rd Night of Hanukkah Card!!

Hello Crafty Friends!! 

Larissa here today sharing a Card for the 3rd Night of Hanukkah!! 
I LOVE the Stars A2 Panel Die as it's so versatile!! I've used it for the background of my Card today along with the Star of David Stamp Set!!
 

I Started by Die Cutting the Stars A2 Panel Die from some of the Foiled Lawn Fawn Patterned Paper!! Then I I created my Card Panel background by Inking it with some Tumbled Glass Distress Oxide Ink and some Cracked Pistachio Distress Oxide Ink!! 
Then I used the Happy Hanukkah Sentiment from the Star of David Stamp Set and Stamped with some WoW Ultra Cear Embossing Ink!! Then Embossed with some WoW Metallic Gold Sparkle Embossing Powder!! I Heat set it with my WoW Dual Speed Embossing Tool!! It coordinates so BEAUTIFULLY with the Gold Foiled Patterned Paper!! 

Then I adhered the Stars A2 Panel Die Cut to the Inked Stamped and Embossed Card Panel Background using some Utlrabond Adhesive!! 
I wanted to add some extra Sparkle and Shine so I adhered some Metallic Stars, Gold Sequins and a few Pearls!! 
I LOVE the added touch as it adds the perfect touch of Sparkle and Shine, plus it helps to create a visual Triangle around the Sentiment!! 

For TONS of AMAZING Inspiration make sure to visit the CAS-ual Fridays Stamps Blog and shop the NEW, Old and Sale Products in the CFS Shop!! You can also use my discount code LARISSASENTME to SAVE 15% off anything in the Shop!! WHOOP WHOOP!! 

THANKS SO MUCH for stopping by today and I hope you have a FABULOUS WEEKEND!!
Larissa Heskett 💗


Sunday, March 1, 2020

Some Bunny

Hi all, it's Vicki here today from All I Do Is Stamp.


Today I made a fun card for my neice-in-law, as I missed her birthday [no surprise there].  I even made a card holder to put cards in it to remember to send them out.  Yeah, plans are good. :)  Hence me having to make a "late" card.

 I do like this hanging guy.  He rather makes me smile.  I started by cutting a card panel with the Stars A2 Panel Fri-Die,  and then spray inked it.  Once dry, I adhered the cover plate to the card base.  I stamped and colored [with Copics] the bunny from Some Bunny, and stamped the sentiment.  I cut both out, and using dimension tape I adhered them to the card top.

I think my niece-in-law will enjoy this one.


Don't forget, you can use my code below to save 15% off your purchase.  This applies to the Retiring items too!


Thanks for stopping by~


Sunday, December 8, 2019

A Sparkly Happy Hanukkah!


Lisa from Life of a BZScrapper here!  It is the holiday season and I thought I'd share with you a quick (and quite sparkly) shaker using some of the vast array of Judaica themed stamp and die products in the shop!

Have you seen the awesome A2 panels in the shop?  This is the Stars A2 Panel and I love that it covers the entire front of an A2 card just like the Hearts and Flakey A2 Panel Fri-Dies!  So quick and easy to create a shaker (or not!).


Just cut an A2 Panel, adhere some acetate to the entire back and add foam tape around the outside.  All that's left to do is choose your "filling" and pop it over the top!  I mixed up some of my sequins and beads from my stash and added a few of the glitter paper Star of David cuts that were left after cutting out the panel.

I added my sentiment using the Star of David Fri-Die as a backdrop and then cut the Happy Hanukkah from white cardstock three times and stacked them for dimension.  It also helps the sentiment to stand out against that busy backdrop.


I always add a few sequins to the front... as if they've escaped!

And that's me for today!  Thanks so much for stopping by and I hope you enjoyed your visit!  And don't forget to visit the CAS-ual Fridays shop for all of your Hanukkah and Judaica themed crafty items ... and then some!


Wednesday, November 6, 2019

Easy Cards You Can Mass Produce with Maria

Hello everyone.  Maria here on the blog with you with some easy cards to make that you can mass-produce, showcasing some of the older stamp and dies from Cas-ual Fridays stamp!  

My first card is clean and simple but creates a huge impact in my opinion.  It pretty much says it all!  This card is going to my friend because she is really "AMAZING".

I stamped the image on Neenah solar white card stock and colored the flower with my Spectrum Noir Classique Markers in PP4, PP5 and PP6.  Adhered this piece on some A2 size card base.  Simple yet classy!  Here's the card:


I love that the sentiment can be used as the stem for the flower.  There are so many possibilities using this Mon Ami stamp set.  Here's a closer look:


My second card is for a Jewish holiday.  I am showcasing the Happy Hanukkah Fri-Dies and Stars A2 Panel Fri-Die.

I die-cut all of the pieces that I needed for my card with some gorgeous card stock that I have from my stash.  Adhered them on an A2 size-white side-fold card base and voila!  You're done!


You can easily mass-produce both cards that I have for you today.  Here's a closer look at this beautiful die:


Here are the items that I showcased today:


I hope you like my cards today.  Please don't forget to check out the sales at the shop.  You can use my coupon code below for an additional 15% off.  Have a nice day and happy stamping!