Translate

Showing posts with label Heart Note Fri-Die. Show all posts

Friday, September 30, 2022

Affogato Your Birthday


Yesterday was National Coffee Day and tomorrow is International Coffee Day.  I thought I'd celebrate a bit with a coffee card.  And the Coffee'isms stamp set that I used for that sentiment is in the shop at a deeply discounted price .. as are the Heart Note Dies that I used today.


As you know, the shop is closing soon and there are currently very limited items left and all are on clearance at a price that you just can't say no to!


It's a bittersweet day.  This will be my last post for CAS-ual Fridays.  But there are many CFS products that will stay in my stash for always because I just love them.  These are a few of the items I won't be able to let go of.

I've really enjoyed creating for Michele and helping her show off her products each month.  Thank you Michele for being one of the first to have faith in me and love what I do and thank you for all of your fun and sassy crafty stamps and dies and stencils over the years.  Onward!

Before I go, I'll share some things I made using some of the products left in the shop.  Don't miss out!


Here are all of the Heart Note Dies and I used the Snowflake Stencil on the background.
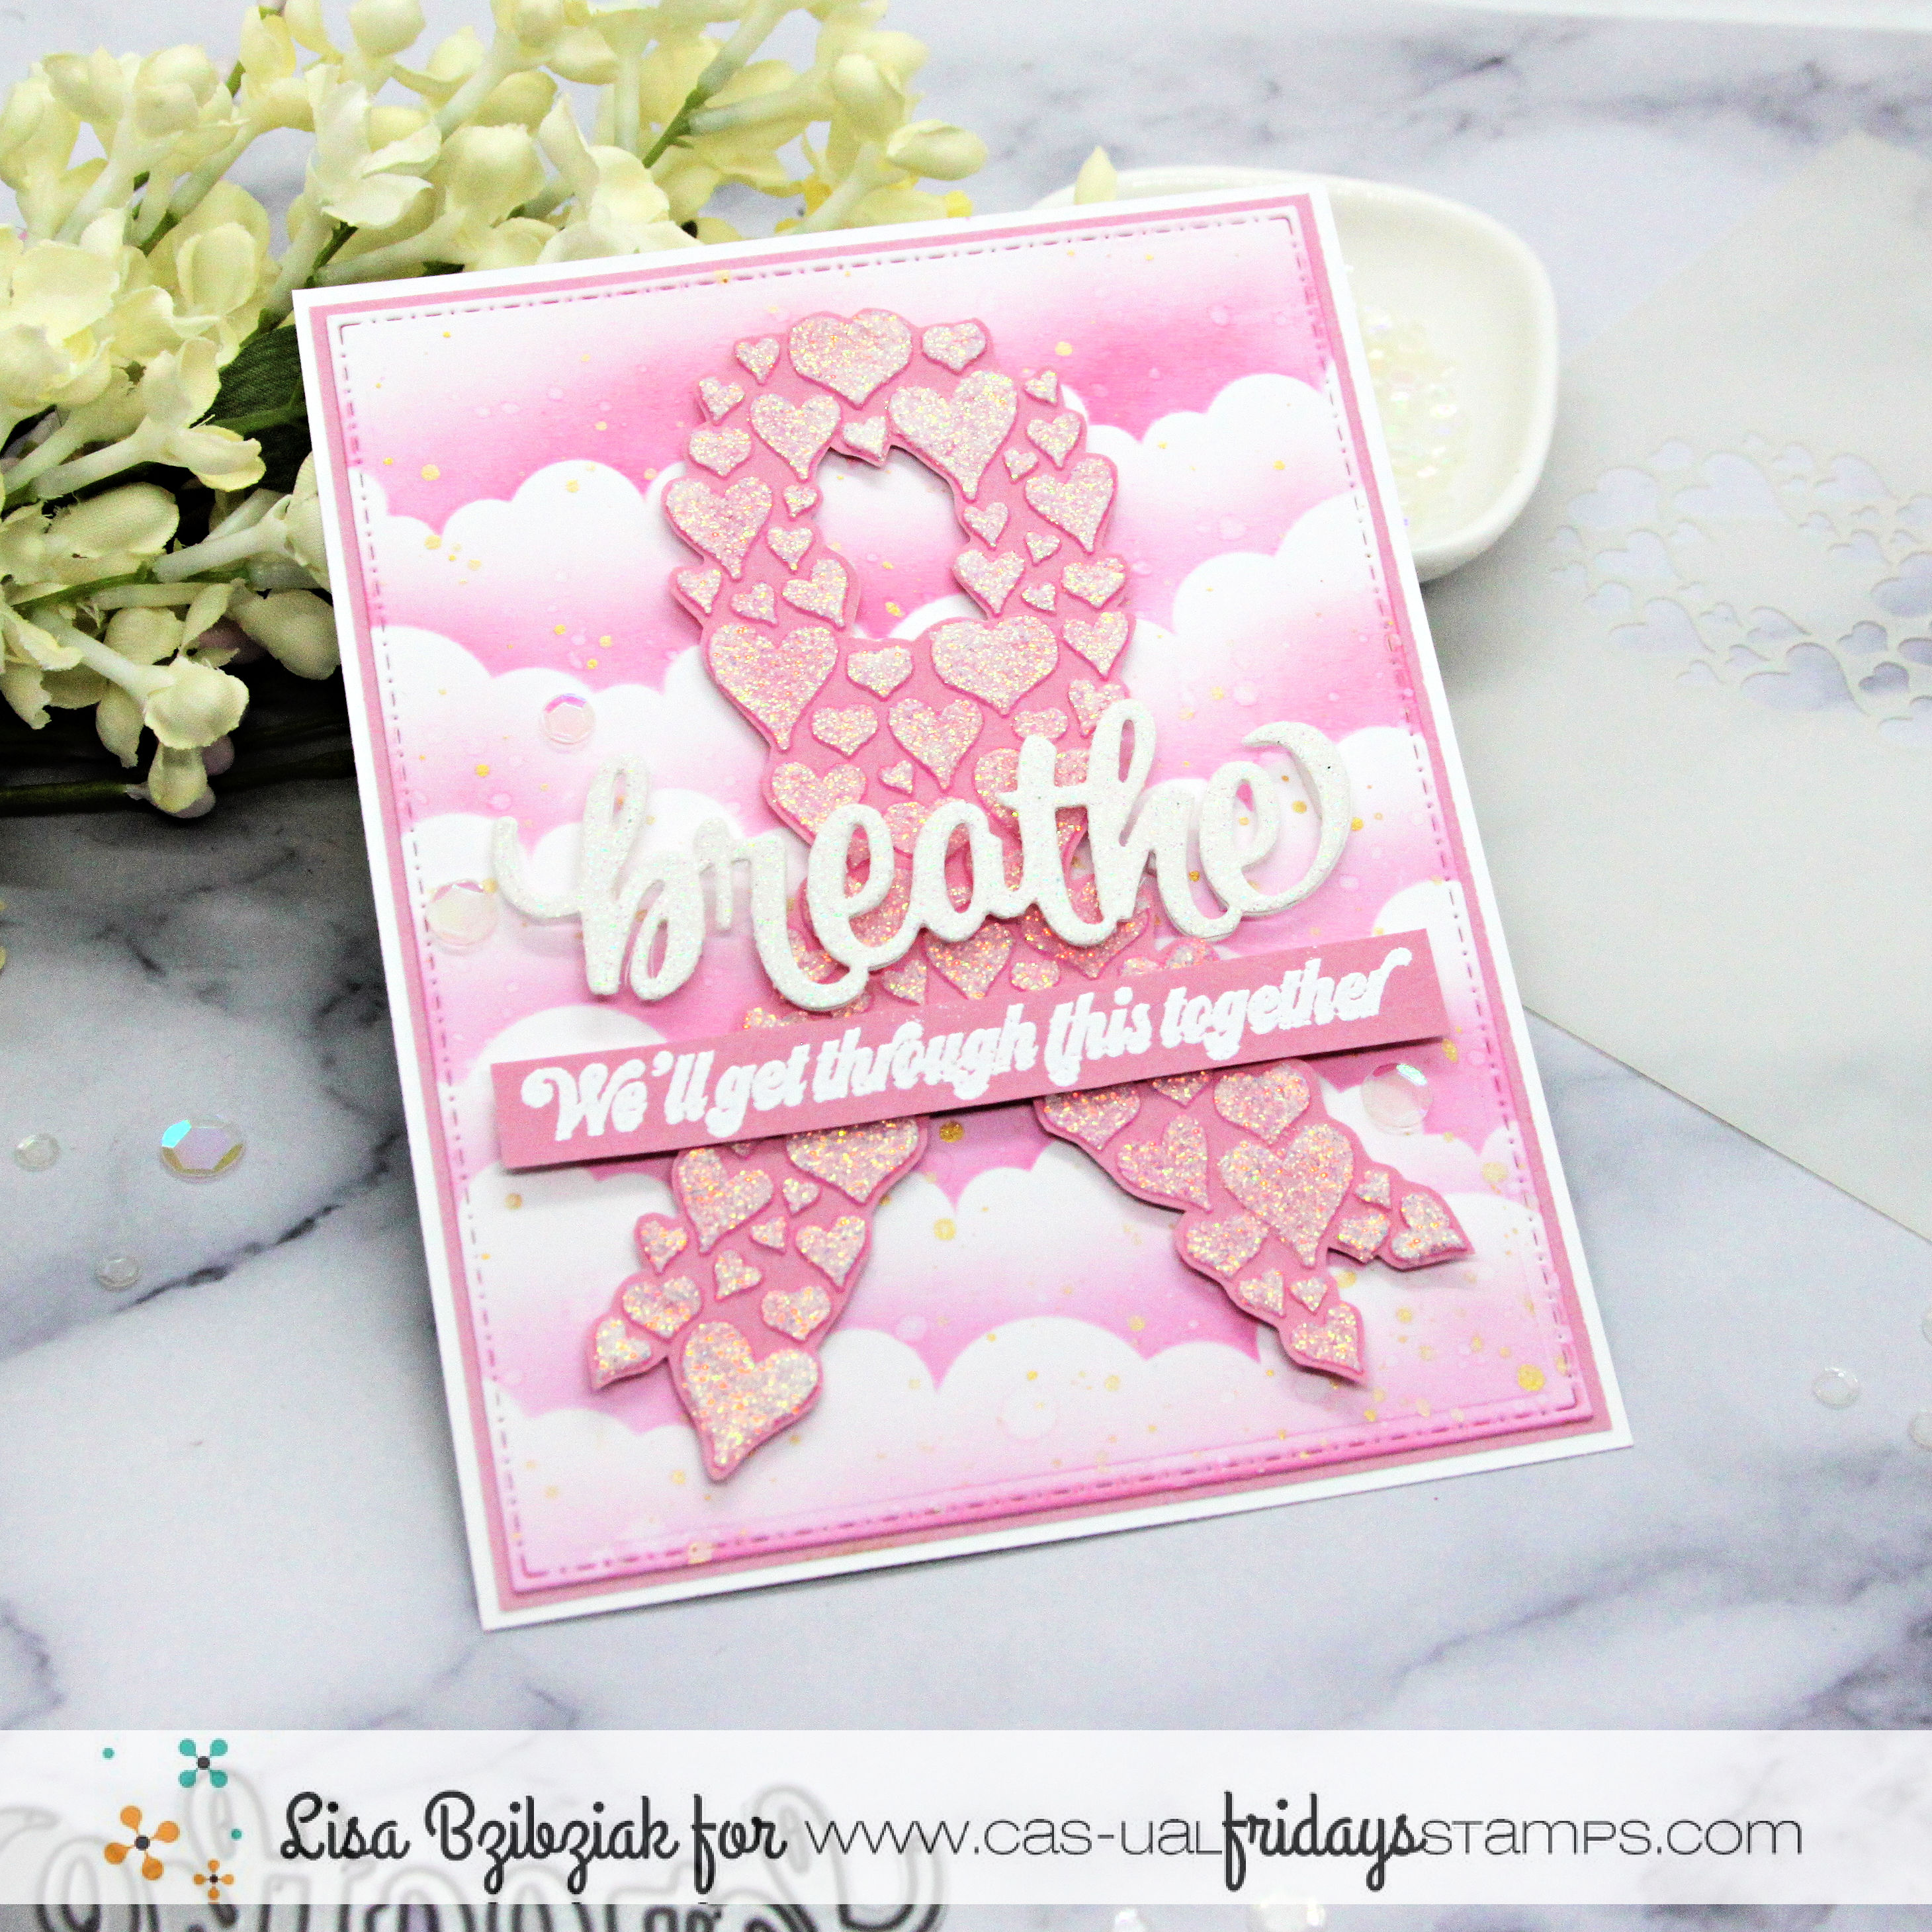

I used the Heart Ribbon Stencil for this one and fussy cut it out.


I used the Partly Cloudy Stencil for that rainbow and those clouds...


And the Heart Ribbon Stamps for this one.

All of the items I've mentioned and linked to here as of the writing of this post are still available in the shop at a deep discount along with a handful of other items... get them while you can!  And over there you'll find more inspiration for each one.

Thank you for all of your visits and the love over the years!  I had a lot of fun and I'll be seeing you all around the Interwebs!


Monday, August 29, 2022

It's Your Birthday


Hi All, it's Vicki here today with a fun birthday card. I used a few products [differently], which is always fun - getting more use out of a product!

Let's start with the basics; this is a 5x5 card, and the layered panel is a 4.25x4.25 size.  I used one of the circle dies from the Pinked Slimline Die Set to cut out the center.  [Unfortunately, these are no longer available, so basically any die would work].  I cut a 3x3 piece of card stock, and water colored some stripes, let it dry, and adhered it to the back of the card layer.

Using another die from the Slimline Die Set, I cut a circle, and using the Heart Note Die, I cut off the heart and adhered it on to the circle die cut, along with a pearl from my stash.  I used the Stars A2 Panel Die to get the 2 stars that I adhered onto a tiny strips of white card stock.  Lastly, I used a sentiment from Whole Shebang Stamp Set.

That's it for today's card.  Don't forget, you can save 15% off your purchase - even the sale and clearance sections! [There really are some amazing prices!]


Thanks for stopping by~

ps - I have used affiliated links in this post at no additional cost to you. Thanks for the support! 


Monday, July 4, 2022

Love and Heart Notes


Welcome back!  Sharing a card with you today using the Heart Note Dies and Love Notes Stamp Set. 


I was loving the colors and textures on this gel print, so I stamped a few lines from the Heart Notes set over the top with Distress Oxide... I didn't want a crisp line, but wanted to keep with a distressed look.


I die cut the Heart Notes from a foiled gel print... love the gold sparkle on them against that super distressed background.


Finally my favorite sentiment from the Love Notes set and a few sequins!

Thanks so much for stopping!  I hope you'll come again soon!


Friday, July 1, 2022

So Sorry


Hi All, Vicki here today from All I Do Is Stamp. Excuse me, but what the heck happened to June?  Poof - we are 6 months into the year.  I can't believe this is July 1st - absolutely [time fast] crazy!
 
Okay, my shock is over, and I need to share my card  with you all.  It's one of those cards that you really don't want to have to make, but you do it anyway.  At least I do.  I am all about pet sympathy cards.

I used the Rainbow Bridge stamp set.  This set really is cute - tiny paw prints, great mixed font sentiments, and of course the appropriate heart!  Makes for a perfect pet sympathy card.
 

The added hearts are from the Heart Note Dies.  [I just cut them a little different].  I do love getting  multiple uses out of products. 😀

That's it for today.  I hope you enjoyed my clean and simple pet sympathy card!  See you in a couple of weeks with another card.


Thanks for stopping by~

ps - I have used affiliated links in this post at no additional cost to you.Thanks for your support!


Friday, June 17, 2022

Happy Birthday


Hi All, it's Vicki here from All I Do Is Stamp.


I stamped the images in Memento Black, colored with Copics, and then cut out the note, adding 3 layers behind it for dimension.  [Actually, I had made 2 panels with the flower images, and cut the note from the 2nd panel.  AFTER, I realized there was no reason for the 2nd panel as I could of just cut the note from the original.  Talk about a DUH moment!]

I cut a couple of masks, and then stamped the background music notes over the top. Lastly, I added a red heart.


That's it for my card today. I hope you enjoyed it!

If interested, you can save 15% off your purchase by using my code.


Thanks for stopping by~
ps - I have used affiliated links in this post at no additional cost to you.Thanks for the support!


Friday, March 25, 2022

Just A Note


Made a quick one for you today!  I don't often keep it this simple, but it was actually a lot of fun and I just may be doing it more often!


I started by stamping the music images in an ombre pattern on my Misti using three different shades of the same color of ink and also moved the stamp around and inked up less as I went for a dramatic fade of both color and image.


Next I splattered some blues and white over the top of it.  I layered the stamped panel onto blue and white cardstock and cut the music note from blue glitter cardstock.


I popped the note onto the panel and then stamped that cute little sentiment onto one of the banners from the Pinked Slimline set and popped it up at the bottom.

Easy peasy!  Thanks so much for stopping and hope you'll come again soon!

I've included links below should you feel like shopping and through April 2nd, you can use the code shopwithme to save 20% on any new order!


Tuesday, February 22, 2022

My Heart Beats For You


Hi all, it's Vicki here today from All I Do Is Stamp. This month, I have 3 CFS days!  Aren't you all so lucky... :)  Oh yeah, happy 22222 day also.

I seem to be making no red Valentine's Day colored cards this year.  Worked for me.

[Well, with the exception of a glittered heart]  I started by making an inked panel and adding some gold foil.

Using the Heart Notes Die, I cut out the image, and then using the Love Notes Stamp set, I picked a sentiment, white embossed it, and added a strip.  Once again, an easy card, but I will tell you, my husband did love it! 

See you next month~


Thanks for stopping by~

ps - I have used affiliated links in this post at no additional cost to you. 


Friday, January 14, 2022

Silly Love Songs


Hello! Today I've got a wintery slimline for you for just about anyone...


I started with a slimline panel of Gel Print paper and used white ink and a sponge to add the snowflakes from the Snowflakes stencil to the edges.  I ran a heatgun over it to help it dry since pigment inks take a while.


While it was drying, I die cut the Heart Notes from pink glitter paper to match the pinks in my gel print and then a couple more times from some pink cardstock and stacked them for depth.  I added foam tape to the back for a little more dimension.


I layered my panels and then used the pigment ink to stamp the sheet music image from the Love Notes stamp set and heated that as well.


Finally I added the pink glittery notes to the front and a sentiment from the Love Notes set to finish it off.


Ready to drop in the mail to make someone smile!

Thanks so much for stopping and hope you'll come again soon!


Wednesday, September 29, 2021

It's Time to Party-Stretching your Supplies

Hello everyone!! It is Nora here on the blog today with a Halloween card that I created with non-Halloween supplies!


I started off my card by spraying Distress Stain in green and purple Distress Mica Stain on a white panel measuring 4" by 5 1/4."


I wrapped some orange twine around the panel and adhered it to an A2 5 1/2" by 4 14"  white card base. I then adhered three squares that I had die cut out of scraps of pattern paper.


I set the card aside to work on my pumpkins. I used the Pinked Slimline small circle to die cut circles out of orange scraps of pattern paper. 


I then used the Swirls Stencil to mark faces on the pumpkins. I used enamel drops to fill the faces in. I did make a mistake on one pumpkin BUT I fixed it by just drawing the enamel out to make "lashes." 


While the dots dried, I die cut "stems" using the Heart Note Dies.  I just die cut specific pieces of the notes to use that I thought looked like stems. I adhered the "stems" onto the top of my pumpkins when the enamel dried. I used foam adhesive to adhere the three pumpkins to the black squares that were on the card front.


My last step was to find a sentiment. I didn't have one that said "Happy Halloween" so I decided to use the "it's time to party!" sentiment from Sassy Celebrations stamp set. It was the PERFECT size for my card. I stamped it with black ink onto a white paper strip. I used foam adhesive to adhere it to my card front, over the twine. I then tied a bow.


My card was complete and I personally LOVE how it came out. I will be sending it, with a box of goodies, to one of my cousins for Halloween.

Feel like going shopping? Use my code NORASENTME for an extra 15% off your total order.


I want to thank you for taking the time to stop by today. Be sure to come back this week to see some more fabulous creations by the Design Team.

Have a FABULOUS day!!

CAS-ual Fridays Supplies I used for my card: