Translate

Showing posts with label Sassy Celebration. Show all posts

Thursday, October 14, 2021

Time to Party! - Happy Birthday CAS-ual Fridays Stamps!


Welcome back!  I've got some more birthday fun for you today!
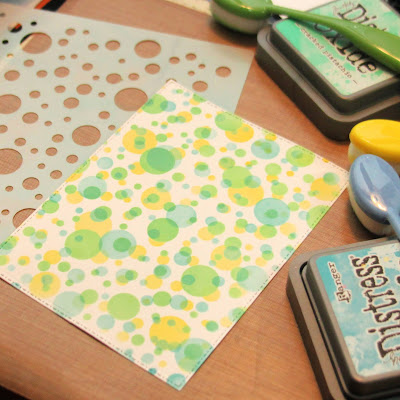

I started by making a fun multicolored background using the Bubbly Stencil!  I chose the three colors I wanted to use in my card and started with the lightest.  I laid the stencil over the top of a white panel and blended some yellow through it.  I wiped off the stencil and turned it and applied green through it and then did the same with some blue.
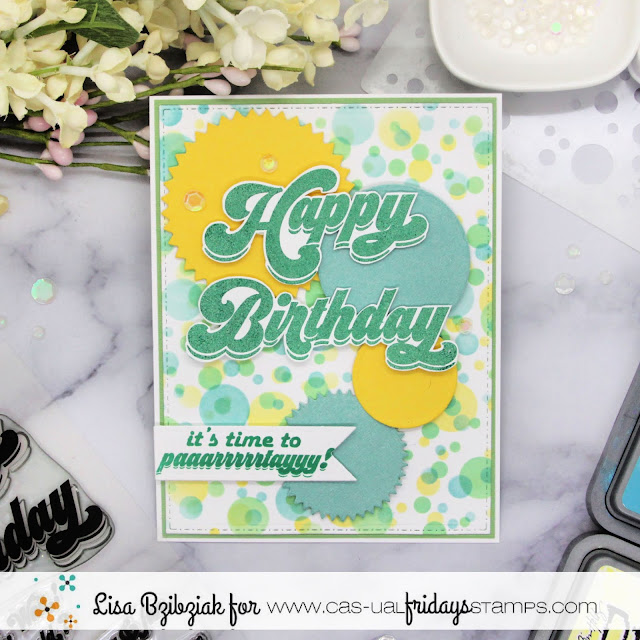

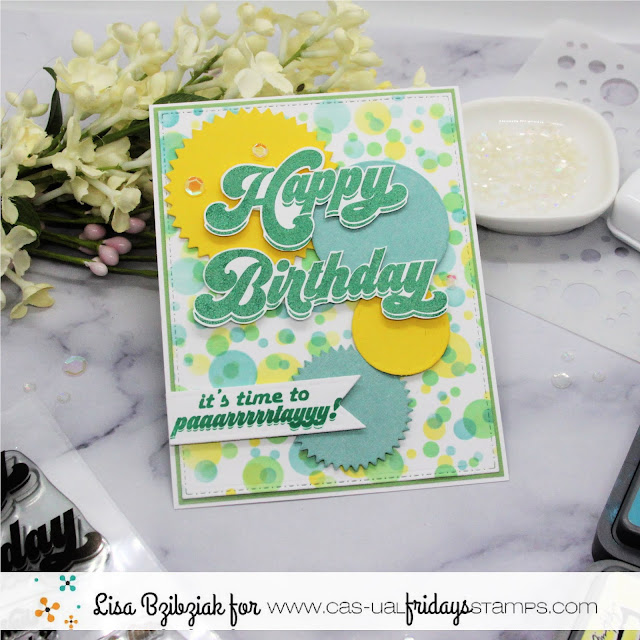
Next I stamped and embossed the Happy Birthday sentiment from the Happy Birthday Stamps and fussy cut it out.  I cut some circles using the pinked and smooth circle dies from the Pinked Slimline dies and cut them in coordinating cardstock colors.  I popped the circles onto the base and then popped up the fussy cut Happy Birthday sentiment over the top of them.
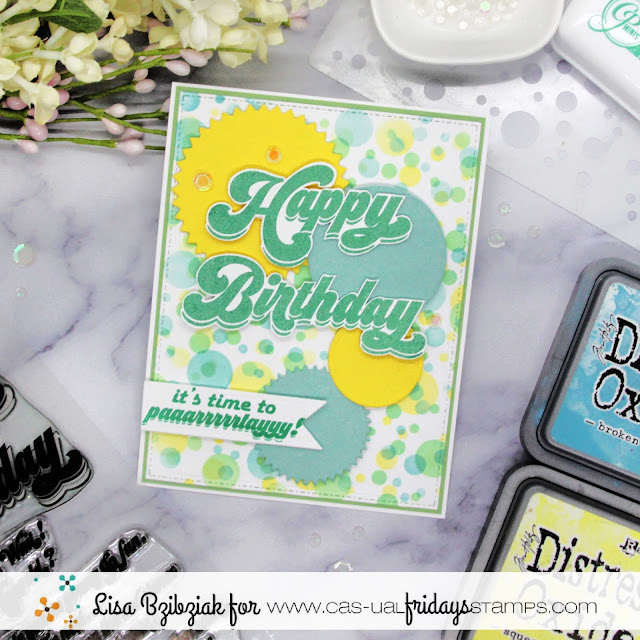

Finally I stamped a sentiment from the Sassy Celebration set onto a banner from the Pinked Slimline set and popped that up over the top.

I finished it off and added it to two bases of green and white and added a few sequins for fun.

That's me for today!  Big Happy Birthday to Michele and CAS-ual Fridays Stamps!

We have a special birthday sale!  Have fun!


Wednesday, September 29, 2021

It's Time to Party-Stretching your Supplies

Hello everyone!! It is Nora here on the blog today with a Halloween card that I created with non-Halloween supplies!


I started off my card by spraying Distress Stain in green and purple Distress Mica Stain on a white panel measuring 4" by 5 1/4."


I wrapped some orange twine around the panel and adhered it to an A2 5 1/2" by 4 14"  white card base. I then adhered three squares that I had die cut out of scraps of pattern paper.


I set the card aside to work on my pumpkins. I used the Pinked Slimline small circle to die cut circles out of orange scraps of pattern paper. 


I then used the Swirls Stencil to mark faces on the pumpkins. I used enamel drops to fill the faces in. I did make a mistake on one pumpkin BUT I fixed it by just drawing the enamel out to make "lashes." 


While the dots dried, I die cut "stems" using the Heart Note Dies.  I just die cut specific pieces of the notes to use that I thought looked like stems. I adhered the "stems" onto the top of my pumpkins when the enamel dried. I used foam adhesive to adhere the three pumpkins to the black squares that were on the card front.


My last step was to find a sentiment. I didn't have one that said "Happy Halloween" so I decided to use the "it's time to party!" sentiment from Sassy Celebrations stamp set. It was the PERFECT size for my card. I stamped it with black ink onto a white paper strip. I used foam adhesive to adhere it to my card front, over the twine. I then tied a bow.


My card was complete and I personally LOVE how it came out. I will be sending it, with a box of goodies, to one of my cousins for Halloween.

Feel like going shopping? Use my code NORASENTME for an extra 15% off your total order.


I want to thank you for taking the time to stop by today. Be sure to come back this week to see some more fabulous creations by the Design Team.

Have a FABULOUS day!!

CAS-ual Fridays Supplies I used for my card:


Saturday, July 3, 2021

Time To Celebrate!


Hello!  I hope you are able to enjoy some fun this holiday weekend!  I'm spending time with family and thought I'd make a red, white and blue card to honor the 4th.  I thought the Jacks Stencil would make a perfect background for this one!


I placed the Jacks stencil over a die cut panel and blended in some Festive Berries Distress Ink to just a section of the panel.


I wiped off the stencil and then blended some Tumbled Glass in other areas careful to leave a bit of white space.


I wiped off the stencil again and then used a spatula to apply some Glitz Glitter Gel through the entire stencil.


Voila!  So pretty, right??  I set this aside to dry.


While the background was drying, I stamped the Celebrate from the Sassy Celebration stamp set onto white cardstock using Catherine Pooler Suede Shoes ink.  Before removing it from my Misti, I stamped it again with some Versamark and heat embossed it with Wow Clear Gloss Embossing Powder.  Then I did the same with the rest of the sentiment in Samba.  I fussy cut the Celebrate and trimmed the rest down into a rectangle and added a blue layer to outline it.

Next I cut the glass from the Champagne Flute from white glitter paper and the star from the Slimline Pinked set from blue foiled paper.


When the stenciled layer was dry, I arranged everything using various thicknesses of foam tape and adhesive and layered it onto a blue and red base.

That's me for today!  I hope you enjoyed it and that you'll come again soon for some more CAS-ual Fridays Inspiration!

In case you feel like shopping, there is a special going on this weekend!  Head on over to the CAS-ual Fridays Shop to take advantage Free Shipping and this cool Stars & Stripes Stencil with a $50 purchase!  Happy shopping!


Come again soon!


Tuesday, June 1, 2021

Celebrate with a Margarita

Happy Tuesday everyone!!! Nora here from A Creative Touch. I cannot believe that it is JUNE!!!

Today I am on the blog with a card that I created with the margarita glass from the Salty stamp set and a sentiment from the Sassy Celebrations set. 


I started off this card by stamping the margarita glass with midnight ink onto a piece of kraft cardstock. 


I colored in the drink with colored pencils and used Gamsol to blend the pencil. 


Next I used a white gel pen to emphasize certain areas of my strawberry margarita.


I then added Stickles glitter glue over the sugar crystals and Glossy Accents to again emphasize areas 
on the glass.


While the margarita was drying, I stamped the "celebrate" in with pink Distress Oxide onto a scrap of white cardstock. I heat embossed over it with WOW! Clear Gloss Super Fine Embossing Powder. I then fussy cut the sentiment out.


Now that all my pieces were complete, it was time to put the card together. 
To begin, I adhered a scrap of pattern paper on the edge of a white, A2, top folding card base. 


I cut a half inch off my kraft card front and adhered it over the white card base. 


I used foam adhesive to adhere my sentiment toward the bottom of the drink and my card was complete. I have a particular friend I intend to send this card to.


Want to go shopping? Use my code NORASENTME to get 15% off your total order at the 


You can even use my code on the SALE items!!!

I want to thank you for taking the time to stop by. Be sure to stop by the blog this week for more crafty goodness from the Design Team. Have a FABULOUS day!!!


Supplies I used from CAS-ual Fridays:


Thursday, February 25, 2021

Mini Slimline Card using the Pinked Slimline Dies


Hello everyone, it’s Michelle here today sharing a mini Slimline card I made using the Pinked Slimline dies.   You don’t necessarily have to make a tall slimline card with these dies and I show you how below.

I started with a piece of card stock measuring 4 1/4 x 5 1/2 and die cut using the pinked die.  I placed it right along the top as you can see below.

Then I placed it back in the die, lining it up so the straight edge only will cut.
No need to run the whole piece through, just the top bit.

And here’s a photo of the finished piece.
I did the same with the next layer but shortened the length slightly.


I made a balloon stencil using the round die and sponged some Catherine Pooler inks to make three balloons. I used a ruler to draw a line for the strings.  I die cut the hooray from the Hooray dies in pink and black and adhered them together offsetting them slightly to give a shadow effect.  I stamped the sentiment from the Sassy Celebration stamp set.


I hope I have inspired you to make some mini slimline cards and if you hop over to the shop you will find all the dies I’ve used today on sale!
You can use my discount code below.