Translate

Showing posts with label Stencils. Show all posts

Saturday, December 4, 2021

A Happy Hanukkah Card

Happy Hanukah my friends!! It is Nora, here from A Creative Touch on the blog today with a festive card to celebrate this holiday of lights.


I started off my card by blending blue ink through the large star on the CAS-Fridays Jewish Star Stencil. I masked it off with tape so that I would only get the ink inside the part of the stencil I wanted. 


I then masked off the star and applied blue texture paste over the top. I utilized the same stencil but used the star strip on the left. I wanted a tone on tone effect that I could get using both the ink and the texture paste together. The texture paste was just a tad bit lighter so that it can be seen over the dark blue of the ink blending.


While my star was drying, I prepared my background. I used my FAVORITE CAS-Fridays stencil, Swirls Stencil, and blue glitter glue to make all the sparkly dots on a die cut, white rectangle. I have used this stencil on SO MANY cards and out of all the stencils I own, I have played with this stencil the most.


I set this panel aside to dry, and die cut the sentiment using the Happy Hanukkah dies. 


I decided to use a silver glitter cardstock to give the sentiment some visual weight because I was using so much blue on this card. I first tried a white glitter die cut but it blended into the background too much.

 
When all the pieces were dry, I put the card together. I adhered the swirls background over an A2, white, top folding card base. I then used foam adhesive to adhere the Jewish Star to my card front. My last step was to adhere the glitter sentiment over the star and my card was complete.


I was not sure where I was going when I started my card but I love the way it came out. I hope this inspires you to use your stencils and dies together.

The two stencils and the die cut for the sentiment are available in the CAS-Fridays Shop. Please use my code NORASENTME to get an extra 15% off your total order!!!


I thank you for taking the time to stop by. Please be sure to check in to the blog this week for some more fabulous creations from the Design Team. 


Saturday, July 3, 2021

Time To Celebrate!


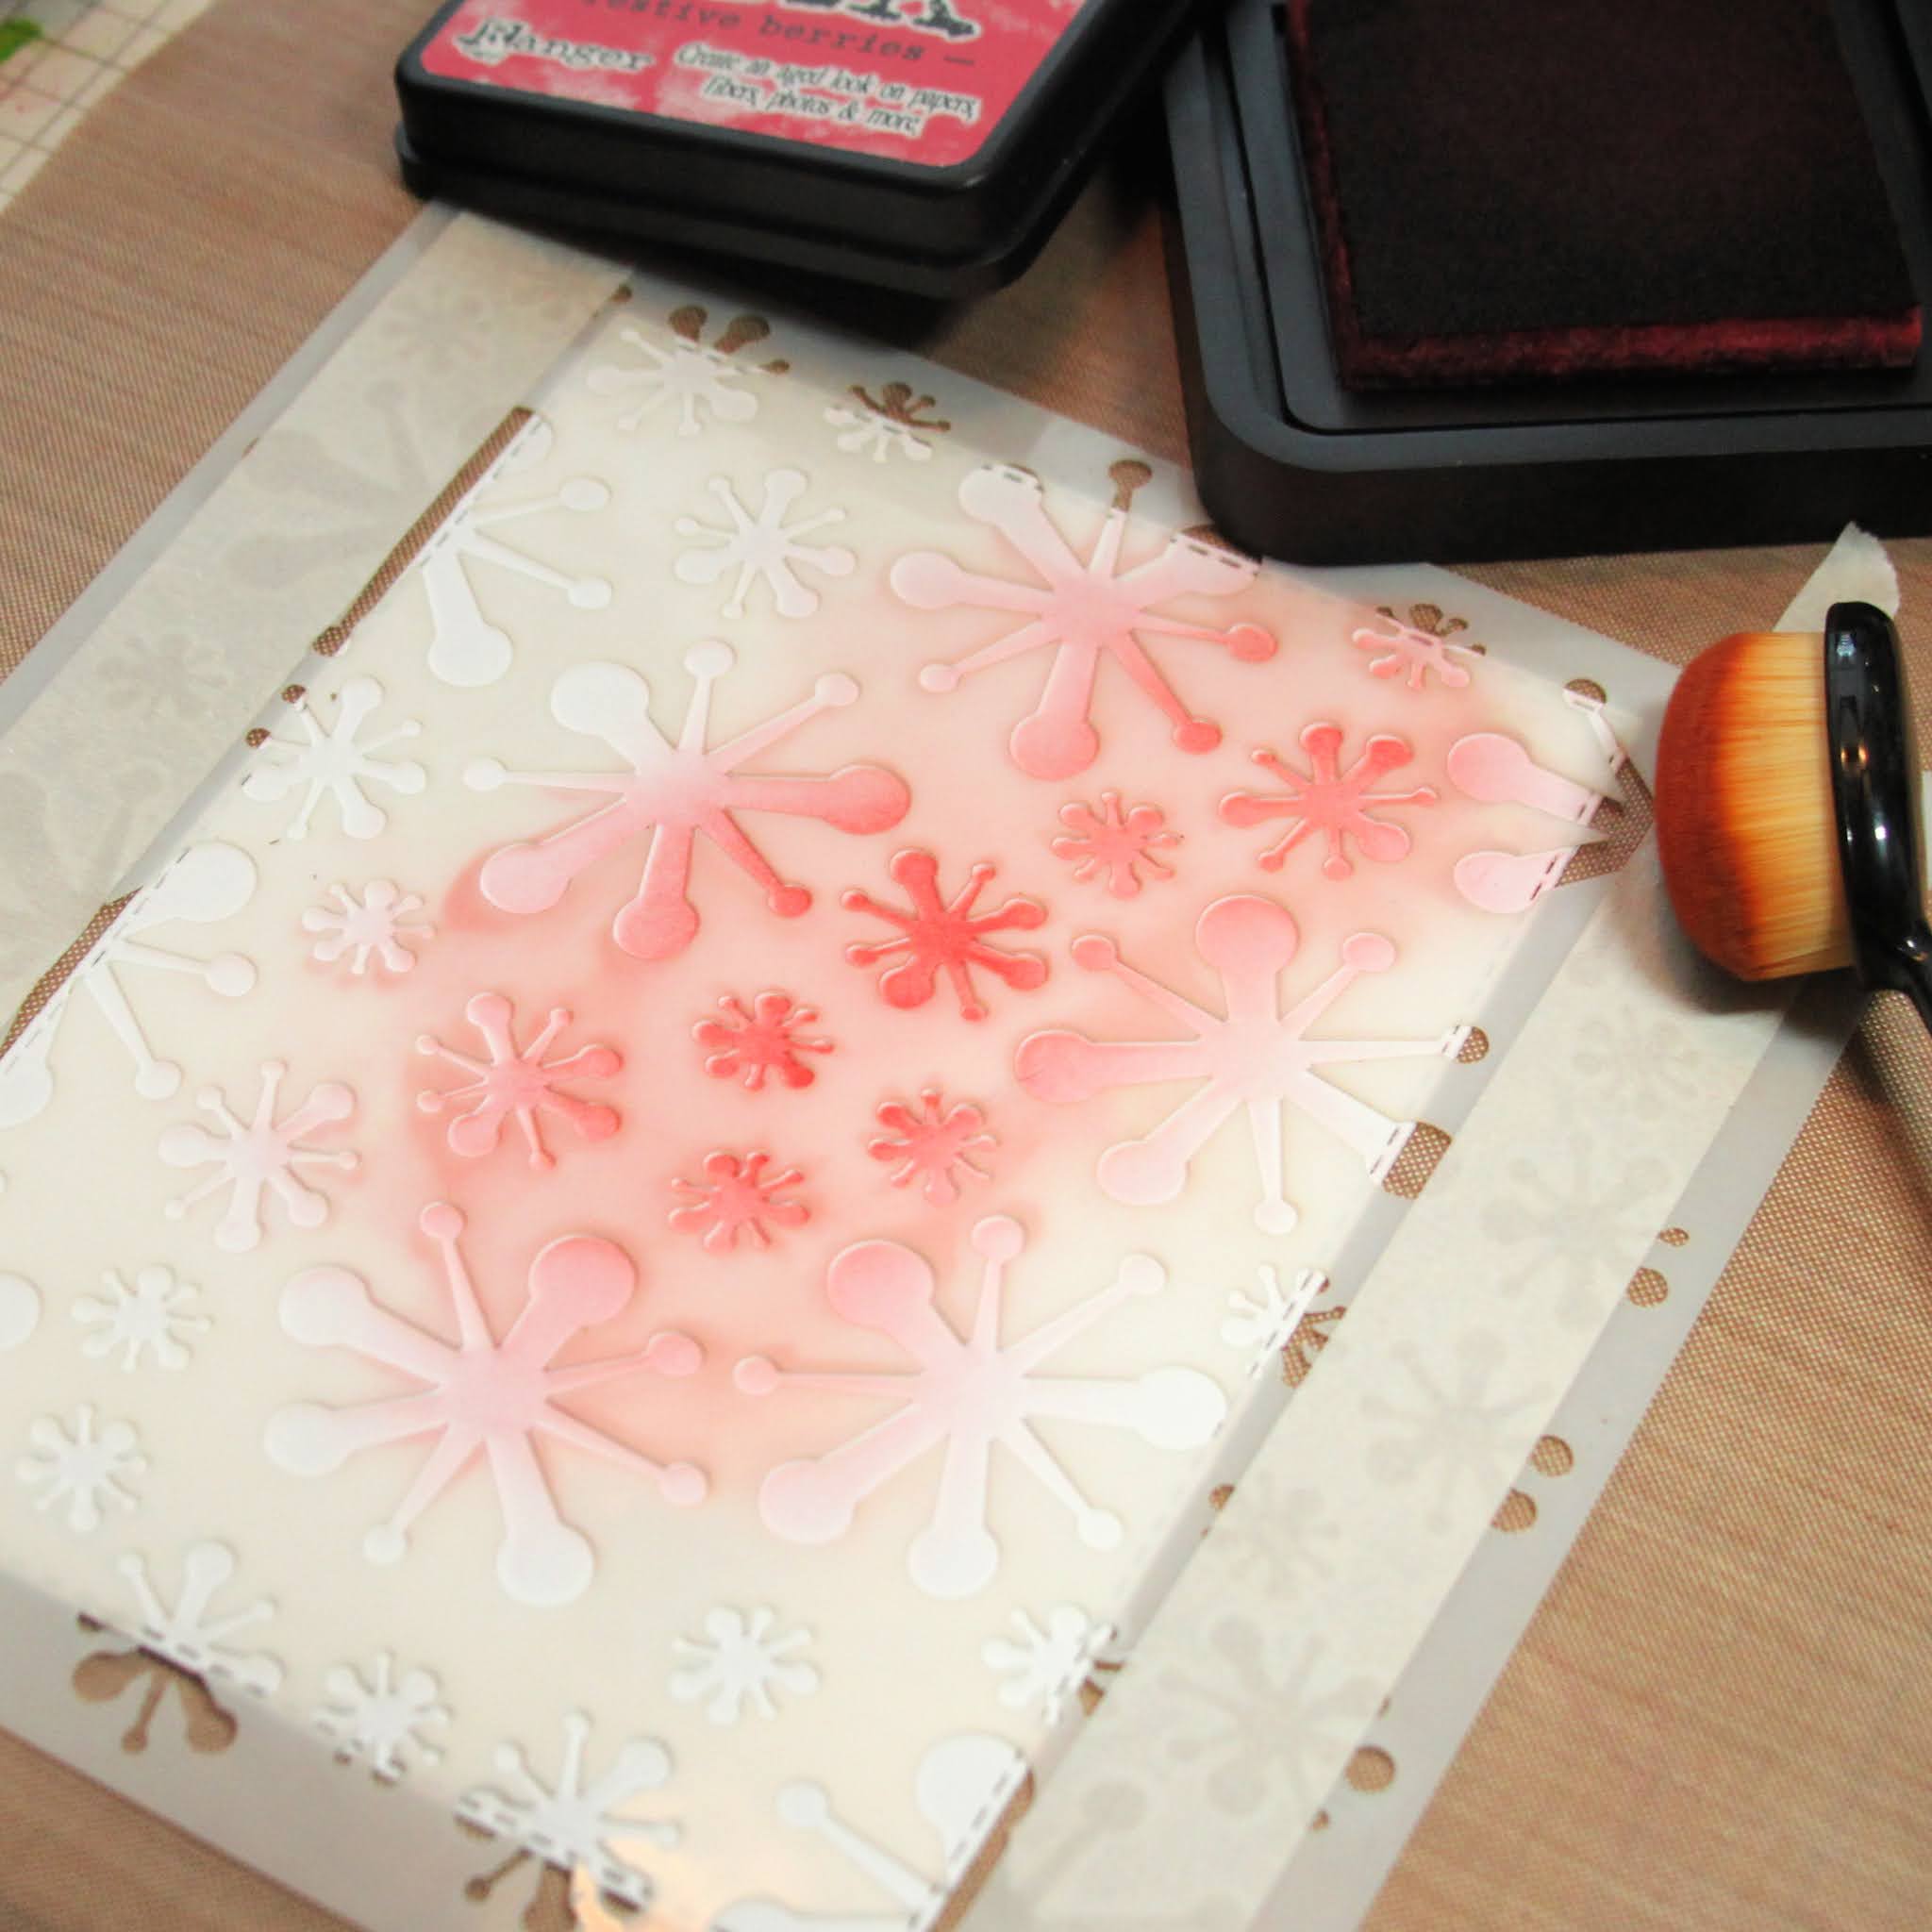
Hello!  I hope you are able to enjoy some fun this holiday weekend!  I'm spending time with family and thought I'd make a red, white and blue card to honor the 4th.  I thought the Jacks Stencil would make a perfect background for this one!


I placed the Jacks stencil over a die cut panel and blended in some Festive Berries Distress Ink to just a section of the panel.


I wiped off the stencil and then blended some Tumbled Glass in other areas careful to leave a bit of white space.


I wiped off the stencil again and then used a spatula to apply some Glitz Glitter Gel through the entire stencil.


Voila!  So pretty, right??  I set this aside to dry.


While the background was drying, I stamped the Celebrate from the Sassy Celebration stamp set onto white cardstock using Catherine Pooler Suede Shoes ink.  Before removing it from my Misti, I stamped it again with some Versamark and heat embossed it with Wow Clear Gloss Embossing Powder.  Then I did the same with the rest of the sentiment in Samba.  I fussy cut the Celebrate and trimmed the rest down into a rectangle and added a blue layer to outline it.

Next I cut the glass from the Champagne Flute from white glitter paper and the star from the Slimline Pinked set from blue foiled paper.


When the stenciled layer was dry, I arranged everything using various thicknesses of foam tape and adhesive and layered it onto a blue and red base.

That's me for today!  I hope you enjoyed it and that you'll come again soon for some more CAS-ual Fridays Inspiration!

In case you feel like shopping, there is a special going on this weekend!  Head on over to the CAS-ual Fridays Shop to take advantage Free Shipping and this cool Stars & Stripes Stencil with a $50 purchase!  Happy shopping!


Come again soon!


Monday, June 21, 2021

A Rainbow of Flowers

Hello everyone!! 

Nora here today from A Creative Touch with a fun card I created with the Flowerburst Stencil and a sentiment from Terrific Flowers. I had the idea for this card in the middle of the night. Does that ever happen to you???


I began this card by using the Flowerburst Stencil with red Distress Ink and stenciling the tiny flowers onto a piece of white cardstock measuring 4" by 5 1/4."


I moved the stencil to the left and then used orange Distress Ink over the top of the white panel.


Here is a photo of what the card base looked like with the red and orange flowers.


I proceeded to move my stencil around the card panel and stenciled the rest of the flowers in a rainbow of color. When I was finished, I used a white gel pen to draw flower centers in all my flowers. I will admit, this sounds like a lot of work but it really wasn't. 


I adhered a strip of blue cardstock across the front of the panel and then adhered the base to an A2 sized card base.


I used the Terrific Flowers stamp set to stamp the sentiment and used the large, stitched circle from the Pinked Slimline Dies to cut it out. I used foam adhesive to adhere it over the 
blue strip and my card was done.


This background was so fun to make that I will be doing it again sometime soon. I think I want to try it in a mono-chromatic color scheme next!!!

If this inspires you to go shopping at the CAS-Fridays Store, use my code NORASENTME to get an extra 15% off your total order. 


I want to thank you for taking the time to stop by today. Be sure to check back in this week with some more FABULOUS creations by the other Design Team members!!!


CAS-ual Fridays Supplies Used on my Card:


Thursday, April 8, 2021

Wishing You Puppy Butt Wiggles!


There is nothing better than coming home to butt wiggles in my opinion!  I had some fun with the pupp themed products from the shop and started with the Pawesome Stencil!


I love all of the different components of this stencil and decided to create a path of rainbow paws on the slimline panel cut using the Pinked Slimline Dies.  When I only want to use a part of a stencil, I like to use some washi tape to mask off any stencil components that are close by but I don't want to get any ink in that area.


I also clean off the stencil in between colors so as not to get my ink pad colors contaminated and I have a separate brush for yellows, pinks, purples, blues, etc.    I label each of my brushes so I know which is which.


It was fun to use a part of the rainbow from the Rainbow Bridge set as an embellishment on one end of this slimline!  I had stamped and colored it previously but it wasn't working on that project yet it was perfect for this one after I trimmed off the largest semi circle.

Also, I added a layer of black in between the two die cut slimline panels to balance out all of the black in the other elements of the card.


And the pups from the Nate & Friday set along with that sentiment were just right to send to a friend with fur babies!  Sometimes when I don't want to hide too much of my background, I love to stamp and then cut my sentiments into strips... I love the look and love that it takes up a little less real estate on my card.

That's me for today!  I hope you enjoyed it!  If you saw something here today that you must have, I have this for you:


Also there is a great sale going on in the Retiring section of the shop and no code needed so you can use the above code as well!  You really need to check it out for a chance to get some great items at a deep discount!


Thanks so much for stopping today and hope you'll come again for more CAS-ual Fridays inspiration!


Monday, July 27, 2020

A Background With A Bang!


Hi all!  Lisa here and today I'm sharing a project with some of my very favorite things!

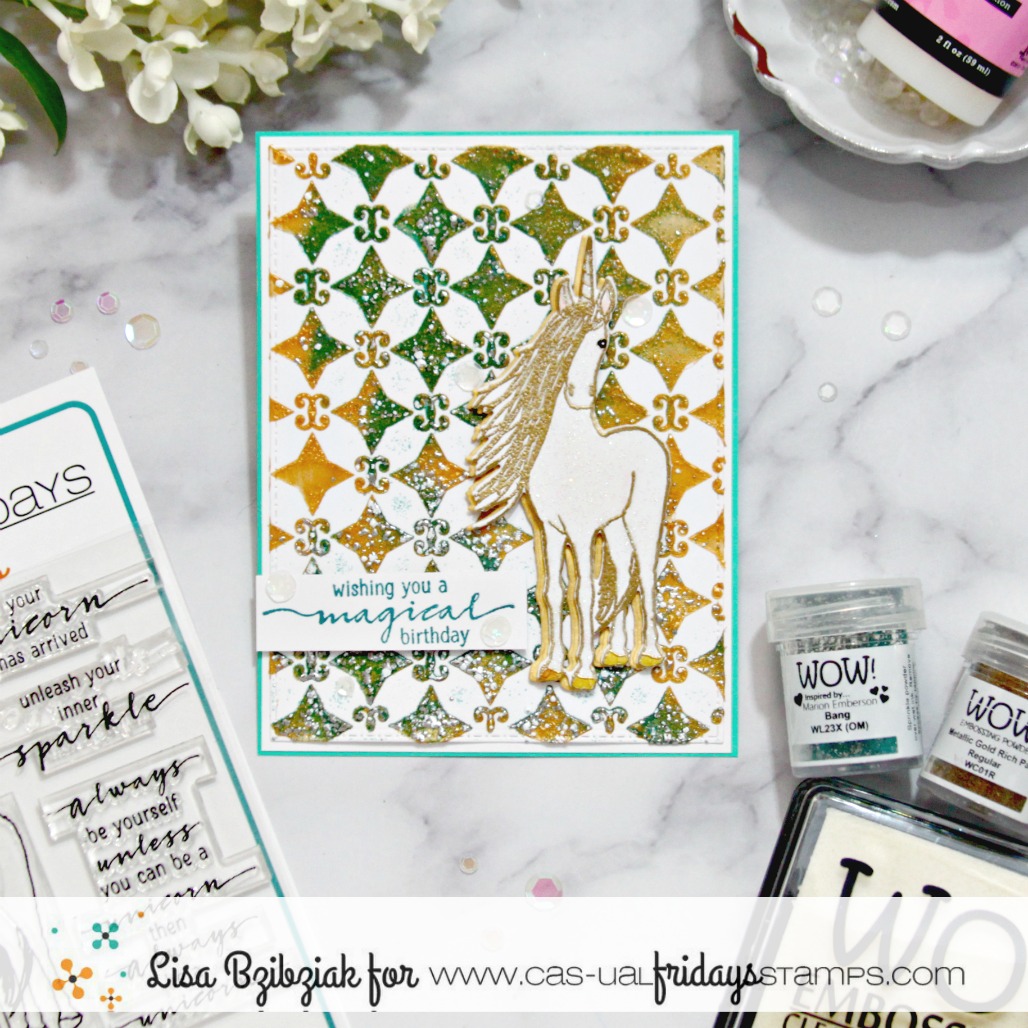
I started with my favorite stencil... the Starlequin Stencil!  I am not sure what it is about this stencil but it's my go to... if I had it in the picture you'd be able to tell it's my most used...lol!  (Which is why it's not in the picture...lol!)  I applied some gold texture paste through the stencil and while it was wet, I sprinkled on some of my favorite Wow Embossing Powder, Bang Colour Blend.  I didn't cover the entire texture paste area but instead randomly sprinkled it on.  I heated it up... when you use texture paste to emboss you are looking for the "bubble"... it is so cool and fun to watch the powders transform!


I set that aside to be sure the texture paste that was exposed was completely dry and worked on the unicorn from the Be A Unicorn stamp set.  I stamped it using the Wow Clear Ultra Slow Drying Embossing Pad and then heat embossed it using another favorite, Metallic Gold Rich Pale.  I die cut it with the coordinating die and then I mixed up some white glitter and Glossy Accents and painted the unicorn inside the lines with the glitter mixture.  I darkened his eye using a black alcohol marker and colored in his hooves with a gold gel pen.  I die cut another unicorn in gold and popped up my glittery embossed unicorn onto the solid gold die cut piece, but offset it for a shadow effect.


Finally I stamped one of the sentiments from the Be A Unicorn set in a coordinating color and trimmed it down and popped it up and then scattered a few sequins around.

Should you see something that you need to purchase, I have this for you:


That's me for today!   Thanks so much for stopping and I hope you enjoyed it!  Come again soon for more CAS-ual Fridays inspiration!


Monday, July 13, 2020

What's Up Friend? - Painting With Glitter


Hello all!  Lisa here!  And today I'm sharing another card using the Bold Flower stencil along with the Somebunny stamp set and a few other things!  I did some painting with Glitter on this one because I'm playing with this technique this month and I love it!


I started by using Distress Oxides and the Bold Flowers stencil to add the two largest flowers to my slimline sized card.  I knew I wanted to use a few colors on the petals so I stuck with the largest flower on the stencil and added one off the left edge at the top and off of the right edge at the bottom.  Then I took a paint tray and added a little bit of anemone colored Eco Sparkles glitter from Wow and some Glossy Accents and mixed them together.  You don't need a lot and you can always add just a little water to the mix if you need to thin it out a bit while you paint.


After I got done "painting" the glitter onto the purple areas, I rinsed out my paint tray and grabbed pink, orange and yellow glitters from my stash and repeated the process with each.... rinsing out in between so that cleanup would be easy... and it was!  Before I set that aside to dry I sprayed some Distress Oxide Spray in purple over the panel and then set it aside.


I cut the Friend word die from the Sweet Friends word die set once from purple card stock and twice more from white and stacked and glued them together.  Then I decided it would be fun to paint the sentiment with glitter too, so I did!  I wanted even more dimension for this part of my sentiment so I decided to add additional Glossy Accents over the top of it and set it aside to dry.


I colored in my bunny and balloon and then decided the balloon could use a little sparkle too...lol!  So I broke out the chunky orange glitter and liquid glass and proceeded to paint that too... I can't get enough!


I absolutely love the shimmer of the glitter and glossy accents painted on!  It's much lighter than just adding glitter to your project.  The Glossy Accents is light enough that it doesn't buckle your paper, and there is no glitter to fall off of your project either at your house or your recipients!  It's all securely in place with the Glossy Accents... smooth and sparkly!

I used one of the short sentiment pieces from Somebunny along with the Friend word die to build my sentiment.


I just added some jewels and sequins and I was done!

So thanks for joining me today!  I hope you enjoyed it!  Should you see something that you must have today, I have this for you:


And you just might find some really great deals in the sale section too!

Come again soon for more CAS-ual Fridays Inspiration!