Translate

Showing posts with label Happy Hanukkah Fri-Dies. Show all posts

Saturday, December 4, 2021

A Happy Hanukkah Card

Happy Hanukah my friends!! It is Nora, here from A Creative Touch on the blog today with a festive card to celebrate this holiday of lights.


I started off my card by blending blue ink through the large star on the CAS-Fridays Jewish Star Stencil. I masked it off with tape so that I would only get the ink inside the part of the stencil I wanted. 


I then masked off the star and applied blue texture paste over the top. I utilized the same stencil but used the star strip on the left. I wanted a tone on tone effect that I could get using both the ink and the texture paste together. The texture paste was just a tad bit lighter so that it can be seen over the dark blue of the ink blending.


While my star was drying, I prepared my background. I used my FAVORITE CAS-Fridays stencil, Swirls Stencil, and blue glitter glue to make all the sparkly dots on a die cut, white rectangle. I have used this stencil on SO MANY cards and out of all the stencils I own, I have played with this stencil the most.


I set this panel aside to dry, and die cut the sentiment using the Happy Hanukkah dies. 


I decided to use a silver glitter cardstock to give the sentiment some visual weight because I was using so much blue on this card. I first tried a white glitter die cut but it blended into the background too much.

 
When all the pieces were dry, I put the card together. I adhered the swirls background over an A2, white, top folding card base. I then used foam adhesive to adhere the Jewish Star to my card front. My last step was to adhere the glitter sentiment over the star and my card was complete.


I was not sure where I was going when I started my card but I love the way it came out. I hope this inspires you to use your stencils and dies together.

The two stencils and the die cut for the sentiment are available in the CAS-Fridays Shop. Please use my code NORASENTME to get an extra 15% off your total order!!!


I thank you for taking the time to stop by. Please be sure to check in to the blog this week for some more fabulous creations from the Design Team. 


Tuesday, March 24, 2020

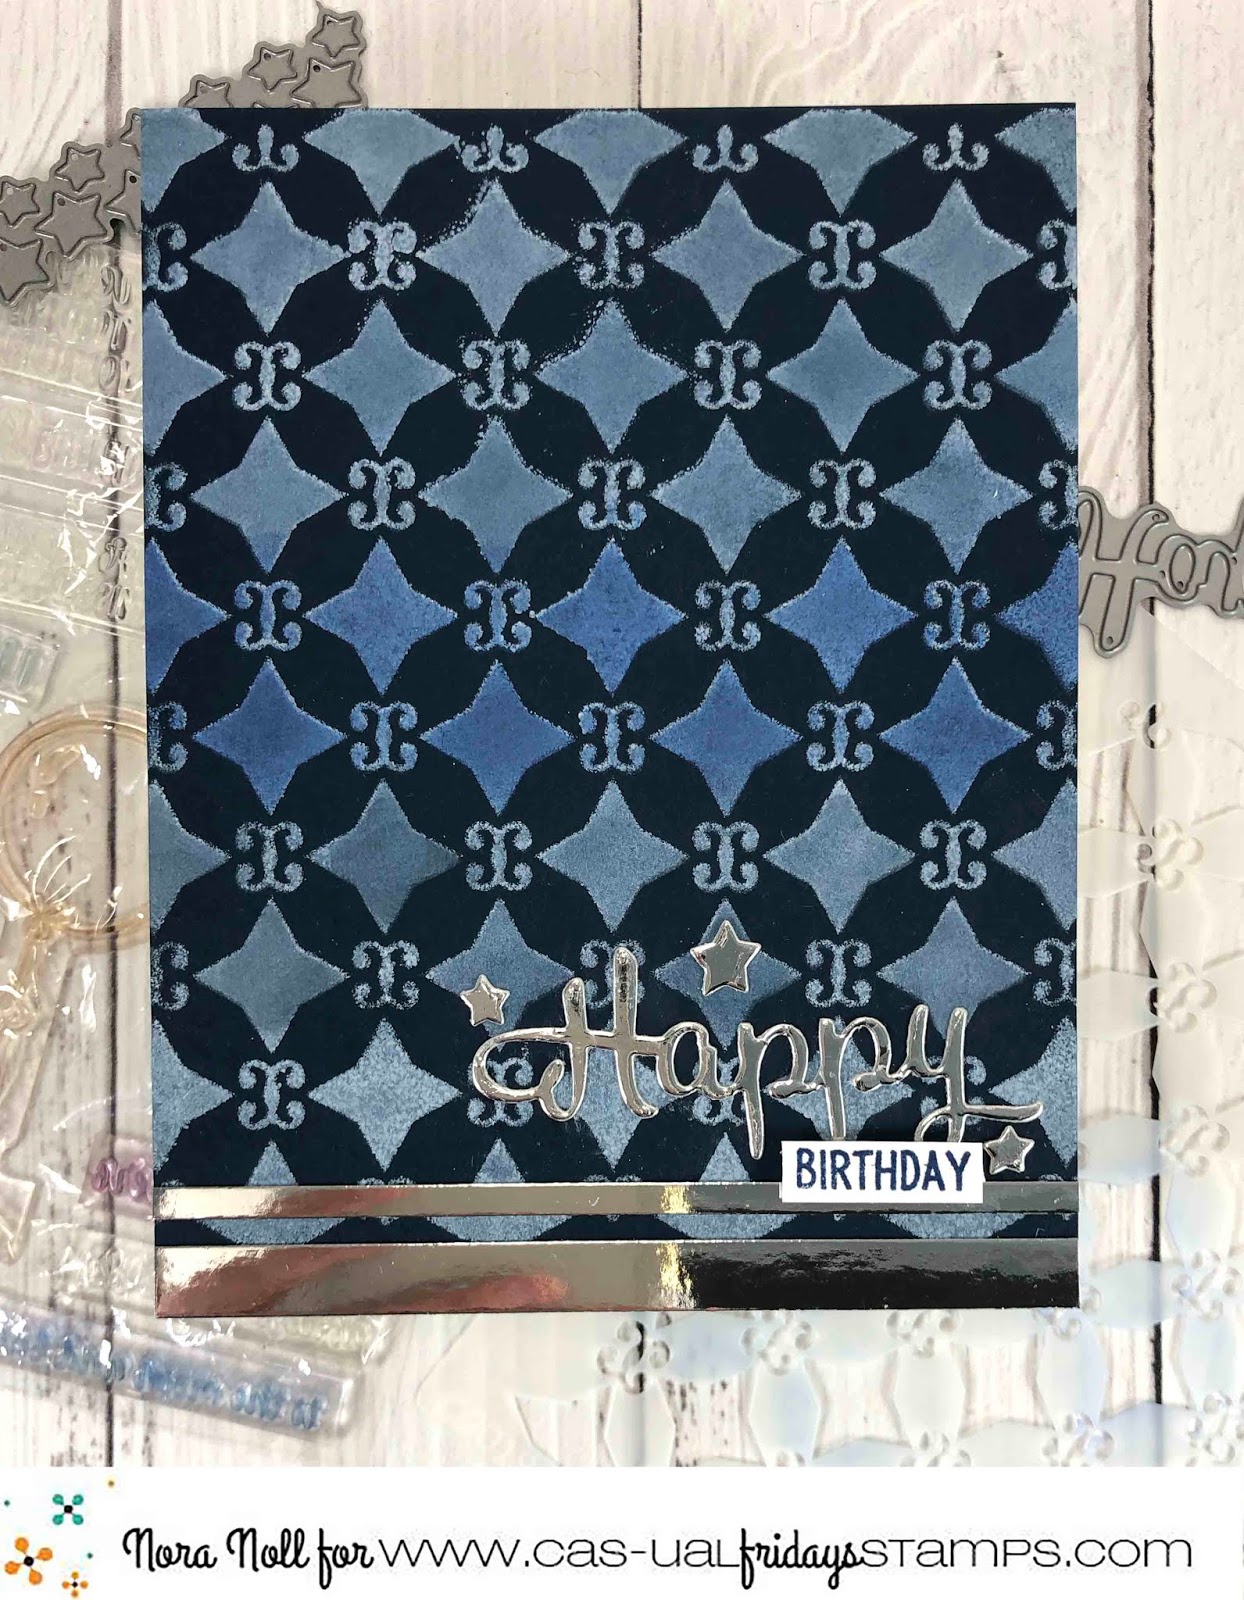
Happy Birthday using a Stencil Technique on Dark Cardstock

Hi everyone!! Nora here from A Creative Touch with a masculine birthday card using stencils on dark cardstock.

Stamps: Somebunny
Stencils: Starlequin


I started off this card by daubing white pigment ink through the Starlequin stencil onto navy blue cardstock. I tried to cover the blue paper with as much white as I could get onto it. Next I heat set the ink with a heat gun.


I then used blue dye ink and foam daubers to blend three different colors of blue over the white, creating an ombre look. Just make sure that the pigment ink is dry because you do not want to contaminate your ink pads.


I left the bottom white as I knew that I was going to cover most of it up with the sentiment. 


Using the Happy Hanukkah Fri-die, I die cut "happy" out of silver cardstock and used a trimmer to cut two different width strips.


I adhered both strips of cardstock to the bottom of the card, and added the sentiment above.


I masked off sentiment from Somebunny and used blue dye ink to stamp"birthday" onto a white strip. I used foam adhesive to adhere it to the card.


The card still needed a little something so I die cut some stars out of silver using the Fun-Fetti Fri-dies and adhered them around the sentiment. 


This was a really fun card to create and I urge you to give this technique a try.

I hope that I inspired you today and don't forget to use my code NORASENTME for 15% off in the CAS-ual Fridays Store.


 I thank you for stopping by today. I hope you have a FABULOUS day!!


Monday, January 13, 2020

Creating a Background Using a Sentiment Stamp

Happy Monday everyone!! Nora here from A Creative Touch. It has been a long time since I have created a card. I needed a challenge so I decided to create a background with just one sentiment stamp from the Love Notes stamp set.


I used hugs and kisses symbols from the stamp set and stamped them randomly in different color reds across a white cardstock background.  


Next I die cut the panel and adhered it on an angle to an A2, top folding card base. I adhered the negative "frame" that I usually would throw out over the top of the angled panel.


I then die cut the "happy" using the Happy Hanukkah Fri-dies out of red cardstock and adhered it to the card front. 


Using the Love Notes stamp set again, I stamped the sentiment with black dye ink onto a white cardstock strip. I adhered the strip onto the card front using foam adhesive.


My last step was to adhere Fun-Fetti Fri-Die hearts that I had die cut in pink and red under and over the sentiment. I used a clear shimmer pen to give the little hearts some sparkle and then covered them with Glossy Accents. 

I hope this card inspires you to take a look at your sentiment stamps and create a fun background of your own. Please leave a link because I would love to see what you made.

If you would like to go shopping, there are some sale items still in stock at a FANTASTIC price. Use my code NORASENTME to get 15% off your total order.


I thank you for taking the time to stop by today. Have a FABULOUS week!!


CAS-ual Fridays Products Used for this Card:


Sunday, December 8, 2019

A Sparkly Happy Hanukkah!


Lisa from Life of a BZScrapper here!  It is the holiday season and I thought I'd share with you a quick (and quite sparkly) shaker using some of the vast array of Judaica themed stamp and die products in the shop!

Have you seen the awesome A2 panels in the shop?  This is the Stars A2 Panel and I love that it covers the entire front of an A2 card just like the Hearts and Flakey A2 Panel Fri-Dies!  So quick and easy to create a shaker (or not!).


Just cut an A2 Panel, adhere some acetate to the entire back and add foam tape around the outside.  All that's left to do is choose your "filling" and pop it over the top!  I mixed up some of my sequins and beads from my stash and added a few of the glitter paper Star of David cuts that were left after cutting out the panel.

I added my sentiment using the Star of David Fri-Die as a backdrop and then cut the Happy Hanukkah from white cardstock three times and stacked them for dimension.  It also helps the sentiment to stand out against that busy backdrop.


I always add a few sequins to the front... as if they've escaped!

And that's me for today!  Thanks so much for stopping by and I hope you enjoyed your visit!  And don't forget to visit the CAS-ual Fridays shop for all of your Hanukkah and Judaica themed crafty items ... and then some!


Wednesday, November 6, 2019

Easy Cards You Can Mass Produce with Maria

Hello everyone.  Maria here on the blog with you with some easy cards to make that you can mass-produce, showcasing some of the older stamp and dies from Cas-ual Fridays stamp!  

My first card is clean and simple but creates a huge impact in my opinion.  It pretty much says it all!  This card is going to my friend because she is really "AMAZING".

I stamped the image on Neenah solar white card stock and colored the flower with my Spectrum Noir Classique Markers in PP4, PP5 and PP6.  Adhered this piece on some A2 size card base.  Simple yet classy!  Here's the card:


I love that the sentiment can be used as the stem for the flower.  There are so many possibilities using this Mon Ami stamp set.  Here's a closer look:


My second card is for a Jewish holiday.  I am showcasing the Happy Hanukkah Fri-Dies and Stars A2 Panel Fri-Die.

I die-cut all of the pieces that I needed for my card with some gorgeous card stock that I have from my stash.  Adhered them on an A2 size-white side-fold card base and voila!  You're done!


You can easily mass-produce both cards that I have for you today.  Here's a closer look at this beautiful die:


Here are the items that I showcased today:


I hope you like my cards today.  Please don't forget to check out the sales at the shop.  You can use my coupon code below for an additional 15% off.  Have a nice day and happy stamping!