Translate

Showing posts with label birthday cards. Show all posts

Tuesday, March 24, 2020

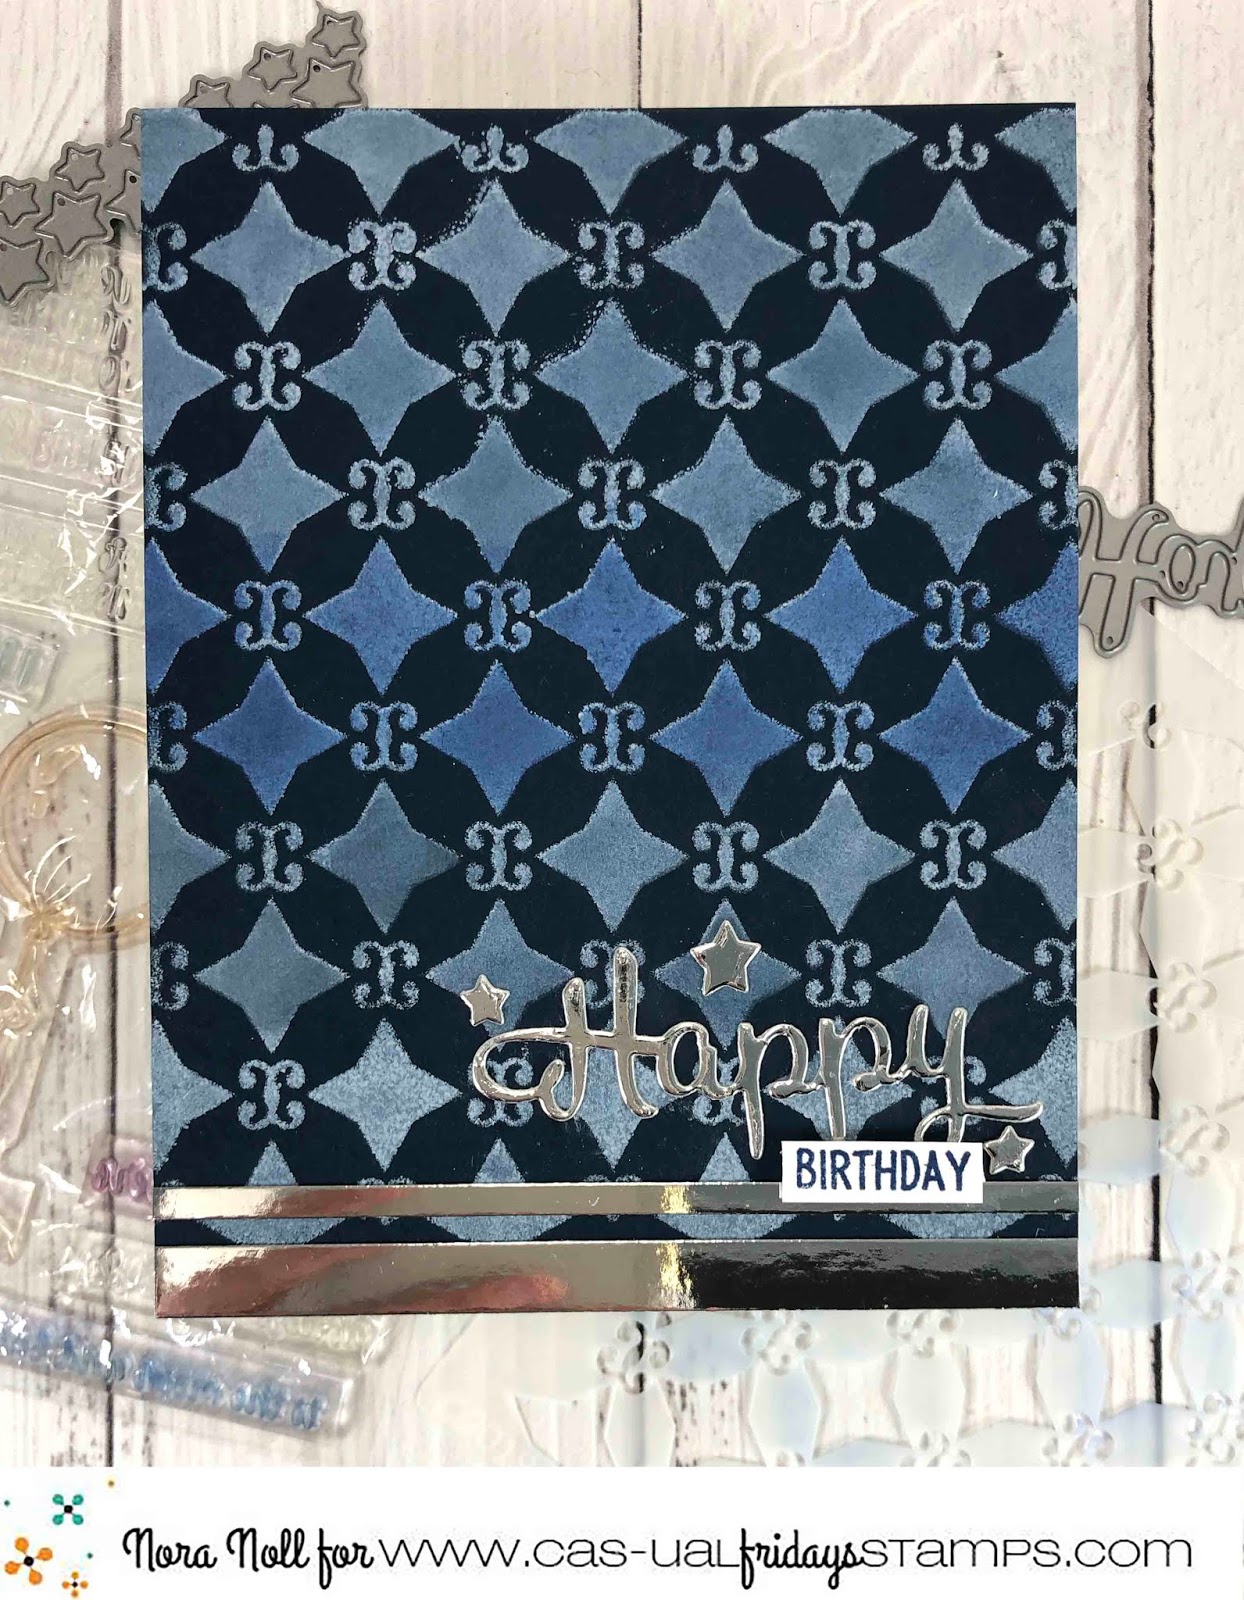
Happy Birthday using a Stencil Technique on Dark Cardstock

Hi everyone!! Nora here from A Creative Touch with a masculine birthday card using stencils on dark cardstock.

Stamps: Somebunny
Stencils: Starlequin


I started off this card by daubing white pigment ink through the Starlequin stencil onto navy blue cardstock. I tried to cover the blue paper with as much white as I could get onto it. Next I heat set the ink with a heat gun.


I then used blue dye ink and foam daubers to blend three different colors of blue over the white, creating an ombre look. Just make sure that the pigment ink is dry because you do not want to contaminate your ink pads.


I left the bottom white as I knew that I was going to cover most of it up with the sentiment. 


Using the Happy Hanukkah Fri-die, I die cut "happy" out of silver cardstock and used a trimmer to cut two different width strips.


I adhered both strips of cardstock to the bottom of the card, and added the sentiment above.


I masked off sentiment from Somebunny and used blue dye ink to stamp"birthday" onto a white strip. I used foam adhesive to adhere it to the card.


The card still needed a little something so I die cut some stars out of silver using the Fun-Fetti Fri-dies and adhered them around the sentiment. 


This was a really fun card to create and I urge you to give this technique a try.

I hope that I inspired you today and don't forget to use my code NORASENTME for 15% off in the CAS-ual Fridays Store.


 I thank you for stopping by today. I hope you have a FABULOUS day!!


Friday, July 12, 2019

Funny Birthday Card with Frankly-isms by Maria

Hello CAS-ual Fridays fans!  It's Maria back on the blog with you today with a super funny (and quick), clean & simple card showcasing the Frankly-isms stamp set.  


I have been dying to use this stamp set for a friend's birthday.  She and I share the same twisted humor and I thought this is going to be a perfect birthday card for her.


I ink-blended an A2-size Bristol smooth white card stock with distress oxide inks.  I used a stencil from my stash and combined Fossilized Amber, Carved Pumpkin and Candied Apple with my mini ink blending tools.

I stamped the sentiment in the middle and adhered this piece on an A2-size card base.  


I finished my design by adding the sparkling clear jewels to add more interest and texture.  Here's a closer look:


I hope you like my project today.  Please visit CAS-ual Fridays Stamps  to purchase the stamp that I featured today.  You can also visit my blog for further details including a full list of the supplies I featured today.  Don't forget to use my coupon code "MARIASENTME" for 15% off your order at CAS-ual Fridays.  Happy stamping!


Thursday, June 13, 2019

Somebunny Told Me - Huggable Critters


Lisa here and today I'm sharing with you a card I made using the Huggable Critters Fri-dies and a punny sentiment from the Somebunny Stamp Set!  I wanted this to have a kind of sewn stuffed animal feel so I used some pretty coordinating patterns and along with the stitching on the Fri-dies, I love the way it turned out!


There are SO many options with this die set!  You can create all different kinds of expressions and faces... with four different ear shapes and a few eye, mouth and nose combos, two different paws and three different tails.  I trimmed down the bunny ear and attached the puppy ear to create the look of one of his ears being turned down.  And I love to use foam tape to create depth on these... I think it makes such a difference.  I also trimmed down just the inside two of the bunny ears to create a lighter inside ear color.  I added a flower by cutting two of the smallest Four Petals shapes and layering them and used Nuvo drops for the center.


And this sentiment from the Somebunny stamp set was perfect!  A sweet birthday card for a sweet little girl!  And I kinda want a stuffed bunny like this now!


Sweet, right??  I love how these critters can hold a gift card... a sign... some flowers... anything!

So thanks for stopping by today!  I hope you enjoyed it and I can't wait to see what you create with these critters!  If you don't have them yet and you feel the need to get them, I have this for you:


Stay tuned and come back often for more CAS-ual Fridays Inspiration AND for something special coming later this month!

Saturday, May 25, 2019

Colorful Embossing on Dark Cardstock

Happy Saturday!! Nora here from A Creative Touch on the blog today with a birthday card that uses a ton of embossing. 

I am going to confess that I have a love/hate relationship with embossing. No matter how hard I try, I get powder EVERYWHERE. However, over the years, I have accumulated a ton of different embossing powders so I decided to try something new for me-embossing on black cardstock.

Stamps: WTF 2 and Bomb Diggity


I started off this card stamping the number 50 from the WTF 2 stamp set onto black cardstock and  heat embossing each in a bright colored, opaque embossing powder. Don't have colored embossing powder? This could also be done with any metallic-gold, silver, copper-and look just as fabulous.


I adhered the piece of black cardstock to a white, A2, top folding card front. I stamped the "fabulous" sentiment using Bomb Diggity onto white cardstock and heat embossed it with black embossing powder. I then fussy cut it for more emphasis. I kind of played with it on the black background and decided I needed something more for it to pop. I wound up cutting strips of rainbow colored paper scraps and adhered them to the bottom of the card front. 


I then adhered a hash tag sticker and popped up "fabulous" with foam adhesive. 


All my friends are turning fifty this year so I am going to make a bunch of these cards to send out. It was easy and fast to create and I think, packs a punch.

Here are links to the WTF 2 and Bomb Diggity in the CAS-ual Fridays Store. Don't forget to use my code NORASENTME to get 15% off your total order.


I thank you for stopping by. Have a FABULOUS day!!


Sunday, April 28, 2019

Rainbow Birthday with Shenanigans

Hello it's Michelle here today from Seashell Creations with a colorful birthday card.
My card today is not my usual style as it is a special birthday card for my hubby who's birthday it is today!  As much as he likes my pretty cards, I thought I would make him a more masculine card.  In fact I made two, one using alcohol markers and another using watercolor markers.

Here's the first one using alcohol markers,


and the second using watercolor markers.


I started by coloring a rainbow of colors with some alcohol markers onto a piece of white card stock.  


Next, I put my card panel into my MISTI and placed some sentiments from the Shenanigans stamp set on top.  I closed the lid of my MISTI and stamped the sentiments all in one go with some Versafine Black ink.  Then I die cut the panel using a stitched rectangle die and adhered it onto a white top folding card base with dimensional tape.


I repeated the same process using some water color markers and water color card stock.


I think I like them both the same, now I want to try making some in pretty colors and add some sequins.

Here's a link to the Shenanigans stamp set and don't forget you can use my special discount code below for 15% discount in the shop!  Just add MICHELLESENTME when you check out.


Thanks for looking and I'll see you again soon!


Sunday, April 21, 2019

A Magical BIrthday Card

Happy Easter everyone!! It is Nora here today on the blog. You would think that I would have created an Easter card today BUT I thought that would be too traditional! I decided to create a birthday card instead!!

Stamps: Be A Unicorn


I started off this card by stamping and die cutting the Unicorn from the stamp set. I then used Copic Markers to color it in.


I then covered the mane and the tail with Diamond Stickles and set it aside to dry.


While the image was drying, I die cut a piece of Yupo paper and used alcohol ink in regular and pearl to create a rainbow background. This was SO FUN and very quick to do. I don't spend hours working it like others do but I think it came out fantastic.

 I then stamped the sentiment from the Be A Unicorn stamp set in an alcohol safe, black ink and mounted the card front on a 5 1/2" by 4 1/4"  white card base. My last step was to use foam adhesive to pop the unicorn up over the rainbow.

This was a really quick and easy card to create and it looks like it took a ton of time. If you feel like getting yourself an Easter present, use my code NORASENTME to get 15% off your total purchase at the CAS-ual Fridays Store!


That is it for me today. I hope you all have a FABULOUS day!!