Translate

Showing posts with label Fun-Fetti Fri-Dies. Show all posts

Monday, November 2, 2020

Happy Thoughts

Happy Monday everyone!! Nora here from A Creative Touch with a card that I created using a neutral color palette with a splash of color. 


I rarely create anything using strictly black ink as a background. I see cards all over web that I LOVE using this neutral combination of black and white but every time I have made a card using this palette, it just doesn't look right to me. I decided that these dragonflies would be fabulous with this technique, though, and so I decided to give it a try.


I started off by stamping the small dragonfly from the Everyday Dragonflies set onto a white 4 1/4" by 5 1/2" piece of cardstock using Catherine Pooler's Midnight ink.


Next I mixed the smooshed the black ink onto my glass mat, mixed it with a little water and used a paint brush to splatter it onto my background. It gives it a subtle effect but if you have any mistakes, this technique covers it up LIKE A DREAM.


I then used the Pinked Slimline Dies to die cut a pinked circle out of red cardstock and a stitched circle out of white. I stamped the sentiment from Everyday Dragonflies with red dye ink onto the white circle. I originally was just going to layer the sentiment circle over the red but it did not look grounded. I then die cut another circle from black paper using a die from my stash. I adhered all three of the sentiment pieces together.


Now my card was ready to be assembled. I cut my white panel down to 4" by 5 1/4" and adhered it to a top folding, A2, black card base. 


I then used some silver thread that was in a knotted mess and just adhered it to the card front in the area where I was going to put my sentiment. As you can see, you don't have to be neat about it because no one will see this when the card is all put together.


I adhered the sentiment circle over the top of the thread knot using a combination of foam adhesive and some glue so that the layered circles would be sure to stick. I piled on some acrylic blocks that I use for stamping and let it dry for a couple of minutes.


I could have stopped here but since in design, a good rule of thumb is to do things in threes, so I die cut some red hearts using the Fun-Fetti Fri-dies (my FAVORITE set of dies from anywhere that are being retired) and adhered them under the sentiment. 


I LOVE how this came out and would be a really fun card to make using another color to showcase besides red over the black and white base. 

For tons more inspiration, be sure to visit the CAS-ual Fridays Blog and hop on over to the CFS Store to do some shopping. You can use my code, NORASENTME, to get an extra 15% off your total order!!


I thank you for taking the time to stop by and I hope you have a FABULOUS day!!!


Thursday, July 23, 2020

Christmas in July

Happy Thursday!! Nora here from A Creative Touch with a slimline Christmas card. This is only the second slimline card I ever created and it was so fun!!


I started off this card by stamping with Versamark ink onto a white card base sized 8 1/4" by 3 1/4" with Bringing on the Snowflakes and heat embossing the snowflakes in white.


Next I used Victorian Velvet as my first color to blend onto the front of my cardstock.


I followed this with Abandoned Coral.


Then I used Festive Berries.


Over that I used Candy Apple Distress Ink.


I did go back and forth with the color before to get this blend. The last color I used was Vintage Photo Ink. When I was done with the blending, I spritzed water over the top to give it some texture. 


I let the cardfront dry while I die cut the sentiment three times using the Merry Christmas Fri-dies. I stacked the die cuts together, adhering them for some dimension. I used some Nuvo White Blizzard Glitter Drops over the top and set it aside to dry.


I then stamped some small snowflakes using the Snowy Sayings stamp set and heat embossed them with gold embossing powder. 


I took the card front and sprinkled gold watercolor and watered down white acrylic paint on top. I then dried it using a heat gun and then adhered the panel over a red card base measuring 
8 1/2" by 3 1/2."


I adhered some vellum strips over the top of the card front and then the dried sentiment over that. 


My last step was to adhere some gold stars that I die cut using the Fun-Fetti Fri-dies.

This card was so fun to make!!! I encourage you to create a slim line card of your own.

I want to thank you for taking the time to stop by. If you like what I did, use my code NORASENTME to get 15% off your total order.


Have a FABULOUS day!!!


Thursday, May 28, 2020

A Masculine Happy Birthday Card

Hello everyone!! 

It is Nora here from A Creative Touch with a masculine themed birthday card using the Jacks Stencil, the new Happy Birthday stamp set and a sprinkle of stars using the Fun-Fetti Fri-dies.


I don't know about you but I have a heck of a time creating birthday cards with a masculine flair. For this card, I chose to use a technique using the Jacks Stencil with Indigo Color Burst. I thought the colors would be perfect for a masculine card.


I started off by putting Color Burst over my stencil and then liberally spritzing with water. I then took watercolor paper and placed it down on top of the stencil. When I lifted it up, I got this really cool pattern. I was actually able to dip two more watercolor papers onto the wet stencil to make THREE backgrounds. 


When my panel dried, I stamped Happy Birthday with Versamark ink and heat embossed over it with silver. I actually had to heat emboss the sentiment twice because even under the opaque silver powder, you could see the rich blue underneath after only one pass. 


I cut down the panel and layered it over a shiny piece of blue and silver cardstock. I then sprinkled silver star die cuts using the Fun-Fetti Fri-dies as an additional element to draw your eye through 
the card.


I love how this turned out and cannot wait to send it to my nephew who has turned twenty one
 this week!

I hope you like this project. Please don't forget to use my code NORASENTME to get an extra 15% off your entire shopping order!!!


 I thank you for taking the time to stop by. Don't forget to check out the blog this week for more fabulous inspiration from the other Design Team members!!

Have a FABULOUS day!!


Tuesday, March 24, 2020

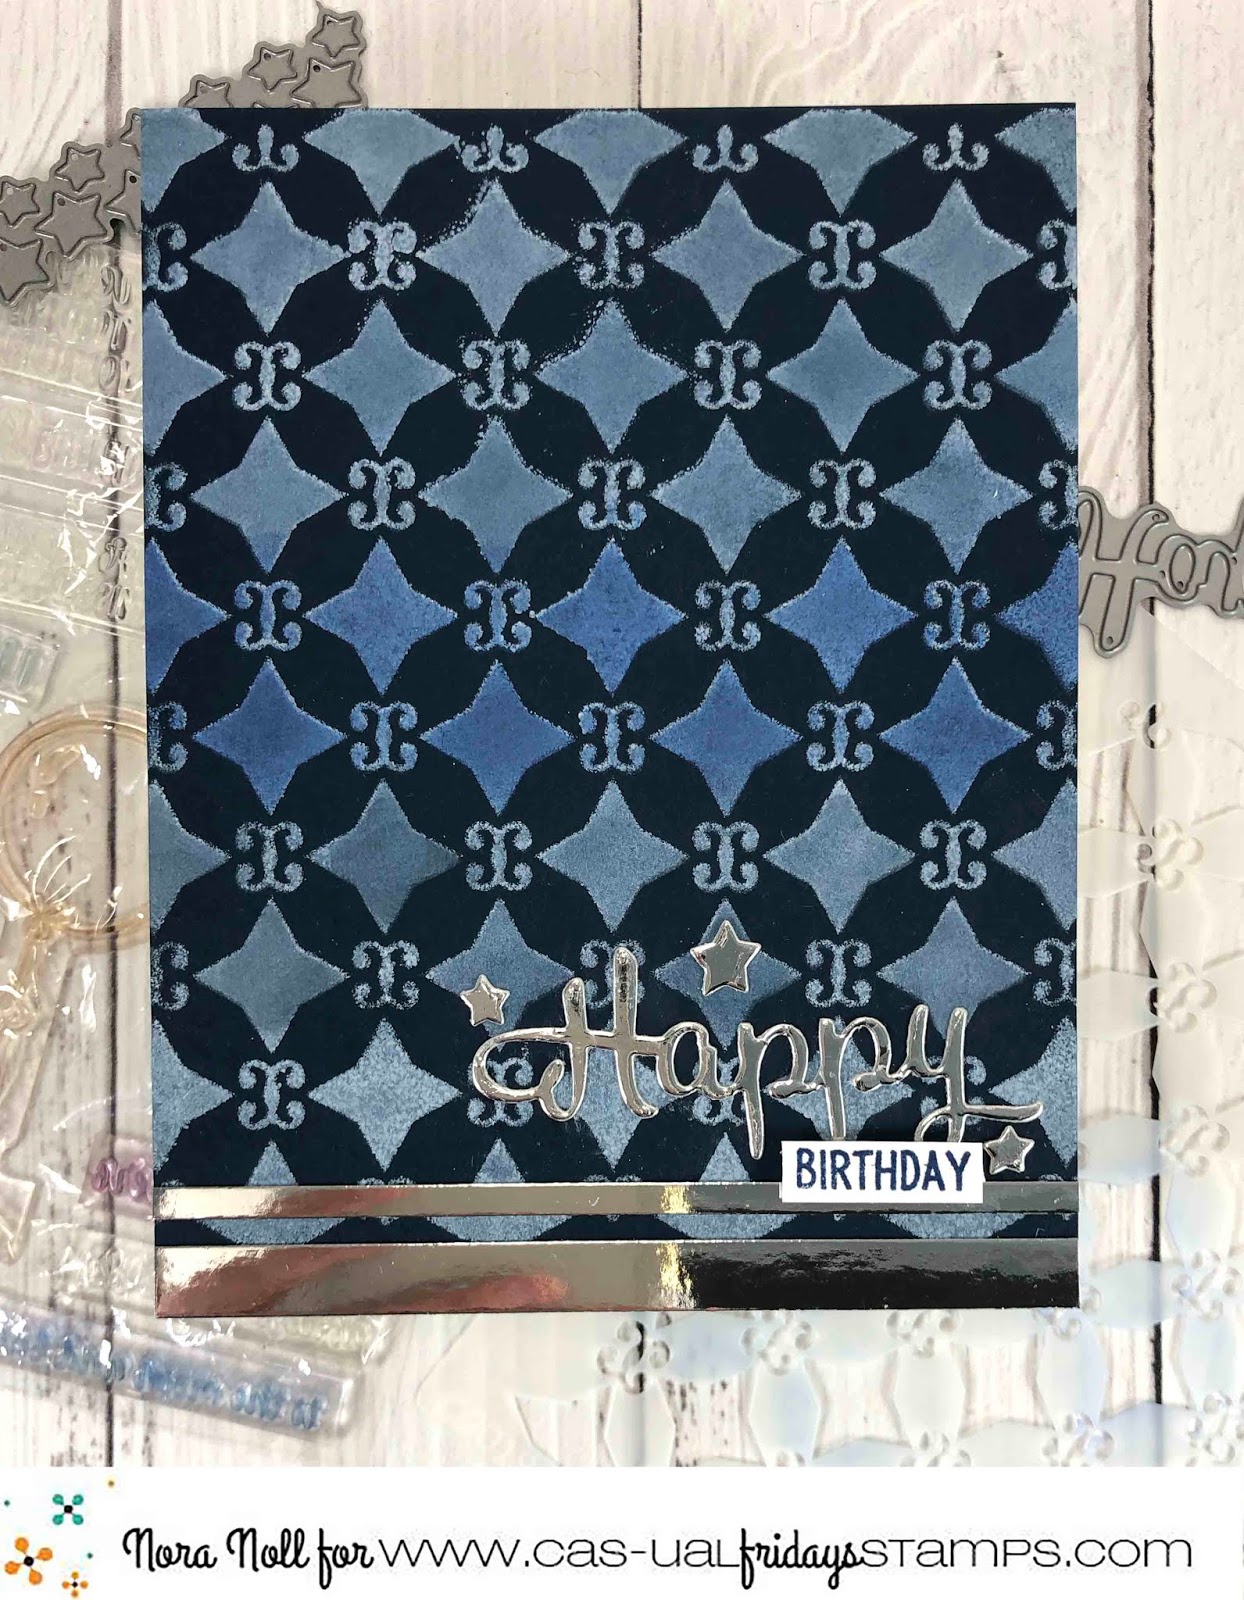
Happy Birthday using a Stencil Technique on Dark Cardstock

Hi everyone!! Nora here from A Creative Touch with a masculine birthday card using stencils on dark cardstock.

Stamps: Somebunny
Stencils: Starlequin


I started off this card by daubing white pigment ink through the Starlequin stencil onto navy blue cardstock. I tried to cover the blue paper with as much white as I could get onto it. Next I heat set the ink with a heat gun.


I then used blue dye ink and foam daubers to blend three different colors of blue over the white, creating an ombre look. Just make sure that the pigment ink is dry because you do not want to contaminate your ink pads.


I left the bottom white as I knew that I was going to cover most of it up with the sentiment. 


Using the Happy Hanukkah Fri-die, I die cut "happy" out of silver cardstock and used a trimmer to cut two different width strips.


I adhered both strips of cardstock to the bottom of the card, and added the sentiment above.


I masked off sentiment from Somebunny and used blue dye ink to stamp"birthday" onto a white strip. I used foam adhesive to adhere it to the card.


The card still needed a little something so I die cut some stars out of silver using the Fun-Fetti Fri-dies and adhered them around the sentiment. 


This was a really fun card to create and I urge you to give this technique a try.

I hope that I inspired you today and don't forget to use my code NORASENTME for 15% off in the CAS-ual Fridays Store.


 I thank you for stopping by today. I hope you have a FABULOUS day!!