Translate

Showing posts with label Happy Hanukkah. Show all posts

Saturday, December 4, 2021

A Happy Hanukkah Card

Happy Hanukah my friends!! It is Nora, here from A Creative Touch on the blog today with a festive card to celebrate this holiday of lights.


I started off my card by blending blue ink through the large star on the CAS-Fridays Jewish Star Stencil. I masked it off with tape so that I would only get the ink inside the part of the stencil I wanted. 


I then masked off the star and applied blue texture paste over the top. I utilized the same stencil but used the star strip on the left. I wanted a tone on tone effect that I could get using both the ink and the texture paste together. The texture paste was just a tad bit lighter so that it can be seen over the dark blue of the ink blending.


While my star was drying, I prepared my background. I used my FAVORITE CAS-Fridays stencil, Swirls Stencil, and blue glitter glue to make all the sparkly dots on a die cut, white rectangle. I have used this stencil on SO MANY cards and out of all the stencils I own, I have played with this stencil the most.


I set this panel aside to dry, and die cut the sentiment using the Happy Hanukkah dies. 


I decided to use a silver glitter cardstock to give the sentiment some visual weight because I was using so much blue on this card. I first tried a white glitter die cut but it blended into the background too much.

 
When all the pieces were dry, I put the card together. I adhered the swirls background over an A2, white, top folding card base. I then used foam adhesive to adhere the Jewish Star to my card front. My last step was to adhere the glitter sentiment over the star and my card was complete.


I was not sure where I was going when I started my card but I love the way it came out. I hope this inspires you to use your stencils and dies together.

The two stencils and the die cut for the sentiment are available in the CAS-Fridays Shop. Please use my code NORASENTME to get an extra 15% off your total order!!!


I thank you for taking the time to stop by. Please be sure to check in to the blog this week for some more fabulous creations from the Design Team. 


Thursday, December 2, 2021

Layered Regal Flocked Happy Hanukkah Shaker Card!!


Hello Crafty Friends!! 
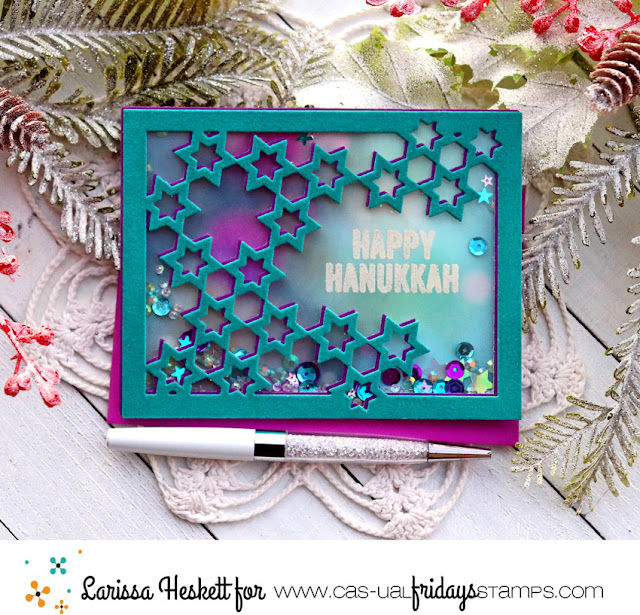
Larissa here today with a Layered Regal Flocked Happy Hanukkah Shaker Card!! I'm NOT ready for Winter yet, but I am in the mood for using my Products to create some of the Winter Cards I'm going to need!!

SWOON!! Doesn't this SCREAM Regal!!?? I LOVE the Color Combo and with the Flocked Texture and the Sparkle and Shine from the Sequins reminds me of the Gems and Gold!! PERFECT for the feeling I'm going for, Made for a King!! 


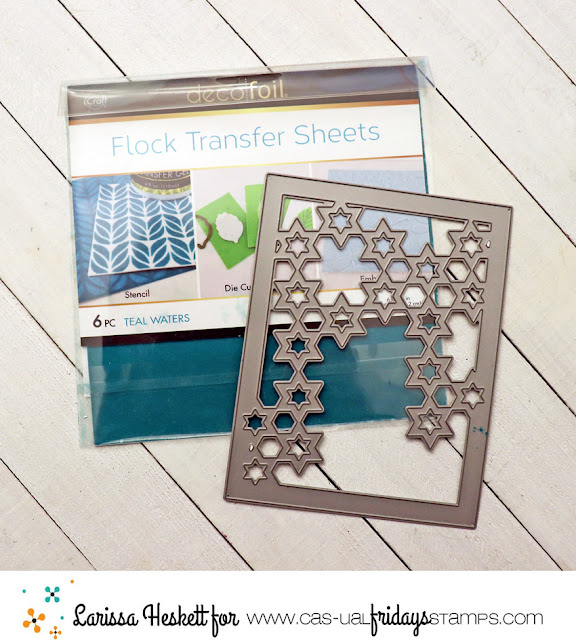
So when I think of the Star of David it makes me think Regal so I decided to use the Deco Foil Flock Sheets in Purple Punch along with the Double Sided Foam Adhesive Sheets to create the STUNNING Stars A2 Panel!! 

I then repeated the same process only this time I used the Deco Foil Flock Sheets in Teal Waters!! 
I like to leave the Die Cut Panel in the Die as it makes it alot easier to add the Acetate onto the back of it without distorting it in anyway!! As soon as the Acetate is adhered to the back I cut down some Foam Tape into strips and added it to the outer frame of the Card to build my Shaker Window!! 
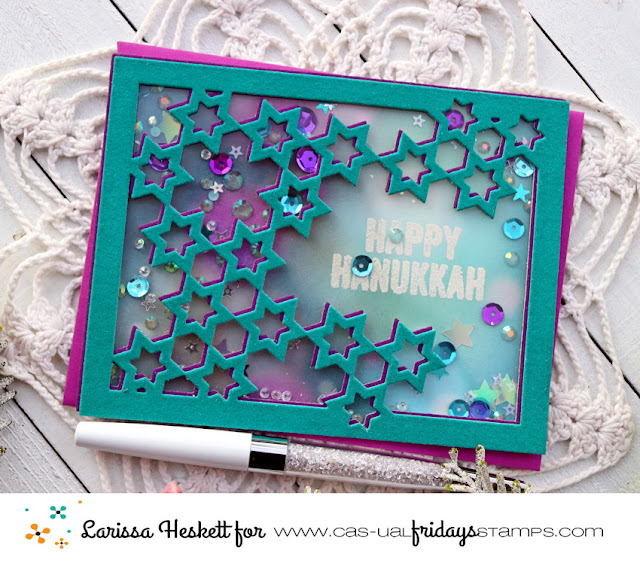
I found this Bokeh Patterned Paper in my stash and wanted to use it for the background of my Shaker Card, but first I needed to Stamp and Emboss the Sentiment!! I used the Star of David Stamp Set and some Ranger Vintage Pearl Embossing Powder!! It matches perfectly with the Bokeh Design of the Paper and adds a touch of Sparkle too!! 
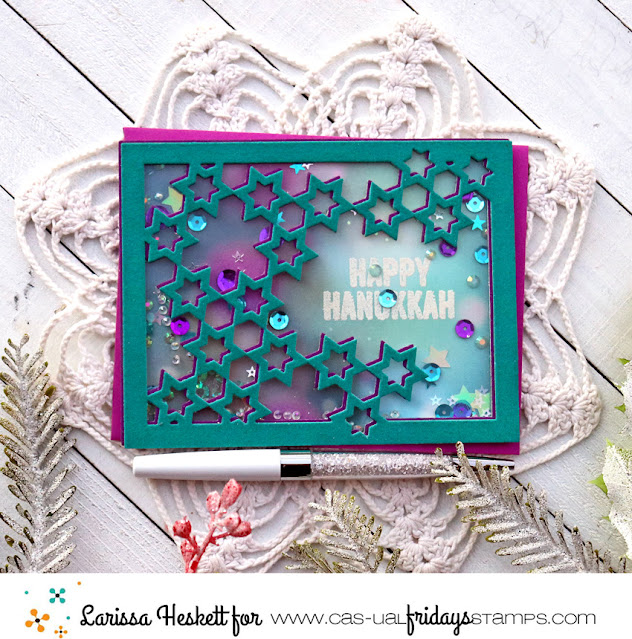
I added a mixture of Sequins and Jewels and then adhered the Stars A2 Panel and the Background Paper together creating the Shaker Card!! I adhered it onto and Top folding Cardbase and I LOVE the way it turned out!! Full of Texture with the Deco Foil Flocking Sheet and then the addition of the Sparkle and Shine from the Shaker Elements just makes this Card SPECIAL!! 
THANKS SO MUCH for stopping by today and I hope you'll give Deco Foil Flock a try with your Intricate Dies!! I ASSURE you, you'll LOVE it too!! Have a FABULOUS WEEKEND!! 

LARISSA   =) 

 Use my discount code LARISSASENTME, to save 15% off on all of the goodies in the 
CFS Shop!!


Sunday, December 8, 2019

A Sparkly Happy Hanukkah!


Lisa from Life of a BZScrapper here!  It is the holiday season and I thought I'd share with you a quick (and quite sparkly) shaker using some of the vast array of Judaica themed stamp and die products in the shop!

Have you seen the awesome A2 panels in the shop?  This is the Stars A2 Panel and I love that it covers the entire front of an A2 card just like the Hearts and Flakey A2 Panel Fri-Dies!  So quick and easy to create a shaker (or not!).


Just cut an A2 Panel, adhere some acetate to the entire back and add foam tape around the outside.  All that's left to do is choose your "filling" and pop it over the top!  I mixed up some of my sequins and beads from my stash and added a few of the glitter paper Star of David cuts that were left after cutting out the panel.

I added my sentiment using the Star of David Fri-Die as a backdrop and then cut the Happy Hanukkah from white cardstock three times and stacked them for dimension.  It also helps the sentiment to stand out against that busy backdrop.


I always add a few sequins to the front... as if they've escaped!

And that's me for today!  Thanks so much for stopping by and I hope you enjoyed your visit!  And don't forget to visit the CAS-ual Fridays shop for all of your Hanukkah and Judaica themed crafty items ... and then some!


Monday, September 16, 2019

Regal Flocked Happy Hanukkah Shaker Card!!

Hello Crafty Friends!! 
Larissa here today with a Hanukkah Shaker Card!! I'm NOT ready for Winter yet, but I am in the mood for using my Products to create some of the Winter Cards I'm going to need!! 
So when I think of the Star of David it makes me think Regal so I decided to use the Deco Foil Flock Sheets in Purple Punch along with the Double Sided Foam Adhesive Sheets to create the STUNNING Stars A2 Panel!! 
I like to leave the Die Cut Panel in the Die as it makes it alot easier to add the acetate onto the back of it without distorting it in anyway!! As soon as the Acetate is adhered to the back I cut down some Foam Tape into strips and added it to the outer frame of the Card to build my Shaker Window!! 
I found this Bokeh Patterned Paper in my stash and wanted to use it for the background of my Shaker Card, but first I needed to Stamp and Emboss the Sentiment!! I used the Star of David Stamp Set and some Ranger Vintage Pearl Embossing Powder!! It matches perfectly with the Bokeh Design of the Paper and adds a touch of Sparkle too!! 
I added a mixture of Sequins and Jewels and then adhered the Stars A2 Panel and the Background Paper together creating the Shaker Card!! I adhered it onto and Top folding Cardbase and I LOVE the way it turned out!! Full of Texture with the Deco Foil Flocking Sheet and then the addition of the Sparkle and Shine from the Shaker Elements just makes this Card SPECIAL!! 
Here's a Close up so hopefully you can see the details alittle better!!??

THANKS SO MUCH for stopping by today and I hope you'll give Deco Foil Flock a try with your Intricate Dies!! I ASSURE you, you'll LOVE it too!! Have a FABULOUS WEEKEND!! 

LARISSA   =) 

 Use my discount code LARISSASENTME, to save 15% off on all of the goodies in the 
CFS Shop!!

Friday, November 9, 2018

Happy Hanukkah Mixed Media card

Hanukkah is just around the corner and as CAS- ual Fridays have the most beautiful Hanukkah stamps and Fri- dies this is a time to get yourself a few new items from the shop and to make a few new Hanukkah cards.
This time I decided to stay with die cutting  only and there is no stamping on this new card. But then there are a few background techniques that can be useful for non  stamping crafters or for these who want to make a set of cards with just dies and to try some Mixed Media easy techniques.


This card was made over the thick white cardstock without any patterned paper (not so much of  Hanukkah cardstock can be found in the shops).
I tried to stay in our traditional Hanukkah colors of blues and silver, but believe me you can use purples and gold, black and white or even reds and oranges of candle flames.
This is how it looks from the side: flat and fits the regular cheap mailing envelope.


And here is the main part- with both CAS- ual Fri- dies.


I used two sets of dies for this card: the first is the new and just released Happy Hanukkah Fri- dies set and the second is the older,but still much loved Happy Hanukkah Fri-n dies set.


Happy Hanukkah


And I made a full step by step photo tutorial for you all too.

1.Cover the card front with 3 strips of painters tape (repositionable tape to use for painting lines).


2.Use inks (I used American Crafts Mixed Media inks for this card) to ink the first strip on the card and then move the strips and ink all other parts with different blue ink colors.


3. Die cut the Star of David as shown and then arrange it inside with colors in the different spots.


4. Cover the card front with the stencil and use translucent texture paste over the stencil.
Let it dry for a few minutes.


5. Heat the dry paste and use silver foil and bone folder to add some distressed silver foil over the stencilled parts. This is not the usual way to use the foil, but  it worked without any laminators or other fancy tools. Anyway all I wanted is the get some silver over the texture paste lines, not to foil the stamped images.


6. Add some silver glitter drops over the die cut star as shown and let them dry.


7. Die cut the Happy Hanukkah and heat emboss it using VersaMark ink and glitter blue embossing powder.


8.Arrange the card and add more glitter glue drops over the card front.
Happy Hanukkah to you!

 I really hope that you like my Hanukkah card and my small tutorial.

And if you want to buy our fantastic Hanukkah dies in the shop- here is my discount code  for you to use:

See you soon again  with more CAS- ual Fridays inspiration!

Irit