Translate

Showing posts with label valentine's day. Show all posts

Friday, February 14, 2020

You've Got Me Floating On Air - A Valentine's Day Card by Maria

HAPPY, HAPPY VALENTINE'S DAY!    Maria here on the blog with you today with a cute Valentine's Day card showcasing the Somebunny and Floating stamp sets.


Before I proceed with my project, I'm just curious.  Who's going out to dinner tonight to celebrate this occasion?  My hubby and I don't normally go out on Valentine's day.  He makes me a special dinner instead and it is sooooo much better than being in a restaurant because he is such a great cook!   For dinner tonight, hubby is making me Roast Duck with Black Cherry sauce.  Yum!  

Okay, before I get hungry and start looking for an unhealthy snack, I might as well explain how I made my card.  

to begin, I cut a 5 x 7 Bristol smooth white card stock and inked up the panel with my clouds and grass stencils, and distress oxide inks.  I set this panel aside to dry.

I stamped the images on some Neenah solar white card stock and used my TriBlend alcohol markers to color them in.  I fussy-cut the images with my Honey Bee scissors and adhered them together with liquid glue.

I adhered the images on the colored panel and added this to a 5x7 card base.

The sentiment was stamped with versamark ink.  I sprinkled some white embossing powder and heat-set with my heating tool.  I foam-mounted this piece on my card to give it more depth & dimension.  Here's my card:


To finish my design, I adhered the yellow stars and added a red heart on the bunny's chest.   Here's a closer look:


I hope you like my Valentine's card today.  The supplies I used can be found on the Cas-ual Fridays online store.  Please don't forget to use my coupon code below for 15% off your order.


Thanks for stopping by and have an amazing day!


Monday, January 13, 2020

Creating a Background Using a Sentiment Stamp

Happy Monday everyone!! Nora here from A Creative Touch. It has been a long time since I have created a card. I needed a challenge so I decided to create a background with just one sentiment stamp from the Love Notes stamp set.


I used hugs and kisses symbols from the stamp set and stamped them randomly in different color reds across a white cardstock background.  


Next I die cut the panel and adhered it on an angle to an A2, top folding card base. I adhered the negative "frame" that I usually would throw out over the top of the angled panel.


I then die cut the "happy" using the Happy Hanukkah Fri-dies out of red cardstock and adhered it to the card front. 


Using the Love Notes stamp set again, I stamped the sentiment with black dye ink onto a white cardstock strip. I adhered the strip onto the card front using foam adhesive.


My last step was to adhere Fun-Fetti Fri-Die hearts that I had die cut in pink and red under and over the sentiment. I used a clear shimmer pen to give the little hearts some sparkle and then covered them with Glossy Accents. 

I hope this card inspires you to take a look at your sentiment stamps and create a fun background of your own. Please leave a link because I would love to see what you made.

If you would like to go shopping, there are some sale items still in stock at a FANTASTIC price. Use my code NORASENTME to get 15% off your total order.


I thank you for taking the time to stop by today. Have a FABULOUS week!!


CAS-ual Fridays Products Used for this Card:


Thursday, January 24, 2019

You Have My Heart

Hello everyone!! Nora here from My Creative Touch with a Valentine card using the smaller images in some of the stamp sets. Smaller images often get ignored but are really fun to create patterned papers.


I started off by creating a sketch for this card as a start off point. 


I knew I wanted to use the little envelope stamp from the Special Delivery stamp as an accent and this was the starting off point for creating the whole sketch.

I stamped the background using the small heart stamps from Bushy Tailed and Calm and Loving stamp sets. I stamped the outline hearts with three different pinks and the solid hearts with red.


The banner and sentiment are also from Bushy Tailed. The heart, the banner and the envelope are all popped up over the die cut circle with foam adhesive. 

This is a great template to make a bunch of other cards and I will be using the rest of the tiny envelopes to create some more this week. I hope I inspired you to take a different look at your tiny stamps in the stamp sets you have.

I hope you have a FABULOUS day. I thank you for taking the time to stop by.


Sunday, January 6, 2019

2 Cards Same Style with Somebunny Stamp Set by Maria


Hello CAS-ual Fridays fans!  Maria here on the blog with you today and I am so excited to be sharing two cards with you for my first post in 2019.  

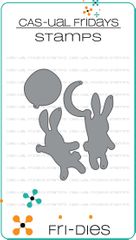
For today's project, I am showcasing the Somebunny stamp set and dies.  Here's what they look like:


I wanted to create a shaker card for my first project.  I inked up Some Bristol smooth white card stock with my distress oxide inks.  I used a stencil from my stash to add the stars on the background.  I then used a double-stitched heart die to cut out the middle piece.  I adhered some acetate sheet onto the window and created my well using foam adhesive.  I added some gold confetti sequins and adhered this piece onto my card base.

I stamped the two bunnies from the Somebunny stamp set with memento ink and I did some simple Copic coloring.  I die-cut the images with the coordinating dies.  I adhered the bunny on my foreground and added the little stars.


To finish my design, I stamped the sentiment on my card and added some white dots using my Sakura gel pen.  Here's a closer look:


For my second card, I wanted to create the same design but use a different stencil.  I used my Tumbling hearts stencil and inked up the background with my distress oxide inks.  I used the double-stitched heart die again to die-cut the middle piece.  I adde some foam adhesive onto the back of my colored background and adhered this piece on my card base.  I also adhered the bunny with foam adhesive.


To finish the design, I added some white dots with my Sakura gel pen and stamped the sentiment.  Here's a closer look:


I used the same designs on both cards but they look completely different.  Which one is your favorite?  Here's anotehr look:


I hope you like my cards today.  Please don't forget to check out the sales going on right now at the shop.  Don't forget to use my coupon code below to get an additional discount off your pruchase.  Have an amazing day and happy crafting!