Translate

Showing posts with label Casual Trees Fri-Dies. Show all posts

Friday, August 28, 2020

What would I do without you??

Hi there everybody and welcome to the CAS-ual Fridays Stamps blog! Its early Saturday morning for me here in New Zealand and I'm glad the week has finally finished, although I have lots to do over the next two days. The weather is looking fantastic, so hopefully when the weekend arrives for you, you too will have lots of sunshine!

I've got a card to share with you today using lots of cool blues and mint/turquoise colours. I find these the most calming and relaxing, and after the week I've had, working with these hues helped me to slow down a little. I totally admit that I find it very hard to stop, let alone sit down and its something I really need to work on before my body stops on its own....:


I just love that even though these dies and the floral stamp set are older, they still bring me so much joy and I can still find so many ways to use them. That shows what fantastic designs they are and are 'classics' in my stash.

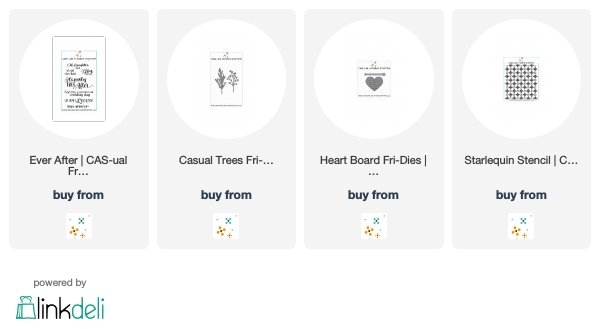
I used the Casual Trees and Bubble Box Fri-Dies along with the Mon Ami and Terrific Flowers stamp sets. It makes me so excited when I can get so many different products on one card! To find out how I put this all together you can pop over to my blog HERE.


I used up lots of cardstock scraps when making this card and hopefully it gives you a few ideas on how to use your stock-pile, which we all seem to have.... Enjoy your weekend and I'll see you back here next month with some more card making ideas.

Take care
Shona


Wednesday, August 26, 2020

Fall Card

Hello my crafty peeps!  Who else is excited for fall?  I am so over this heat and I can't wait until the weather cools off for a bit.  

For my card today, I am showcasing the Casual Comfort stamp set and Casual Trees fri-dies along with the Sweet Friend fri-dies and a retired A2 Tin Roof cover plate.


I started by embossing my background panel using the Tin Roof cover plate die.  I did this to create some subtle texture to my background.  I adhered this panel on an A-2 size card base.

Next, I die-cut the branches using the casual trees fri-dies a few times.  I placed the negative back in my Misti stamping tool and position the positive die-cuts and stamped the images.  

I die-cut the bow using a die from my collection and adhered them all together with liquid glue.


I adhered the focal image onto my card with liquid glue, and added the "hello" die-cut from the Sweet Friend fri-dies.   Here's another look:


Here are the supplies:


I hope you like my card today.  Please don't forget to use my coupon code below for 15% off your order.


Monday, August 24, 2020

Hello Wow Changers!


Hello all!  Lisa here and today I'm sharing a card using a couple of the fantastic new Wow products now available in the CAS-ual Fridays shop! 


I started with one of the beautiful florals from the Mon Ami Stamp Set.  I stamped a bunch on some Copic friendly paper and colored them in with V01, V05, and V15 Copic Markers.  Then I used the Wow Mixed Media Embossing Brush and brushed some onto the base of the florals.  You want to be sure to get a lot of the liquid off of the brush and back into the jar using the lip of the jar because some will still be on the base of the brush and will drip down.  You can always dip it in and add some back.


The awesome new Wow Changers Lightening Effects Kit is a great way to use some of the embossing powders in your stash and add a little Wow to them!  The kit is so cool!  It comes with three Changers; Glisten, Texture, and Sheen and three empty jars all in an adorable little handled carrying case.   I took some purple that I had in my stash and added a little of it and a little of the Glisten Changer into one of the empty jars that comes in the kit and shook it up and I love the effect!  I sprinkled that onto the painted flowers and heat embossed them.


I love the shimmery look it gave me otherwise solid purple powder!  So cool.  For this mixture I probably used about 3/4 purple and 1/4 of the Glisten.  In hind site I'd have used a little less of the purple.  I still have some of the mixture left and will use it again and maybe add some more Glisten Changer or maybe one of the others!  Or maybe something else! SO fun!


I created a simple background with some texture paste and the Modern Petals Stencil.  I cut out and arranged all of my flowers into a wreath form around a circle die cut.  Attached them using foam tape and then cut some of those pretty die cuts using the Casual Trees dies and some glitter paper and added those with glue around the wreath.  Finally I used the Hello die from the Sweet Friend Fri-Dies.. cut it once from glitter paper and twice more from white cardstock-stacked them together and then added them across the wreath


Had so much fun experimenting with these new products!  I'll be using them frequently for sure!

Thanks so much for stopping and hope you enjoyed it! Should you see something you need from the shop today, I have this for you:


Come again soon for more CAS-ual Fridays Inspiration!


Saturday, August 22, 2020

Don't Cry

Hi all, Vicki here today.  Today is also the Just Us Girls Challenge #550, because I am on that DT also, I decided to combine the 2.  Plus, maybe you will even join in on the challenge!

I will start off with the photo inspiration, which in turn, will show you how I was inspired.


 I instantly thought of the Cup of Coffee set, and went from there.

So, yeah I am on the trend wagon of slimline cards.  To be honest, I still am not convinced I like them. That said, I wanted to try something [I saw online], and it worked, so I went with it.  What did I try?

Extending your stencils for a background on a slimline card.  Actually, by using the Modern Pedals Stencil, it worked really easy.  Sponge the first half, move and align the stencil pattern, finish sponging the 2nd half.  Super easy.

I also used Pretty Posies  [for the cup pattern], Casual Trees Fri-Dies [for the foliage], and lastly, Coffee'isms [for the sentiment].


[Just a side note - if you use my code, you can save 15% off your purchase!]


Were you inspired by the photo?  I know most of you like coffee cards, so this should be an easy challenge!  Come on over to JUGS and play along!  I'd love to see what you create.


Thanks for stopping by~


Friday, January 3, 2020

On Your Wedding Day


Happy New Year!  Lisa here and today I'm sharing a card for a wedding and I've used lots of embossing powder on the background, sentiment and on the embellishments.  I used some gold mirror cardstock and was wondering how it would take the heat if I were heat emboss it. 

I started by creating my background using the Starlequin stencil and applied some gold embossing paste through it.  Then while it was wet I sprinkled on some Vintage Peacock embossing powder and heated it up.:


Next I die cut one of the CASual Trees Fri-dies from gold mirror cardstock, smooshed the ends onto my embossing ink pad and then smooshed them into the powder.  I didn't worry about full coverage because I like things imperfect and wanted the gold to show through.


As you can see, the mirror cardstock took the heat ok, however, some of the embossing powder seemed to slide around a bit as I heated it.  After it cooled, I applied more embossing ink and more powder and heated it again... this time keeping the heat pointed straight down at it instead of coming from the side as I tend to do and that seemed to help more stay put.....


And this is what I ended up with... I LOVE it!   I used the same powder as in the background, Vintage Peacock, and I mixed in some plain gold die cuts for contrast in my "bouquet". I love imperfect things in my project, but if you don't, then you may want to use plain cardstock for this technique for more even coverage of the embossing powder and you can just keep adding more until you get the look that you like!
  

I love to cut apart the branches of this CASual Trees die cut so I can make a full "bouquet" and love how it coordinates perfectly with the background.  The heart from the Heart Board Fri-Dies is perfect as a vase.


I embossed the sentiment from the Ever After set in white onto some teal cardstock and added a matte of the gold behind it, tucking a few more of the branches from the CASual Trees die cuts in the corner.
  

I'm playing along with the Wow Embossing Powder January Challenge which is Love/Valentines Day/Wedding/Anniversary.  I've got that covered!

If you entered the giveaway for the Season's Giving Blog Hop, be sure to stop back tomorrow to see if you were a winner here at the CAS-ual Fridays Stamps Blog!  And if there are things that you need from the shop, I have this for you:


Thanks so much for stopping by!  Come back again soon for more inspiration!

Below are links to the CAS-ual Fridays Stamps Products I used today:


Thursday, September 26, 2019

An Autumn Hello With Distress Oxide Die Cuts


Lisa here and today I'm sharing a card I made using all Die Cuts... not a stamp to be seen!  And CAS-ual Fridays has some of the best in town!

I started with a neutral but beautiful background layering a base of Kraft with a Kraft layer of the Trellis Cover Die.  When it came time to cut the pieces of the Acorn Fri-Dies I thought I'd use some pretty design papers, but they were too distracting... cardstock was too flat... so I pulled out a 6X9 piece of white cardstock and a bunch of autumn colors in Distress Oxides and decided to make my own:


I started with some Antique Linen and Brushed Corduroy that I applied to the whole sheet.


Then I added some Fossilized Amber to the entire sheet except for one corner that I wanted to leave very light for the bottom part of my acorns and I wanted an area with some green for some of the leaves, so I added the bundled sage just to one corner.


I added Rusty Hinge and Vintage photo (for some leaves) to all of the areas except where the Sage and Antique Linen areas were.  And for my acorn tops and leaf veins I darkened up an area with the Ground Espresso.  So I had all of the colors I needed on one sheet and slowly started taping down the dies to the colors I wanted and ran them through my Gemini.


And I ended up with all of these!  And my favorites are the ones that overlapped the various color "blocks"


I cut a large Scallop Tag from some cool "graph paper" patterned design paper.  Added my leaves and acorns and splattered some gold, bronze and white glitter watercolors over the whole thing.  Then I added and a gold Hello using a die from the Sweet Friend Fri-Dies across them, using popup tape, cut very thin in the middle to support it.


I also cut a couple of the Casual Tree die cuts from some darker kraft and added those to my foliage clusters.


And I still have lots of die cuts left over for another project!  You'll be seeing that soon!

In the meantime, if you've seen something you must have today, I have this for you:


And there are lots of awesome things on sale here!