Translate

Showing posts with label Garden Fri-Dies. Show all posts

Sunday, November 8, 2020

I Say Bad Words


Welcome back!  I've got some more Caffeine for you today using some of my favorite CAS-ual Fridays products (including some that are on sale!)  We are in the middle of the week long celebration of all things Coffee, Tea or Cocoa that is the Coffee Lovers Blog Hop!  And CAS-ual Fridays is a Super Sponsor once again.

Here's how I was inspired:


Have you seen the new Pinked Slimline Dies?  Love them!  That fun pinked edge on the largest die is so fun!


I started by cutting the To Go Cup base from Copic friendly paper and stamped that beautiful Fox from the Foxy Stamp Set directly onto it with Memento Ink and colored it in with Copic Markers.  I cut the lid from some design paper.

Next I stamped the sentiment from the Hot Coffee Stamp Set.in brown ink and then cut out some of the lines from it in strips and the last line was fussy cut.  Then I cut the Coffee word from the Coffee Cup Die Set twice from white and once from brown cardstock and stacked and adhered them together.

I cut the flowers and leaves from the Garden Die Set and layered the flowers with glue.


I used the dies from the Pinked Slimline dies to cut a white base and the design paper layer.  I cut a layer 1/8" larger than the design paper layer with a paper trimmer to create a small thin border between the other two layers.  I cut a strip in white large enough to layer my sentiment on top and a strip in brown 1/8" larger.  And finally I assembled all of my pieces and added a few sequins to finish it off!

Now!  There is a sale going on in the shop on all Coffee items as well as a special clearance section.  (You will find the Foxy stamp and Garden dies in the clearance section at half off!)  No code needed for the sale.  And should you decide you need something, you can also use the code LISASENTME for an additional 15% off of your order!


And don't forget to head on over to the Coffee Loving Cardmakers Blog and check out the Day 1 post of the Blog Hop for all the details including sponsors, prizes, inspiration and how you can link up a new Coffee, Tea or Cocoa themed creation to play along and have a chance or chances to win some great prizes!



Sunday, August 16, 2020

Playing With Pattern


Hello everyone!! 
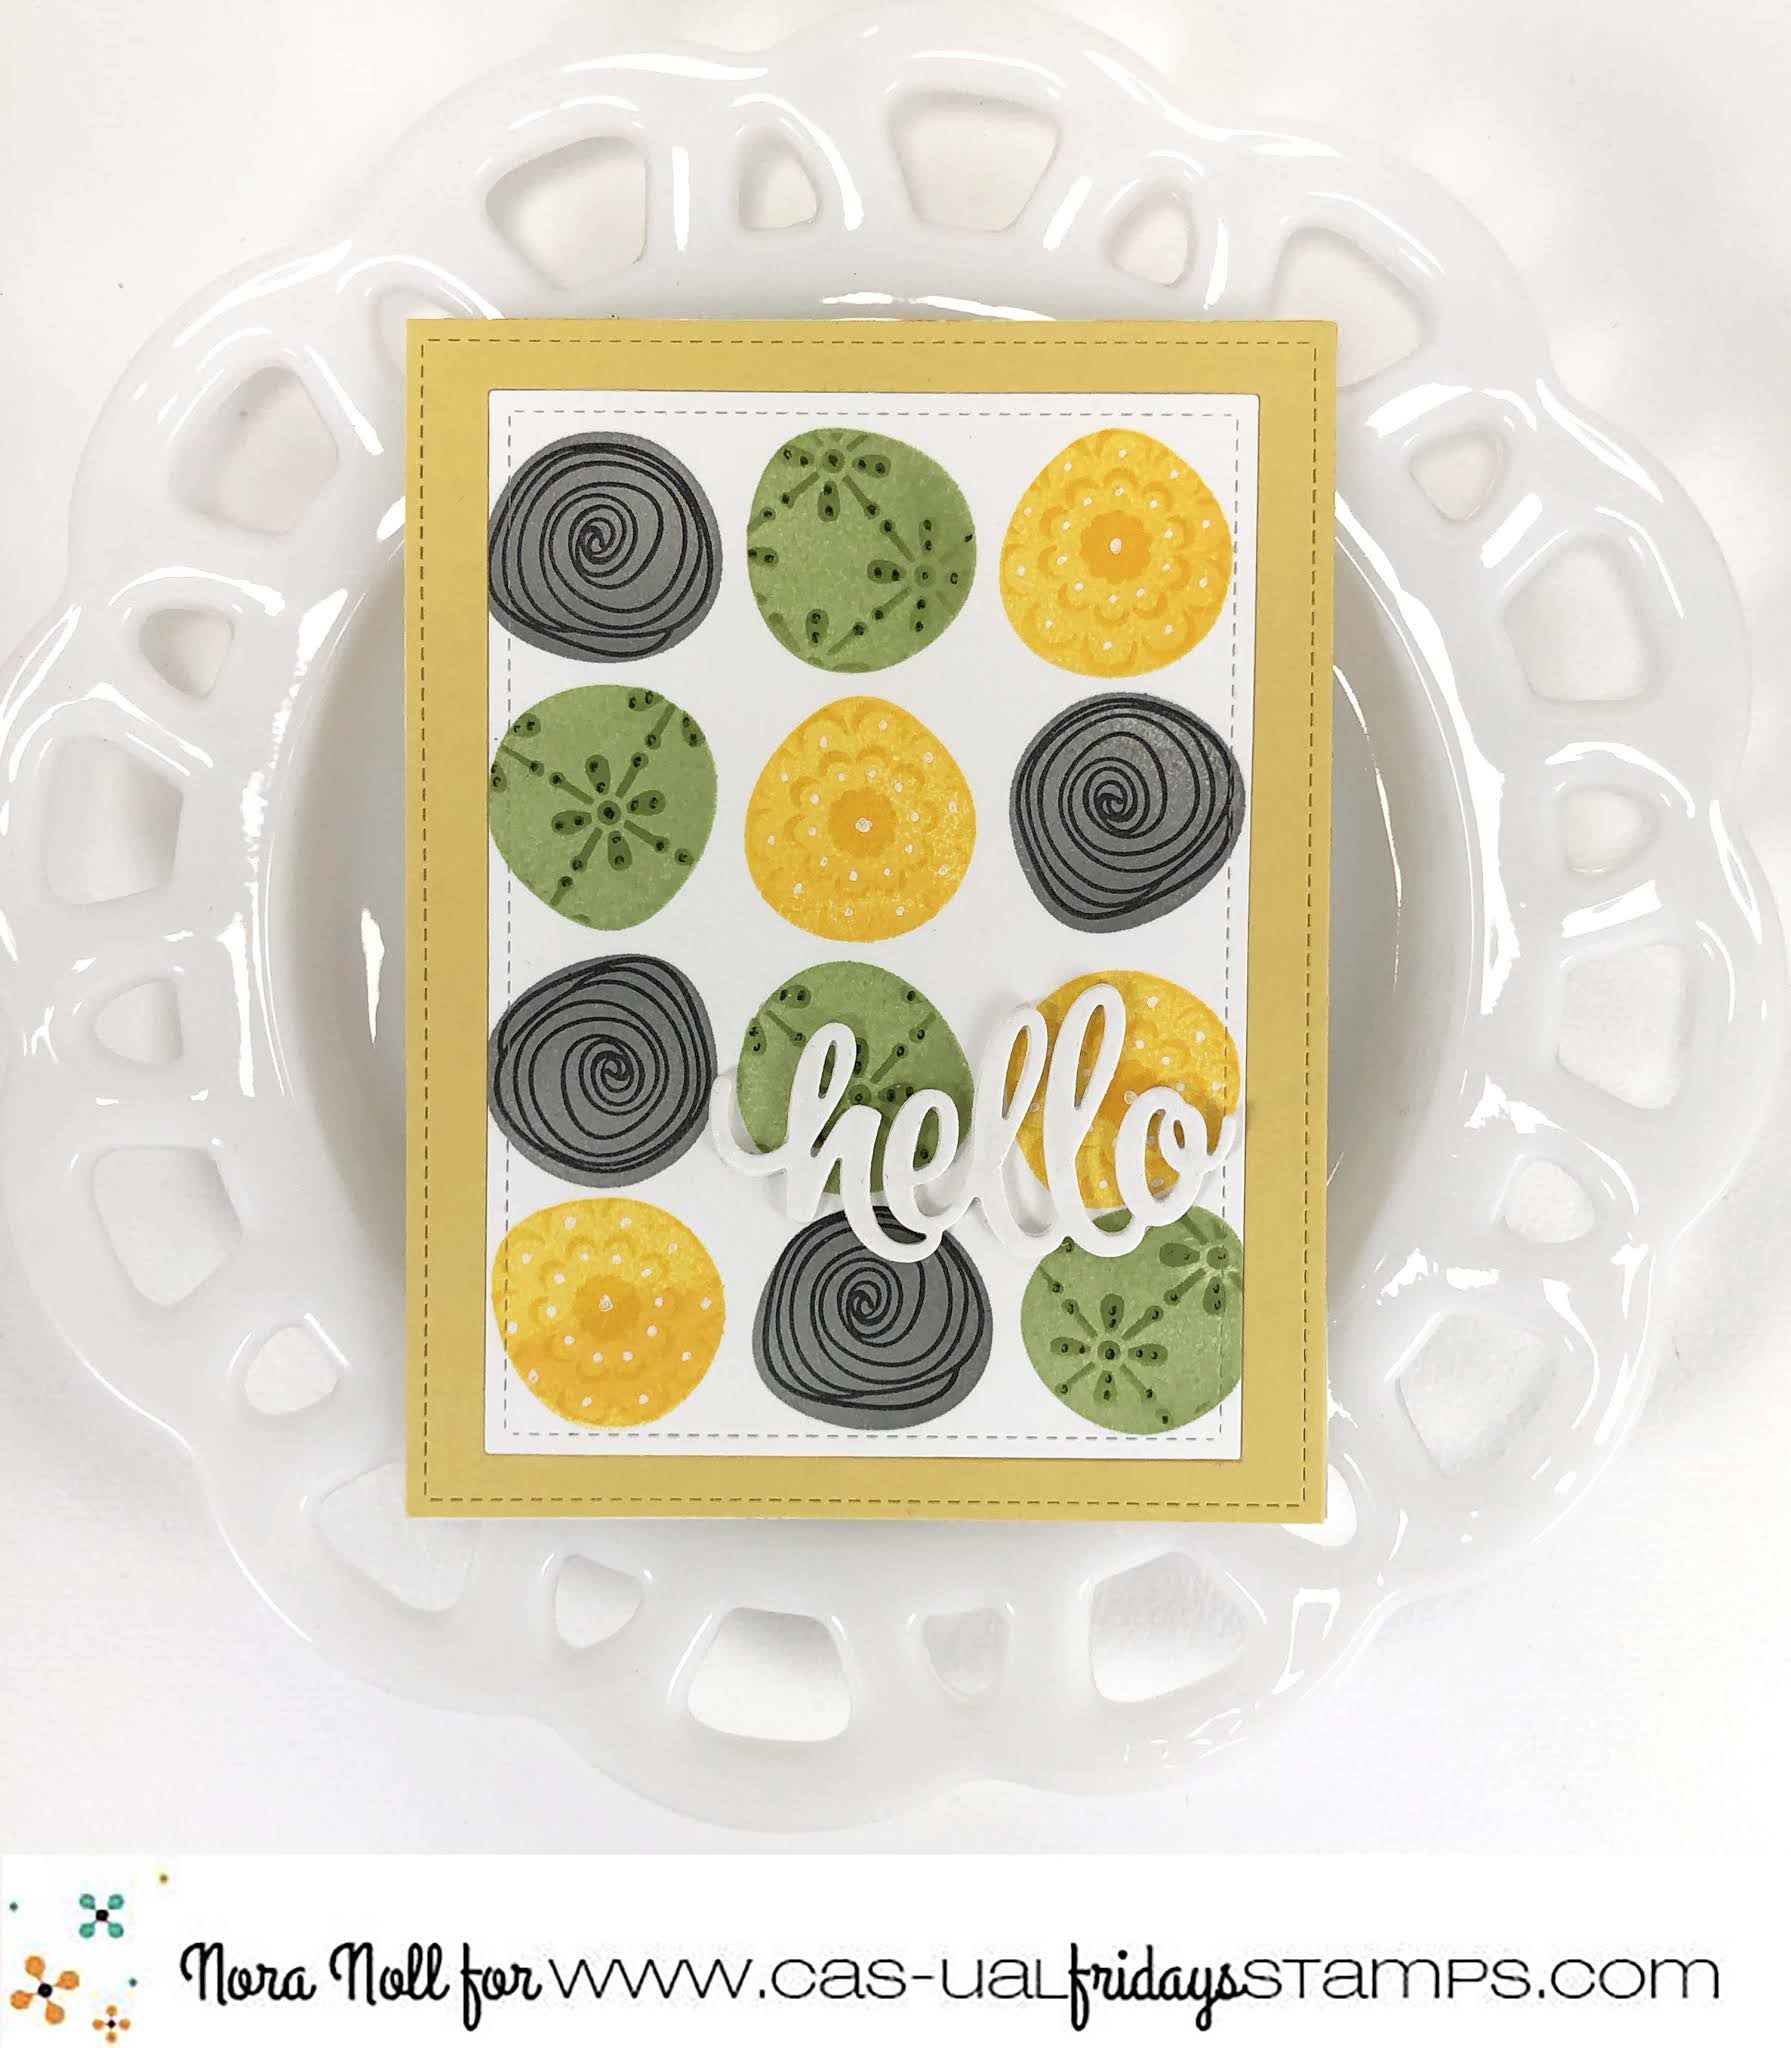
Nora here from A Creative Touch with a fun hello card inspired by a print I saw on Pinterest. 


I don't know about you but I am OBSESSED with patterns. I have a great Pattern Board on Pinterest and I constantly pin ideas that I think I can use to create a card. The print that inspired this card is one that can be found here.

I began this card by using scrap paper and stamping the solid flower stamp from Peaceful Garden using the three colors I thought I might use. 


When I got the design down how I wanted it, I started on my final version of the card.  Again, I used the solid colored flower from Peaceful Garden and stamped twelve solid images-four in yellow, four in green and four in gray-on a white piece of cardstock.


When that was complete, I then stamped the rose image from the same stamp set over the top of the gray using black dye ink. I thought the stamp was perfect for what I had planned.


To decorate the green and yellow solid circles I used stencils. 
I die cut a mask out of a post it using the Garden Fri-dies and used the Bold Flower Stencil with yellow ink to stencil over the solid yellow image.


I then used the Tin Roof Stencil with green dye ink to decorate the solid 
green stamped images.


I die cut my finished panel with a rectangle die and used gel pens in white and green to give the stenciled images a little bit more emphasis.


I added the panel to an A2 sized, top folding card front and framed it with a yellow 
cardstock frame.

 
I added a hello sentiment using the Sweet Friend Fri-dies that I had die cut four times out of white cardstock and adhered together. Adhering die cuts together makes the sentiment sturdier. My last step was to cover the sentiment with clear sparkle pen.

This card was so fun to create and I love that I used a TON of products. I don't know about you, but I tend to buy more than I use so when I can combine my love of stamping, stenciling and die cutting on one card, I always have a fun time. 

Speaking of shopping, use my code NORASENTME to get 15% off your TOTAL ORDER. 


There are some fun, new products that CAS-ual Fridays is stocking so be sure to take a look.

I want to thank you for taking the time to stop by. Have a FABULOUS day!!


CAS-ual Fridays Products Used:


Monday, July 6, 2020

Pattern Inspiration

Hi everyone!! It is Nora here from A Creative Touch with two cards inspired by some patterns that I found on Pinterest. Here is the link to my board: Patterns
I have been obsessed with different patterns created by flowers and leaves for fabric 
and graphic design. I thought it would be fun to makes some cards using them as inspiration.

My first card I used Peaceful Garden stamp set and Distress Oxide Inks to create the 
background pattern.


I stamped the flowers first by turning them upside down.


When the pattern was finished, I layered yellow cardstock frame over the top, added some leaves from die cut from using the Garden Fri-dies and a sentiment from Peaceful Gardens.


I finished the card off with some red sequins.


My next card was inspired by leaves. The leaf stamp from Pretty Posies was perfect for my idea.


I began the card by stamping the Oxide inks with THE BACK of the leaf stamp. 


I then stamped the leaves over the colors with black ink. I layered the panel over an A2 card base, wrapping a piece of jute around the bottom third. 


I masked and stamped the sentiment from Pretty Posies with black ink and then die cut it using a circle die. 


I then layered the sentiment circle using foam adhesive over two die cuts of orange and blue 
die cut circles.


My last step was to adhere gems around the sentiment circle. 

I hope my card inspires you to look at your stamps and see what patterns you can create with your stamps.

Want to go on a shopping spree? Use my code NORASENTME to get 15% off your total order at the CAS-Fridays Store!!


I want to thank you for taking the time to stop by. Be sure to stop by this week to see some fabulous creations from the design team!!


Stamps and dies used for my projects.


Friday, June 5, 2020

Happy Birthday Card FULL of Texture & Sparkle!!


Hello Crafty Friends!! 
Larissa here today and I've got a STUNNING Birthday Card FULL of Texture and Sparkle!! I LOVE being able to combine products and this design shows just how you can combine several for a very BEAUTIFUL Design!! 
I started by creating my background!! I LOVE that stencils can add interest, without distracting away from the Images!!  I added some Chipped Sapphire and Black Soot Distress Inks!! For some Shimmer, I added some Opalescent watercolor splatter along with some Wilted Violet and Turquoise Watercolor that I added Opalescent Watercolor too!! Its HARD to see in the photos, but in real life its SO BEAUTIFUL!! I think the BOLD background  REALLY makes the Flowers POP!! They are front and center!!  
After inking and adding the splatters, I used the Modern Petals Stencil that I sprayed the back with some Pixie Spray from Therm O Web to help hold it in place as I stenciled the design with some White Pigment Ink using an Ink Dauber!! I wanted a subtle Design so I applied the ink very light and I really LOVE the soft Blue hue that was left behind!!
For the Flowers I Stamped and Embossed the Images from the Pretty Posies and Peace & Comfort Stamp Sets!! I used WoW Glitter Embossing Powders!! Using different Colors for all of the different Images so they'd all have their own Color!! Then I used the coordinating Posies Fri-Dies and the Garden Fri Dies to cut them out!! I colored the Images with Copic Markers (Flowers: V1, V04 & V09  RV00, RV09 & RV19  Leaves: G00 & G02   YG11 & YG13   Flower Centers: YR00 & YR02) I added some Tonic Studios Morning Dew to the Centers for some dimension!! I used iCraft 3-D Foam Squares to adhere the Flowers and Leaves to my Card Panel around the Circle Die Cut I Stamped and Embossed the Sentiment on!! I used the NEW Happy Birthday Stamp Set in Navy Metallic Embossing Powder!! To finish off my design, I added a few Studio Katia Iridescent Crystals!! I really LOVE the way it turned out and I hope I've INSPIRED you to try mixing several of your Products together to create a Card FULL of Texture and Sparkle too!! 


Use my CODE LARISSASENTME and receive another 15% off ALL the NEWOLD and SALE items!! WHOOP WHOOP!! 

       THANKS SO MUCH for stopping by today and I hope you have a FABULOUS WEEKEND!! 


LARISSA  💖

Saturday, March 7, 2020

Happy Saturday everyone!! It is Nora here from A Creative Touch on the blog today with three simple Sympathy Cards and ideas on how to fix your "mistakes" on projects rather than throw 
them away.

For these cards I used the Modern Petals Stencils, the Casual Comfort stamp set, the Garden and Fun-Fetti Fri-dies


I began each card by masking a circle in the center of a piece of white cardstock and blending three colors of Distress ink-the lightest on top and the darkest on the bottom.


I then used the Modern Petals Stencil with the same inks and stenciled over the ink blended circle.


I used a sentiment from the Casual Comfort stamp set to stamp directly over the top of the blended circle. Here was where my first mistake happened. I messed up and got a bit of black which was on my finger onto the card front. It was in the Distressed area and so I could not pull the color off with anything without affecting it. My solution? Using some Fun-Fetti Flowers and placing them over my mistake.


I then added some Stickles in the middle of the flowers to give it some bling.


Can you see where I messed up? Nope!! The flowers covered the smudge up. 

For my second card, I was going to make another of the same colored card front. However, I messed up the sentiment, getting my sleeve caught on something and it stamped crooked. I was so mad!!! Instead of throwing the whole piece away, I die cut the circle out this time and mounted against a pattern paper background.


While I was mounting the sentiment, I dropped some glue onto the blended part and it smeared. Again, instead of tossing the whole thing, I made the best of it. I added some leaves from the Garden Fri-dies to hide the mistake. 


To finish my project I added some clear shimmer pen on top. Crisis number three averted!!

I was determined to get ONE card right, to just make one of these cards completely one layer but I was thwarted again. I used purple ink to blend with this time. All was going well until I noticed a purple smudge on the the left edge of the blended card front. Purple ink was on the tape I used to hold the paper down.. 


Once again, I die cut the circle out and mounted it onto a clean, white die cut panel that was adhered to an A2 card base. I then heat embossed the sentiment in white on black cardstock. I adhered the sentiments on top of the circle using foam adhesive. 


My last step was to add some Fun-Fetti Flowers around the sentiment just to spruce it up.

I hope this helps you to think of ways to "fix" any "mistakes" you might make on your projects. When you work on something for  a long time, throwing it away is just not an option!! Three cards would have been tossed if I had given up and I don't have time for that.

If you feel like treating yourself to a shopping spree at the CAS-ual Fridays Store, use my code NORASENTME for 15% off your total order.


That is all from me today. Thank you for taking the time to stop by. Have a FABULOUS day!!


Products used from the CAS-Fridays Store: