Translate

Showing posts with label Tin Roof Stencil. Show all posts

Monday, December 20, 2021

Merry Christmas


Hi All, it's Vicki here today with a last minute Christmas card - for my mailman.  [I seem to always need a last minute card for this season 😀]
 
While this card looks pretty simple, it's step induced.  I started by using the Tin Roof Stencil to create a textured background panel.  [My sandwich combo; base, plate, embossing pad, stencil, card stock, plate]  I like the texture it adds without being too distracting.  I used the negative part of the Merry Christmas Die, being sure to add the small pieces to distinguish the letters better.  I also sponged 2 small panels to put behind the negative cut.
 

Lastly, I cut 3 layers each of a snowflake from Funky Flakes Dies.  The top layer is red mirror paper for pretty added shine. I am happy with this card.  I think my mailman will like it too.

The products I used are on sale, and yep, my code works on sale items too!

Have a wonderful Season and I will see you next year~


Thanks for stopping by~

ps - I have used affiliated links in this post at no additional cost to you. 


Friday, October 8, 2021

Here for You

Hi all, it's Vicki here today and it's Breast Cancer Awareness month, so I am creating a card for that, and to also remind you to get that mammogram. 

I started by using the Tin Roof Stencil for the background panel using pink and red ink.
 
I went on to stamp [Hope Ribbon Stamp set] and emboss the  ribbon on some pink card stock, using some pink embossing powder [from my stash].  I cut it out using the Ruffled Ribbon Die. I used a sentiment from the same set. To add some fun texture I added some pearls to the centers of all the tin roof pattern.  This card is complete.  Fortunately, it goes in my stash of cards - I don't need it. YAY!

That's it for me today.  If you want, you can use my code [below] to save 15% off your purchase including the sale items!


Thanks for stopping by~


Monday, May 24, 2021

Make Pretty Things


Welcome back!  I felt the need to get my gold on for today and what's better than some coffee with that?


I started by applying some glitter embossing paste through the Tin Roof Stencil onto a die cut panel.  While it dried I assembled my cup and sentiment.


One of my favorite die sets from the shop is the To Go Cup Dies!  The wrap was cut from a previously blended and embossed piece (using the Full On Floral Stamp Set) that I saved because of course I would!  I used the colors in it to cut the cup lid and one of the base panels.  I cut the Coffee word die from the Coffee Cup die set from gold glitter paper and twice more from plain cardstock and stacked them together.  Then I stamped the sentiment pieces from the Coffee Talk stamp set and cut them in strips.


Once the paste was dry, the card was assembled and a few sequins added.

That's me for today!  thanks so much for stopping and hope you enjoyed your visit!


Saturday, November 28, 2020

We Need Each Other


Welcome back!  Today I've used one of the sweet angel stamps from the shop, Angel Hugs, along with one of my favorite stencils, the Tin Roof Stencil.  (Bonus!  They're both on sale!  Tin Roof is on sale for 30% off and Angel Hugs is in the clearance section at 60% off!)


I started by applying some Catherine Pooler Ink in All That Jazz color through the Tin Roof Stencil onto a panel.


Then keeping it in place, I applied some translucent texture paste with a spatula and then removed the stencil and sprinkled on some Wow Gold Embossing Powder... lightly and randomly so that it didn't cover the entire panel... and heated it up.  I love the way the embossing powder bubbles on the texture paste!


Then I die cut the largest Scalloped Tag and stamped the sentiment from the Angel Hugs set in the same ink that I used on the background.  I popped the tag onto the embossed panel and then added the Angel Hugs image that I stamped, embossed in gold, colored and cut previously.


I added a few flowers I made using the 4 Petals Fri-Dies.  I love that these come with multiple dies now so it's easy to create bunches!  And there is an awesome Black Friday Sale going on this weekend!


And even better, should you decide you need something, you can get an additional 15% off of the already low marked prices by using one of the Girl Friday savings codes!  Mine is below:


That's me for today!  Thanks so much for stopping by and hope you'll come again soon for more CAS-ual Fridays inspiration!


Sunday, August 16, 2020

Playing With Pattern


Hello everyone!! 
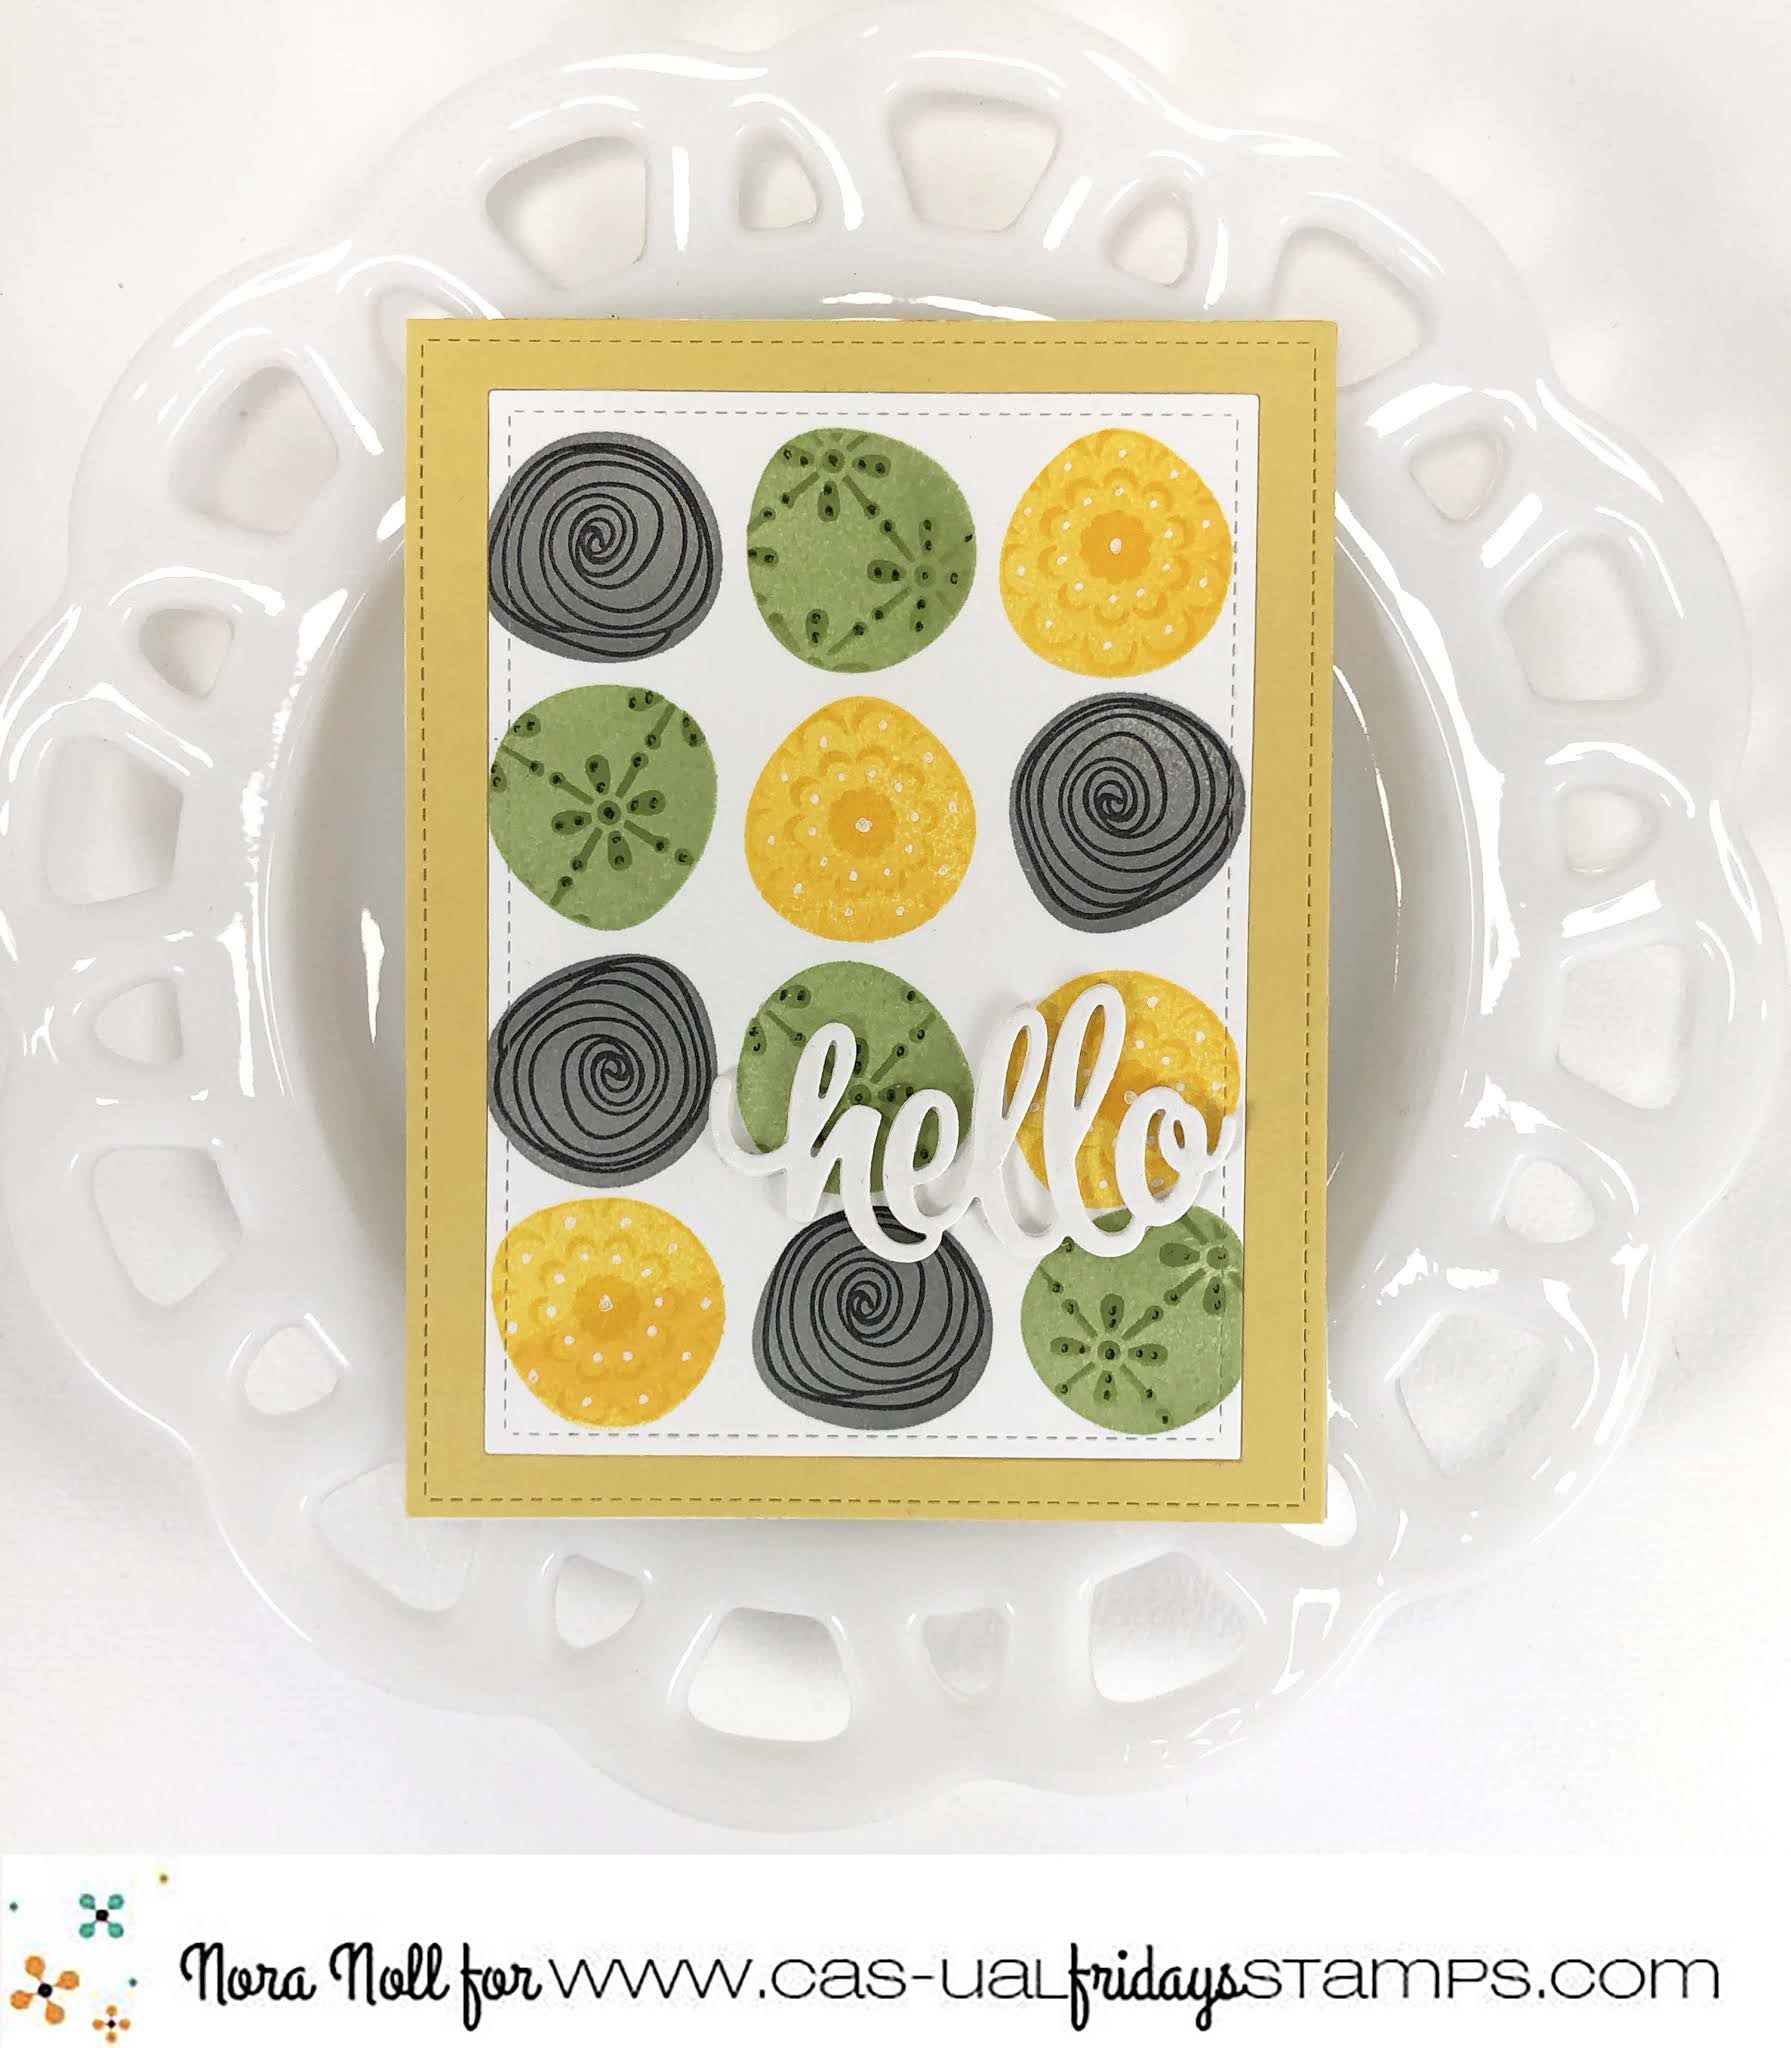
Nora here from A Creative Touch with a fun hello card inspired by a print I saw on Pinterest. 


I don't know about you but I am OBSESSED with patterns. I have a great Pattern Board on Pinterest and I constantly pin ideas that I think I can use to create a card. The print that inspired this card is one that can be found here.

I began this card by using scrap paper and stamping the solid flower stamp from Peaceful Garden using the three colors I thought I might use. 


When I got the design down how I wanted it, I started on my final version of the card.  Again, I used the solid colored flower from Peaceful Garden and stamped twelve solid images-four in yellow, four in green and four in gray-on a white piece of cardstock.


When that was complete, I then stamped the rose image from the same stamp set over the top of the gray using black dye ink. I thought the stamp was perfect for what I had planned.


To decorate the green and yellow solid circles I used stencils. 
I die cut a mask out of a post it using the Garden Fri-dies and used the Bold Flower Stencil with yellow ink to stencil over the solid yellow image.


I then used the Tin Roof Stencil with green dye ink to decorate the solid 
green stamped images.


I die cut my finished panel with a rectangle die and used gel pens in white and green to give the stenciled images a little bit more emphasis.


I added the panel to an A2 sized, top folding card front and framed it with a yellow 
cardstock frame.

 
I added a hello sentiment using the Sweet Friend Fri-dies that I had die cut four times out of white cardstock and adhered together. Adhering die cuts together makes the sentiment sturdier. My last step was to cover the sentiment with clear sparkle pen.

This card was so fun to create and I love that I used a TON of products. I don't know about you, but I tend to buy more than I use so when I can combine my love of stamping, stenciling and die cutting on one card, I always have a fun time. 

Speaking of shopping, use my code NORASENTME to get 15% off your TOTAL ORDER. 


There are some fun, new products that CAS-ual Fridays is stocking so be sure to take a look.

I want to thank you for taking the time to stop by. Have a FABULOUS day!!


CAS-ual Fridays Products Used:


Sunday, June 21, 2020

Stamp Masking and a Two For One Card

Hello everyone!! 
Nora here today from A Creative Touch with two cards I created from one panel. 

Stamps: Pretty Posies
Stencils: Tin Roof Stencil


I have been playing around with different techniques as of late. I want to stretch my stamps as much as possible so I can get more use out of them. These cards I experimented with masking. I actually had a stain glass window in my head when I started but it didn't come out as I wanted. Since it took me a ton of work to create my panel, I decided to recycle it and these cards are what were created.

To start with, I stamped the leaf from the Pretty Posies stamp set multiple times, using Post It Notes for masking.

I then used Copic Markers to color all my leaves in.


Since I did not like the way the design on the panel turned out, I decided to cut it in half to create two cards. This is a great way to use a panel if you are not satisfied with the design and you don't want to discard it.


For my first card, I matted the panel on the left in black and tied a piece of ribbon and twine around the top third of the  stamped panel.


I used foam adhesive to adhere it over a white die cut base that I had dry embossed with the Tin Roof Stencil, and die cut with a scalloped die. 


Once again, I used foam adhesive to layer a black cardstock strip and the stamped sentiment, also from Pretty Posies, as shown.


To complete the card, I added some sequins that matched the colors I used and a bit of Stickles glitter glue in the center to give the card some shine.


On my second card, I matted my panel with a purple/blue cardstock scrap. Next I adhered it over an A2 sized, top folding card base.


I added a thin, black cardstock strip to break up the larger image on the left side, and a larger strip on the right side.


I actually cut the sentiment apart and used foam adhesive to adhere the sentiment over the right black cardstock strip.


My last step was to use an Aqua Shimmer pen on the part of the leaves colored in purple and then cover these same sections with Glossy Accents. 


These were a lot of fun to create. I am actually happy with how they turned out too. I challenge you to go through your stamps and use this fun technique. 


If you are interested in this stamp set and stencil, use my code NORASENTME to get 15% off your total order. 


I thank you for taking the time to stop by. Have a FABULOUS day!!