Translate

Showing posts with label Peaceful Garden. Show all posts

Wednesday, January 13, 2021

Happy Birthday

Hi All, it's Vicki here today.  So what did you think of the new release?  Did you buy anything?  I thought it was a super fun release.  That said, I didn't use any of them for today.  I know, right?! Crazy, but I needed a change for today.

I needed a floral fix, plus I wanted to try the stamping background, and then adhering cut outs over the top of the stamping style.  I used the stamp set Peaceful Garden, [on clearance]. I like the effect of this look.

My hb is from Frankly'isms stamp set.  Another card is complete for my stash.  I am bound and determined to mail out these birthday cards I am making! :)


Remember, if you use my code [below] you can save an additional 15% off your purchase, and YES, it applies to the CLEARANCE category also!  Michele has lowered the prices even further!


Thanks for stopping by~


Sunday, August 16, 2020

Playing With Pattern


Hello everyone!! 
Nora here from A Creative Touch with a fun hello card inspired by a print I saw on Pinterest. 


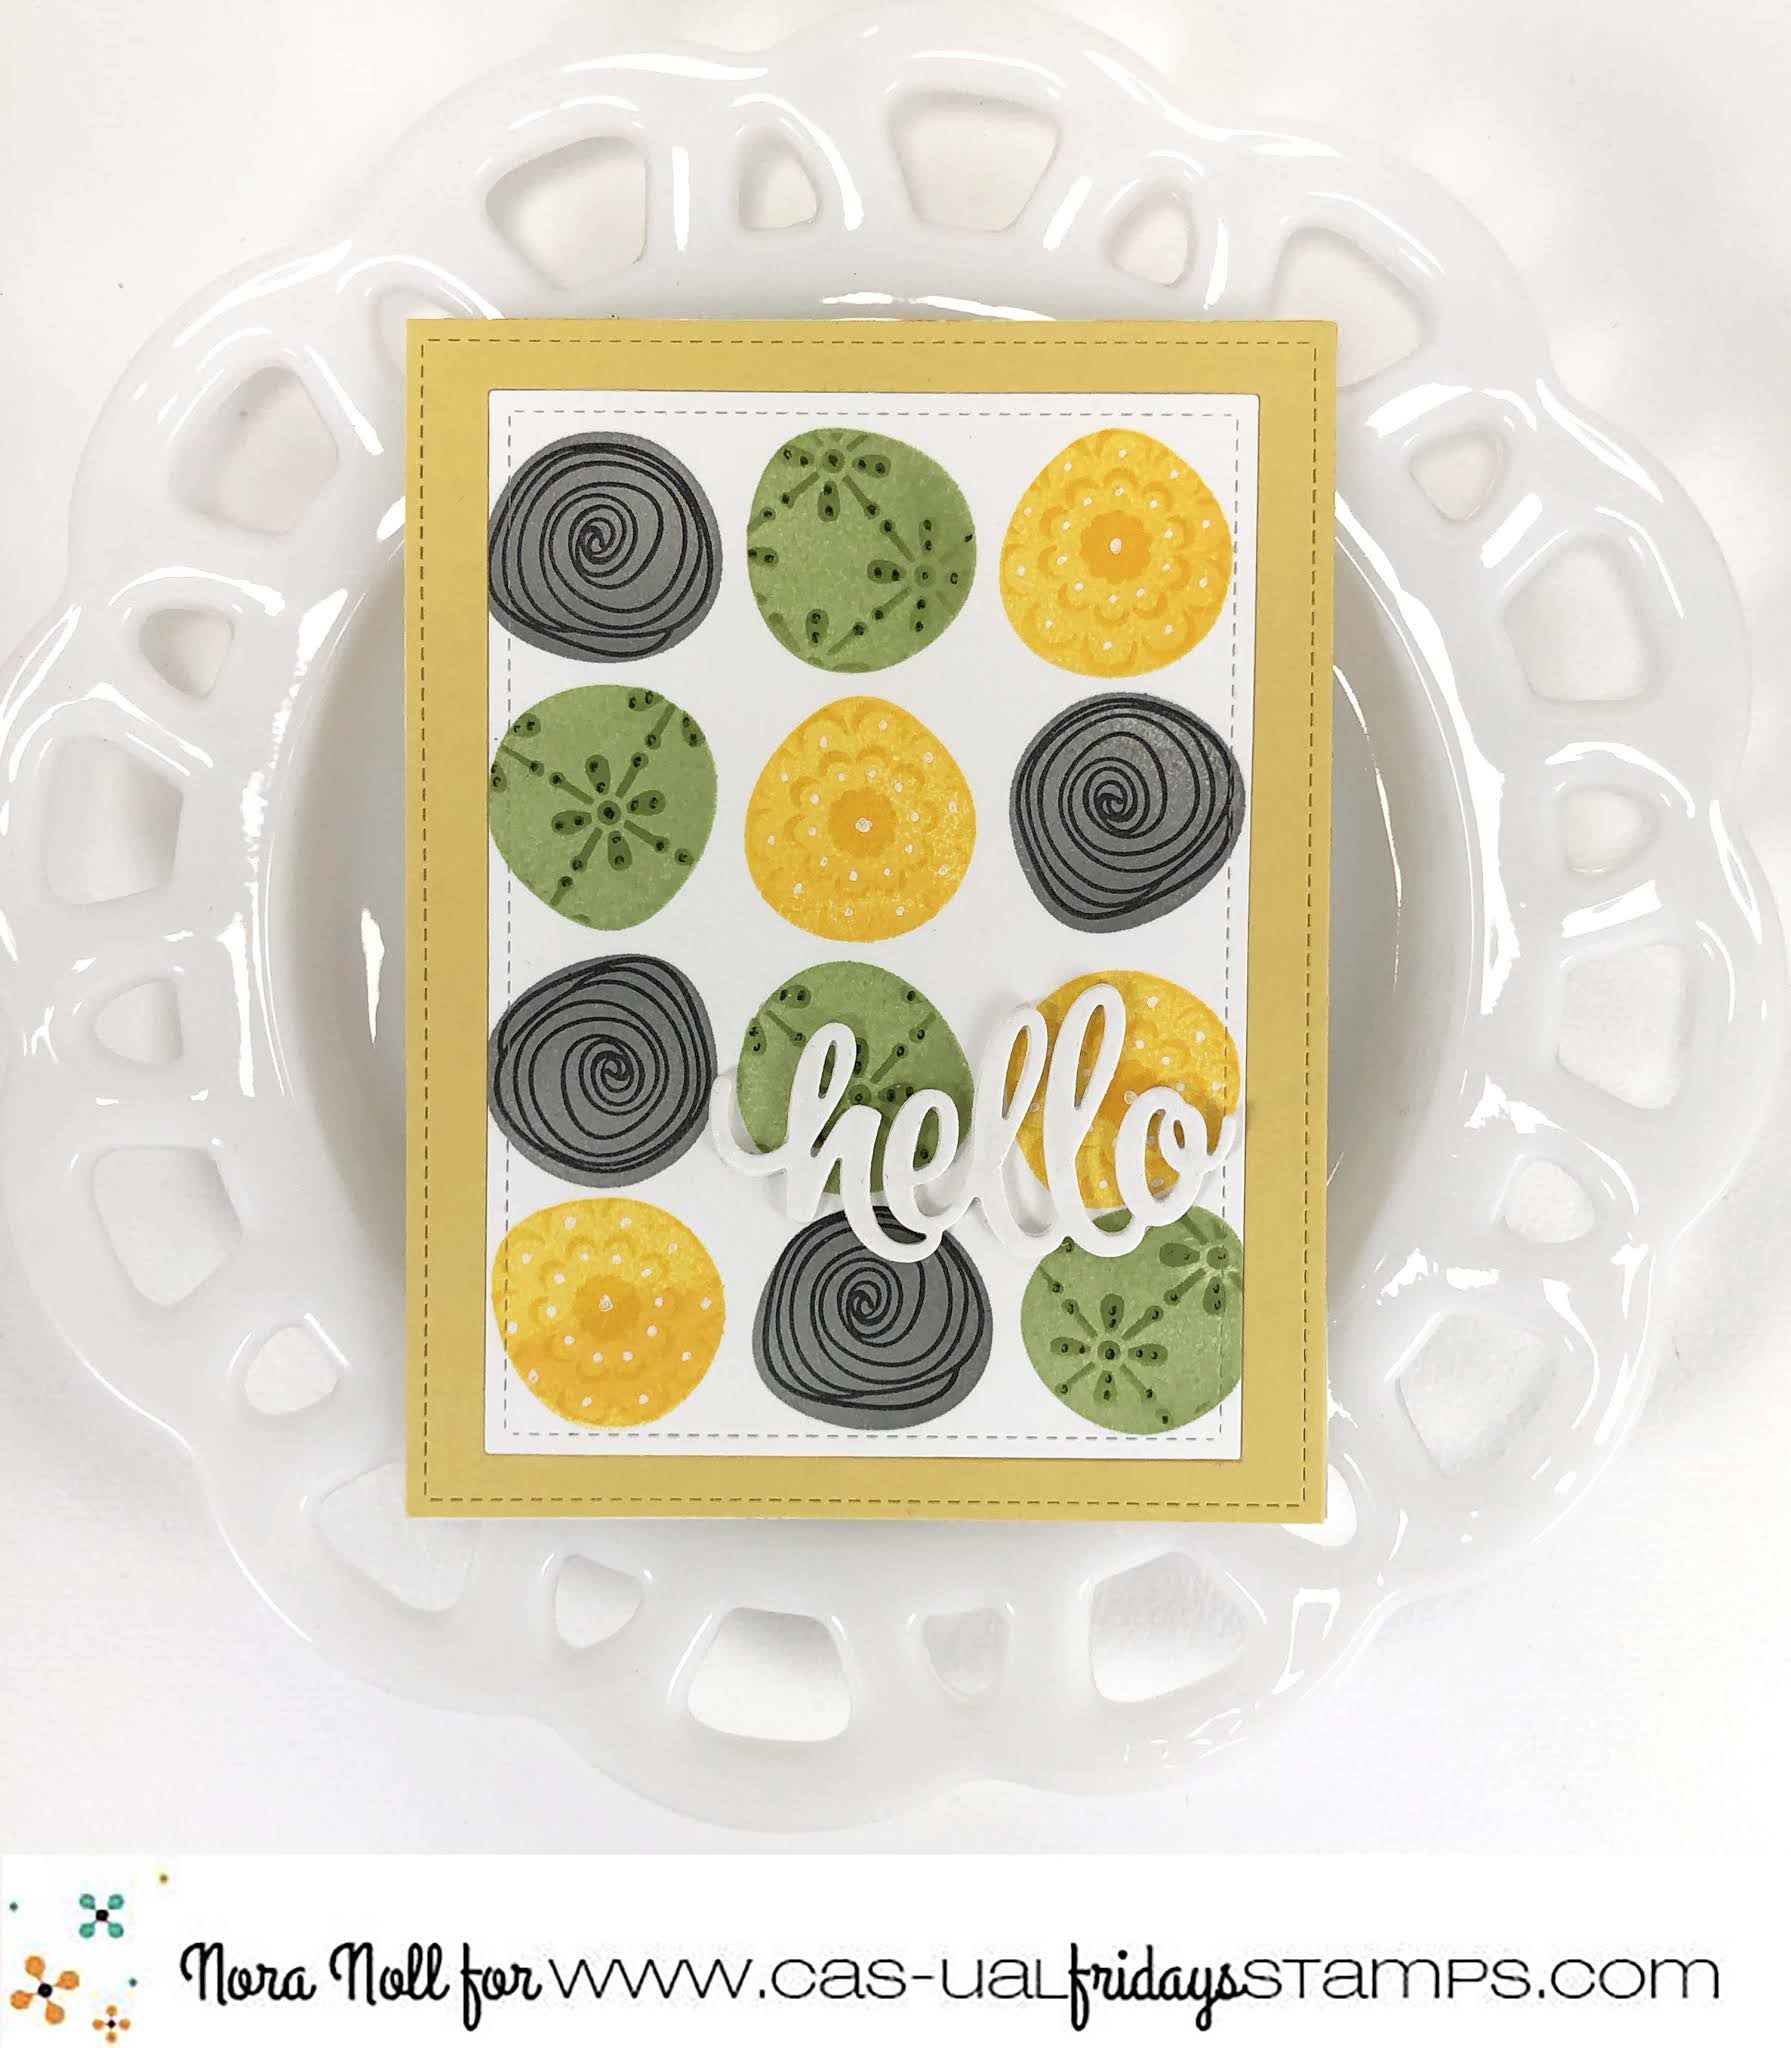
I don't know about you but I am OBSESSED with patterns. I have a great Pattern Board on Pinterest and I constantly pin ideas that I think I can use to create a card. The print that inspired this card is one that can be found here.

I began this card by using scrap paper and stamping the solid flower stamp from Peaceful Garden using the three colors I thought I might use. 


When I got the design down how I wanted it, I started on my final version of the card.  Again, I used the solid colored flower from Peaceful Garden and stamped twelve solid images-four in yellow, four in green and four in gray-on a white piece of cardstock.


When that was complete, I then stamped the rose image from the same stamp set over the top of the gray using black dye ink. I thought the stamp was perfect for what I had planned.


To decorate the green and yellow solid circles I used stencils. 
I die cut a mask out of a post it using the Garden Fri-dies and used the Bold Flower Stencil with yellow ink to stencil over the solid yellow image.


I then used the Tin Roof Stencil with green dye ink to decorate the solid 
green stamped images.


I die cut my finished panel with a rectangle die and used gel pens in white and green to give the stenciled images a little bit more emphasis.


I added the panel to an A2 sized, top folding card front and framed it with a yellow 
cardstock frame.

 
I added a hello sentiment using the Sweet Friend Fri-dies that I had die cut four times out of white cardstock and adhered together. Adhering die cuts together makes the sentiment sturdier. My last step was to cover the sentiment with clear sparkle pen.

This card was so fun to create and I love that I used a TON of products. I don't know about you, but I tend to buy more than I use so when I can combine my love of stamping, stenciling and die cutting on one card, I always have a fun time. 

Speaking of shopping, use my code NORASENTME to get 15% off your TOTAL ORDER. 


There are some fun, new products that CAS-ual Fridays is stocking so be sure to take a look.

I want to thank you for taking the time to stop by. Have a FABULOUS day!!


CAS-ual Fridays Products Used:


Monday, July 6, 2020

Pattern Inspiration

Hi everyone!! It is Nora here from A Creative Touch with two cards inspired by some patterns that I found on Pinterest. Here is the link to my board: Patterns
I have been obsessed with different patterns created by flowers and leaves for fabric 
and graphic design. I thought it would be fun to makes some cards using them as inspiration.

My first card I used Peaceful Garden stamp set and Distress Oxide Inks to create the 
background pattern.


I stamped the flowers first by turning them upside down.


When the pattern was finished, I layered yellow cardstock frame over the top, added some leaves from die cut from using the Garden Fri-dies and a sentiment from Peaceful Gardens.


I finished the card off with some red sequins.


My next card was inspired by leaves. The leaf stamp from Pretty Posies was perfect for my idea.


I began the card by stamping the Oxide inks with THE BACK of the leaf stamp. 


I then stamped the leaves over the colors with black ink. I layered the panel over an A2 card base, wrapping a piece of jute around the bottom third. 


I masked and stamped the sentiment from Pretty Posies with black ink and then die cut it using a circle die. 


I then layered the sentiment circle using foam adhesive over two die cuts of orange and blue 
die cut circles.


My last step was to adhere gems around the sentiment circle. 

I hope my card inspires you to look at your stamps and see what patterns you can create with your stamps.

Want to go on a shopping spree? Use my code NORASENTME to get 15% off your total order at the CAS-Fridays Store!!


I want to thank you for taking the time to stop by. Be sure to stop by this week to see some fabulous creations from the design team!!


Stamps and dies used for my projects.


Friday, December 27, 2019

Maximizing Design Time

Hi everyone!!! I hope you all had a nice holiday. Nora here from A Creative Touch with four cards I created by splitting up a stamped panel. 

Fri-Dies: Garden Fri-dies


When I want to maximize my design time to make more than one card, I usually start with at sketch.


I then stamped my card fronts one right after the other. My first card front I used a teal and gray, the second card front a burnt orange and gray color scheme. The branch was from the stamp set Peaceful Garden and the sentiment was from Peace and Comfort.


When doing multiples of a card, it is easier to use a stamping tool, like the MISTI, but if you don't have one, you just create one card front and then duplicate it using different colors.


When the card fronts were complete, I cut a triangle off of the left side of the panel. I adhered a paper strip to the large piece and adhered it over a card base-the one above being gray.


For the second card, I adhered the triangle piece onto a different card front, adding stamped flowers using the Peaceful Garden stamp set. I then added some white die cuts that I cut using the Garden Fri-dies. Some of the die cuts were cut into pieces so that I could tuck them underneath the stamped triangle.


To kick the cards up a notch, on various branches I added some clear shimmer pen and Glossy Accents.


I used some Nuvo Crystal drops or Stickles in the flower centers of the tiny stamped flowers.

Next time you sit down to create a card, think outside of the box to see if you can maximize your supplies and create more than one card.

Have some Christmas money you would like to shop with? Hop on over the CAS-ual Fridays Stamps Store and use my code NORASENTME to get 15% off your total order.


I want to thank you for stopping by today. Have a FABULOUS day!!


Stamps and Dies I used: