Translate

Showing posts with label Tutu. Show all posts

Thursday, February 6, 2020

Dream Then Do

Hi All - it's Vicki from All I Do Is Stamp.  For some reason, it seems like forever since I used these stamps.   Well, I looked it up, and apparently, not so long ago.  Go figure :)

Today I am using a few products to make my card.  My dog sitter is starting up a new business, so I made this card for her.  I'm thinking she will love it!

I started out by stenciling with the Tin Roof Stencil.  I then cut out the tag using the Scallop Tag Fri-Dies.  I stamped a sentiment from the Dream Then Do stamp set, and lastly, I added the fun ballerina from Tutu, with the matching Ballerina Fri-Dies.

I really think these ballerina images are the cutest!  They just make me smile.


Don't forget, if you use my code you can save an additional 15% off your purchase.  
That includes the sale items!!


Thanks for stopping by~


Sunday, January 20, 2019

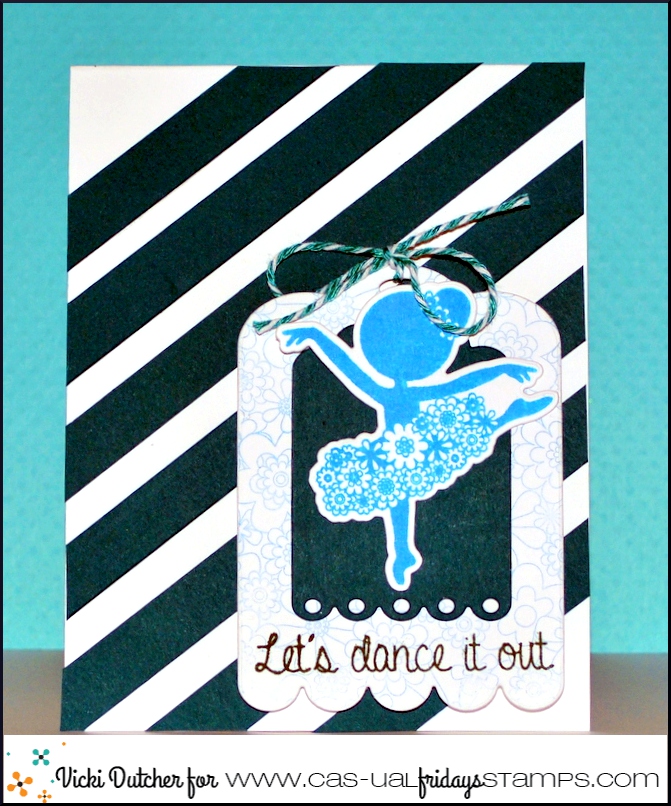
Let's Dance It Out

Hi All - it's Vicki here today from All I Do Is Stamp.  I have [what I think] is a super fun card.  This is going to be perfect for my co-worker, and her stress level.  Dancing it out will add in some fun!

I started by cutting some strips of colored card stock, and adhered them to my card.  Then, using the Scallop Tags Fri-Dies, I stamped the bigger tag with the Full on Floral stamp sheet.  I stamped  the cute image from the Tutu stamp set, and cut it out with the matching Ballerina Fri-Dies.

I am an avid fan of Grey's Anatomy, and this sentiment is one of my favorites. :)

That's it for me today.  I hope you enjoyed my card. :)


Don't forget, you can use my code for a 15% discount.  Check out the $5 sets.  
My code applies to those too!  [Can you say awesome price? :)]


Sunday, September 23, 2018

Put On a Tutu & Twirl

Hello CAS-ual Fridays fans! Maria here on the blog today, with a simple inspirational card, showcasing the Tutu stamp set.

Tutu Stamp Set
I started out with some Bristol smooth white card stock and inked in up with Squeezed Lemonade and Wild Honey distress oxide inks.  I blended the colors together and sprayed it with water using my distress spray bottle.  I dabbed it dry with paper towel.

I used a snowflake stencil from my stash and applied my Nuvo Glimmer paste using my palette knife.  I let it dry for about half an hour.  

I stamped my little ballerina with my Jet Black ink and colored the image with my Copic markers.  I fussy-cut the image with my scissors and adhered this piece with some foam adhesive.


I just LOVE the sparkly effect of the glimmer paste taking on the color underneath.  I finished my design my stamping my sentiment with versafine Onyx black ink.  Here's a little close-up:


I added some sparkling clear jewels on my little ballerina too.  I am giving this card to a friend of mine.  Her granddaughter is now taking ballet lessons and I think she's going to love this card.


I hope you like my card today.  Don't forget to use my coupon code below for 15% off your order.  Also check out the retiring stamps sale because once they are gone, it will not be restocked anymore.


Thank you for stopping by and happy crafting!


Sunday, August 26, 2018

Alcohol Lifting with CAS-ual FRI-days Stamps!

Hello wonderful crafty friends!!!  Are you still swooning over last weeks new release?!  I know I still am!  And today I'm mixing one new set and one older set with a new to me technique: Alcohol Lifting.  Since I'm a newbie to the technique myself I decided to use more solid images, as I thought this would be easier to work with for a first time.

To begin I cut a piece of Yopo Cardstock in half as bases for two bookmarks.  I also laid out my supplies: Alcohol inks, Alcohol Blending Solution, Blending Tool, and Alcohol Lifting Ink.


I then had fun adding the alcohol ink in two different ways.  For one I just dripped the ink repeatedly as well as the Blending Solution, and for the other one I pounced the alcohol ink and blending solution onto the Yupo paper with my blending tool...

Oh how I just love how different each one of these is.  Once they were dry I inked up chosen stamp sets: Nate & Friday and Tutu.  I then stamped them onto my inked backgrounds.  When doing this I noticed that the image might slide a little if you don't hold it firmly down.  I had also watched a previous video done by Tim Holtz on how to correctly use the Alcohol Lift Ink, and so I knew I would have a little bit of time to transfer the ink I lifted from the background onto another area, so I tried that next...

While my stamp off images are not perfect (I didn't stamp them onto a porous surface, but rather onto the back of my Yupo bookmark), but I do love the marble effect it gives.  Next, I flipped my bookmark back over and dabbed where the image was to lift off several times before finally buffing my lifted image on the front...

Isn't this just so cool?!  I LOVE the ghost like look of this, it goes with the bright colors.  I then repeated this with the green bookmark...


I finished both of them off by stamping some sentiments with Versafine Ink...


I then trimmed the edges and added some twine to the tops...


Thanks so much for stopping by today!  I hope you've enjoyed my post, and if you re-create this look with your CAS-ual Fridays Stamps make sure you share it with us on one of our social media sites!
Happy Crafting!
Lisa


Wednesday, August 15, 2018

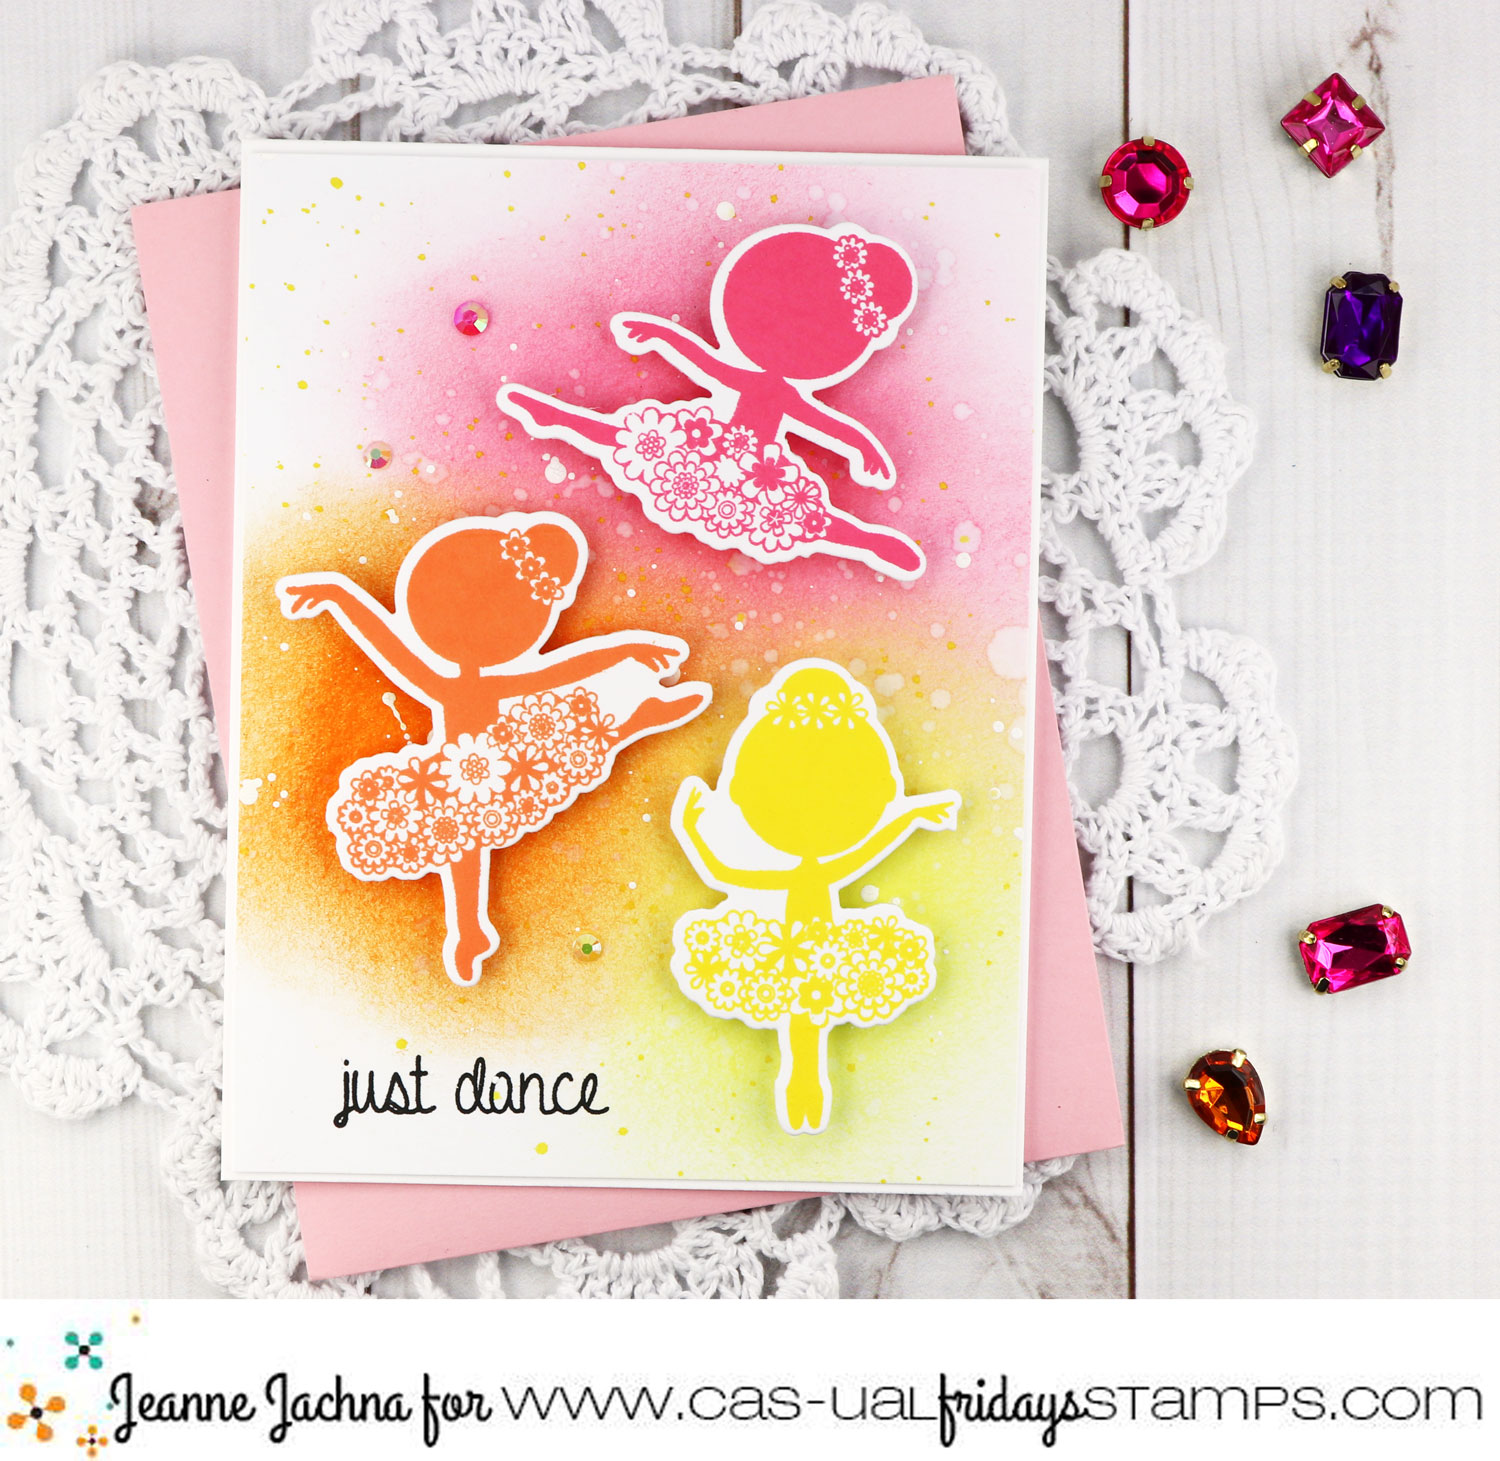
Just Dance!


Jeanne here today!  I hope you're having a great day! Today I'm playing with the CAS-ual Fridays TuTu Ballerinas! I love the solid images that mean no coloring required. 

The matching Ballerina fri dies make them easy to arrange however you like! 

I created a distress ink background with Squeezed Lemonade, Carved Pumpkin and Worn Lipstick. I used stencil brushes for soft no line inking. I chose flower colors for a feminine look.

 I set the die cut stamped images on a piece of clear plastic making it easy for me to pick them all up at once and decide where to put the background ink.

When I was happy with the coverage I spattered the panel with water, some watered down Mustard Seed and white ink.

A simple sentiment was stamped in the bottom corner of the panel.

The die cut ballerinas were adhered with adhesive foam tape to add dimension. 

I added a few jewels for some sparkle and shine! Have a great day!

Finished Size 4.25 x 5.5" Stamps | CAS-ual Fridays Tu Tu Dies | CAS-ual Fridays Ballerina Fri Dies 


TuTu
TuTu

CAS
Ballerina Fri Dies
Ballerina Fri Dies

CAS

Friday, August 10, 2018

You Are Fabulous!! A Simple and Feminine Card Design!!

Hello Crafty Friends!! 
Larissa here today with a BEAUTIFUL Card for a LOT of occasions!! 
I LOVE the Feminine Feel, but its also a Super Simple Design and that means you can make several to have on hand for any reason that might come up!! Lets get started!!  
First Stamp the Full on Floral Stamp onto an A2 Size Card Base using Kraft Ink!! I LOVE the subtle color for this BUSY Background Image!! Then I taped off the left hand Side and splattered some Black Distress Paint for some Texture!! I also knew I wanted to used some Milled Lavender Distress Ink so I also added some Milled Lavender Splatters to the Background!! 
I Stamped and Embossing the TuTu Image using some Versa Mark Ink and some WoW Embossing Fool's Gold Glitter Powder!! Its SO BEAUTIFUL in real life!! It's Gold Embossing Powder with a Pretty Mauve Pink Glitter!! I used the coordinating Ballerina Fri Dies to Die Cut it out!!
I Die Cut a Circle and inked it using the Milled Lavender Distress Ink and added some Water Droplets for some Texture!! Next I Stamped and Embossed the Fabulous from the Bomb Diggity Set using Versa Fine Black Onyx Ink and Clear WoW Embossing Powder!! I Stamped the bottom of the Inked Circle too so that the Ballerina would be Twirling on the "L"!! I adhered the TuTu Image using 3D Foam Squares!! Then I Stamped and Embossed the Words You Are from the Love Notes Set onto a Kraft Banner using WoW Embossing Powder in White!! 


A few Pretty Pink Posh Pansy Purple Jewels finish off the design!! 

THANKS SO MUCH for stopping by today and I hope you have a FABULOUS WEEK!! 
If you create a Paper Pieced Card, I hope you'll share with us on Social Media using the Hashtag #CasFridays as we LOVE to see what you create!!