Translate

Showing posts with label Stencil. Show all posts

Wednesday, September 15, 2021

Sorry for Your Loss-A Pet Sympathy Card

Hello Crafty Friends!! It is Nora here from A Creative Touch with a simple pet sympathy card.


I started off my card by using the paw print heart from the Pawsome Stencil on a rectangle shaped scrap of red cardstock. 


I actually used Fired Brick Distress Ink over my stencil but it wound up looking black after I covered it with a clear sparkle pen and some Glossy Accents. I decided I liked it this way and then used foam adhesive to adhere it to a black frame.


I adhered the framed stencil to my card and stamped a sentiment from the Rainbow Bridge stamp set in black dye ink. 


Using paw prints from Rainbow Bridge, I stamped a trio with red ink above and below the sentiment. I then covered them with a clear shimmer pen and some Glossy Accents. My card was complete!!


 I want to thank you for taking the time to stop by today. Be sure to stop by the CAS-ual Fridays Blog to see some more inspiration by the other designers. The CAS-Fridays Shop has some fabulous sets to choose from. Use my code NORASENTME to get an extra 15% off your total order-even SALE items!!


I hope you all have a FABULOUS week!!


Sunday, August 22, 2021

Looking at Your CAS-Fridays Supplies in a Different Way

Hello my friends!!!

Nora here from A Creative Touch with simple a card I created using a partial stencil technique, some dies and a stamped sentiment.


I started off my card by using the new Falling Leaves Stencil to partially stencil some leaves on a 4 by 
5 1/4" white panel. 


You don't need any extra supplies to do this technique. No masking was required! I even have some partially stenciled leaves on my panel and for the design I was going for, this was okay.


I used two different green inks to stencil my leaves. I started with a light green.


I then shaded over that with a darker green. When I took off my stencil, I thought it needed something else. I pulled out the CAS-Friday Flowerburst Stencil and used purple and pink ink to stencil 
some flowers. 


Once again I did not use the whole stencil but moved my stencil around to get the tiny flowers where I wanted them.


I added this panel to a pink, A2, top folding card base and then used some Nuvo drops in yellow and white to create flower centers. I set this aside to dry.


I wanted to create a butterfly but since I didn't have one from CAS-ual Fridays I created my own. I pulled out both the large and small flower from the 4 Petals Die and die cut one of each from white cardstock.


 I cut each flower in half and blended blue dye ink over the top of the white flowers. 


I then adhered one small set of petals with one large set to create a butterfly. I wrapped some black floss around the middle of the butterfly and tied it at the top to make some antennae.


Next I adhered these butterflies on top of my card-one using glue and one using foam adhesive. 


I used a clear shimmer pen over the butterflies to give them a little oomph.


My last step was to stamp a sentiment with black ink using the Terrific Flowers stamp set. 


I created this card by looking at my stencils and dies in a different way. If you don't have what you need, then create it with what you do have!

Interested in the products I used today? Use my code NORASENTME to get an extra 15% off your total order in the CAS-Fridays Shop


Be sure to return the CAS-Fridays Blog later this week to see some fabulous creations from the other Design Team Members. I want to thank you for stopping by today. Have a FABULOUS day!!


Tuesday, May 7, 2019

Aaaah... Everything Is Okayer Now

Lisa here!  The Spring/Summer 2019 Coffee Lover's Blog Hop is still going strong and CAS-ual Fridays is a Super Sponsor once again!  Just create something new using a Coffee, Tea or Cocoa and Spring/Summer theme (i.e. no Santa, snowflakes, Fall leaves or Halloween...lol!) and link it up for your chance to win prizes!  You can create as many new projects as you like as long as they follow the themes!

We're celebrating here at CAS-ual Fridays and all week we're featuring some of the awesome Caffeinated Beverage themed images and dies in the CFS shop here!  And guess what!  You can get those items on sale right now!  No code needed... they're all 20% off!  At the end of this post I'll tell you how you can save even more!

Here's how I was inspired:


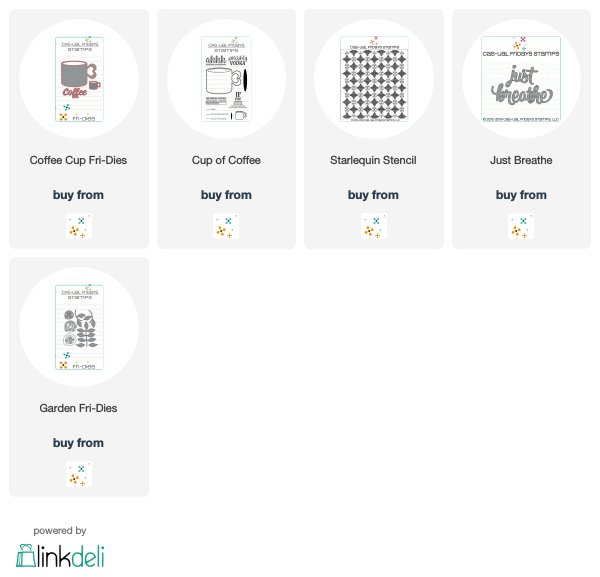
Remember last time I made two backgrounds using the Starlequin Stencil and only used one?  Well, this time around I decided it was time to get the other one on a card!  I've used it today since it has such a bright and springy feeling.


I have a lot of Coffee Cup dies in my crafty collection, but this Coffee Cup Fri-Die is by far one of my very favorites!  I just love the size of it and that so sweet heart shaped handle!!  I also love that the coffee cuts out separately so I can color it easily in a coffee (or tea or cocoa) color.

I stamped that awesome sentiment from the Cup of Coffee stamp set onto the cup in Versamark and heat embossed it in green.  Then I die cut the leaves from the Garden Fri-Dies from some previously watercolored paper and added them and some pre-made paper flowers around the cup.


I added the breathe die from the Just Breathe Fri-Dies in similar colors so that you'd see it, but it wouldn't be the focus... just a very quiet reminder to a friend that's going through a rough patch to take a few moments and just be... it's not quite an eclipse, but we'll touch on those the next time!


And there you have it!  A few sequins as steam and it's ready to pop in the mail.  When's the last time you actually mailed a card you made?  I'm a slow mailer and it's a struggle to get to a post office, but I love to send out my cards and will head there this week!  I'm challenging you to get a few out in the mail this week too!  And I'm challenging you to create something Coffee, Tea or Cocoa and link it up over at the Coffee Hop!

If I've inspired you today and you decide there is something you need to have, you can use this to get a discount on both sale and regular priced products.  Just use this code to get an extra 15% off!  And you don't have to use mine... all of the Girls Friday have one and you can use the code for who inspires you!


Thanks so much for stopping by and hope you'll take a moment to have a cup of whatever makes you happy and Just Breathe!


Monday, October 22, 2018

Fun With Foil and Creating a Stencil With Dies


Lisa here!  So happy you stopped by!  Today I'll show you how I used some CAS-ual Fridays dies to create a stencil and a cool foiled background.


I started by using the Jumping Jacks Fri-dies to create a stencil with some paper.  You may notice I haven't cut the dies apart.  Sometimes with smaller dies like this I'll choose to keep them together.  I feel like it's easier to keep track of them and I'm less likely to lose the smaller ones.  And because they're small, if I cut a few extras.. no worries!

 I turned the dies in various ways to create a random pattern for my stencil.  If you choose to use paper for your stencil, I suggest using something without a whole lot of fibers.  My first one was created with a red fibrous cardstock I thought would be good because it was heavy, but the fibers ended up sticking when I lifted it up.  So the next try I used some glossy paper and that worked much better...just old photo paper for the Inkjet I don't have any longer.  You could also use something like acetate or vinyl if you wanted to use it over and over.  You may have to play with your die cut machine... shims and all of that depending on the material.


Once my stencil was done, I placed it over my cardstock base and used some washi tape to hold down the corners.  Then I used a spatula and some Deco Foil transfer gel and scraped the gel over the stencil.  I did get some underneath my cuts, but I don't mind.  If you prefer a crisp and clean look you'll want to be a little more careful or maybe even use some temporary adhesive on your stencil.  As for me... I like a few splurts and splatters here and there.  Lift your homemade stencil (especially if it's paper) immediately so it doesn't stick to your piece.  Mine actually ended up drying a little stiffer and I was able to save it to use on another project!

It takes a while for the transfer gel to dry so you'll want to set the base aside for a bit while you work on the other pieces for your project.  Kind of like texture paste.  Once it was dry, I placed the foil over the entire piece and ran it through my Minc and voila!


Lots of sparkle and shine!  As I said, I like lots of splurts and splatters (not to mention sprinkles) so I also splashed some Gold Color Shine onto the piece with a paintbrush once it was foiled and set it aside to dry again.

While waiting I die cut my coffee cup from the Coffee Cup Fri-dies and stamped the sentiment from the Coffee Talk Stamp Set using Versamark and heat embossed with some gold embossing powder.  I also smushed my oval coffee piece from the mug into the Versamark and covered that with gold powder and heat embossed it.


I love the Scallop Tags Fri-Dies and cut the large one from gold vellum to frame my cup.  A few more of the smallest jacks cut from some already foiled cardstock as steam (or maybe champagne bubbles?) and that pretty bow I stamped, embossed, colored and cut out from the top of the pretty image from the Mistletoe & Holly Stamp Set.


Oooh!  Aaah!  Pretty!  Sparkly!  ...lol!


One more look at the finished project!  Thanks so much for joining me today!

  Did you know that there is a Collaboration Hop going on with the CAS-ual Fridays and Coffee Loving Cardmakers Design Teams??  We're showing off the awesome array of Coffee themed stamps and dies available in the CAS-ual Fridays shop!  AND you have a chance to win one of three $25 gift certificates for hopping along and commenting at each stop.  There is nothing to lose and all kinds of inspiration to gain and possibly some free stuff!  You can check it out and start hopping at this blog post here!  You have until Friday October 26th to comment!


And should you decide to shop, here's this for you:


See you again soon!