Translate

Showing posts with label Backgrounds. Show all posts

Monday, March 11, 2019

A Pastel Rainbow Alcohol Ink Background


Lisa here and today I'm sharing with you an alcohol Ink pastel rainbow background made using Copic marker refills!!  I knew I wanted a little softer look for this background and I turned to my copic refills because I knew I had some really light colors I could use.


I started by picking out my colors first and laid them in the order I wanted to use them.  You have to work quickly with this technique so if you have separate applicators set up for each color, that's easiest, however, I only had one applicator and then took out as many pads as I had colors.   Then I cut a panel from some Yupo Paper.


I quickly worked my way down the paper.  I dropped a few drops of blending solution and then a few drops of the ink refill across the paper...maybe 4 light drops.  Then I took my applicator and dragged it across the paper.  I moved to the next color and did the same all the way down the paper.  Remember that your colors are going to move together so choose colors next to each other that blend well... the fun thing is it's easy enough to play with the colors because you can always start over!  I did go over a couple areas more than once to make the color a little darker, but in the end I got the exact look I was hoping for!


While I waited for the panel to dry which really doesn't take very long at all, I cut all of my pieces... that beautiful heart from the Heart Board Fri-Dies from some purple glitter paper; the beautiful Big Hope Fri Die from some purple foiled paper; the Bubble Box Fri Die from white cardstock (embossed this with a folder);  and I used the same yellow from my background to color the little bit of Yupo scrap that was left from cutting my background panel and then used the 4 Petals Fri Dies for my flowers.


I layered it all together and added some purple gems to the centers of my sweet yellow flowers.  And it was fun to alternate thicknesses of foam tape to every other heart cut out to accentuate each individual piece.


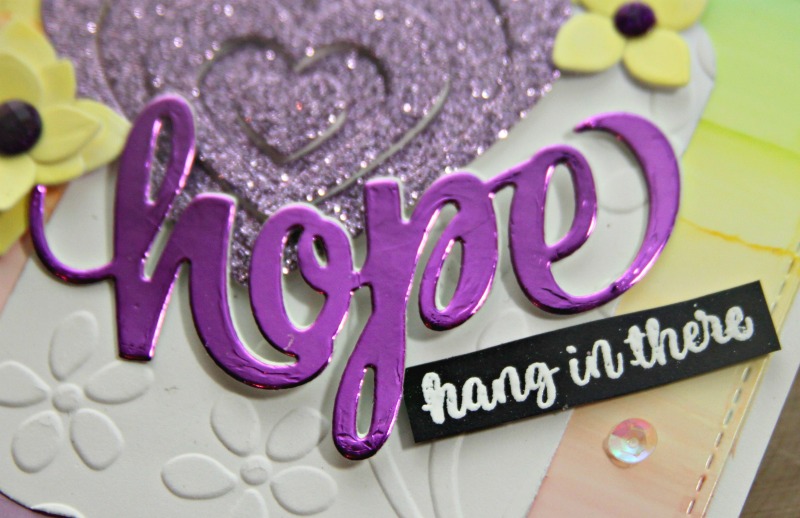
I absolutely love this Big Hope die... I cut it a couple more times from plain old cardstock so I could stack them.  I love the dimension it gives to your word die cuts.  And then I completed my sentiment using the small "hang in there" from the Somebunny Stamp Set... a cute little pick me up for a friend that's having a rough time.  I love to mix and match my sentiments from various stamp sets... you never know what will make a great combo!

And there you have it.. a pastel alcohol ink rainbow!  

Thanks so much for stopping and hope you've enjoyed your stay!  Be sure to come back often for more Cas-ual Fridays Inspiration!

And if you find there is something you must have from the shop I've got this for you:


Tuesday, February 26, 2019

Creating A Fun Background With Copic Markers


Lisa here!  Today I'm sharing with you a fun way to create a background using your Copic markers (or any other alcohol markers) and some blending solution (or alcohol).  These are the cards I created using two backgrounds I made this way.


I started with a white panel... I made two of these... one with regular white cardstock and one with 100 Lb paper that I use when I stamp and color with my Copics.  Both worked just as well.  I basically chose the colors I wanted that I thought might be interesting together and laid them out in the pattern I wanted.  My first strokes down the paper were with the wide flat end of the marker (you know ... the one that is usually only there for filling...lol!).  I quickly moved down the paper and swiped across.  Then I started at the top again and went through it all again.  I probably went over it about 4 times, and the last couple I switched to the brush end and made smaller swipes and filled in blank areas... I also made sure to put some unexpected strokes... a little purple in the blue.. a little blue in the green and finally ended up with this:


Next I poured a little bit of Copic Blending Solution into the cap... 80% alcohol works great for this technique, but I couldn't find my large bottle of alcohol so I decided to use the Blending Solution.  I dipped a paint brush (no water please) into the solution and then splattered it onto the panel that I colored.  If you want big blobs then add more alcohol... smaller splatters use less.  This is even less controllable than splattering water over distress oxides so be willing to let the liquid do what it does .. which is push the color away and you end up with something like this:


Pretty right?  I made two because I didn't think I was happy with the first and wanted to try it with the different paper, but once I was done, I decided I loved both panels and made two cards instead of one!


I started with this one... I used the full panel in the way back... it was the center of the panel that I was not happy with so this was the perfect use for this one.  I used the Bubble Box Fri-Dies and cut the larger one in plain white cardstock and the next size I cut from the second panel.


Before I layered everything, I stamped that pretty border design from the Bold Wishes Stamp Set onto the smaller Bubble Box using Versamark and heat embossed them in gold.  Then I stamped the Wish Big sentiment from the same set in a purple ink, fussy cut it and popped it up onto the inked panel.


I used the balloon dies from the Bunny Fri-Dies to cut out three balloons from some Copic friendly paper and then used some of the same markers that I used for the background to color them in.  I love that these colors don't completely blend.. I think it makes for a fun contrast... I attached some twine with popup tape and added the balloons to the card.


Finally I just added a couple sequins in similar colors to the rest of the card and done!  I thought I was done... but then I was looking at the piece that was left from cutting out the small inked Bubble Box layer and decided it would make a cool shaker frame:


So I made one!


First, I laid the window piece over the white layer so I could line up and stamp my sentiment from the Dream Then Do Stamp Set in the center.  Next I adhered a piece of clear cardstock to the inside of the window panel and then added popup tape around the outside edges.  I added some sequins ... enough to create a pretty sequin filled shaker, but not so much that the sentiment would be covered up.  I saved a few for the outside.


I decided this one called for some pretty flowers... so I used the 4 Petals Fri-Dies to cut some flowers and the Garden Fri-Dies to cut some leaves from white Copic friendly paper and then colored them in with the same markers I used for the background.  I layered the flowers together along with some leaves and then added a few sequins to the center.


I added a few more sequins to the outside of the shaker and this one was done!

I hope you enjoyed your visit today and hope I've shown you a fun new way to use your Copic markers!  Or if not new, maybe just a reminder that you can use them for more than just coloring images.

Should you decide to shop, I have this for you:


For more Cas-ual Fridays Inspiration, check out these places: