Hello Crafty Peeps!!!
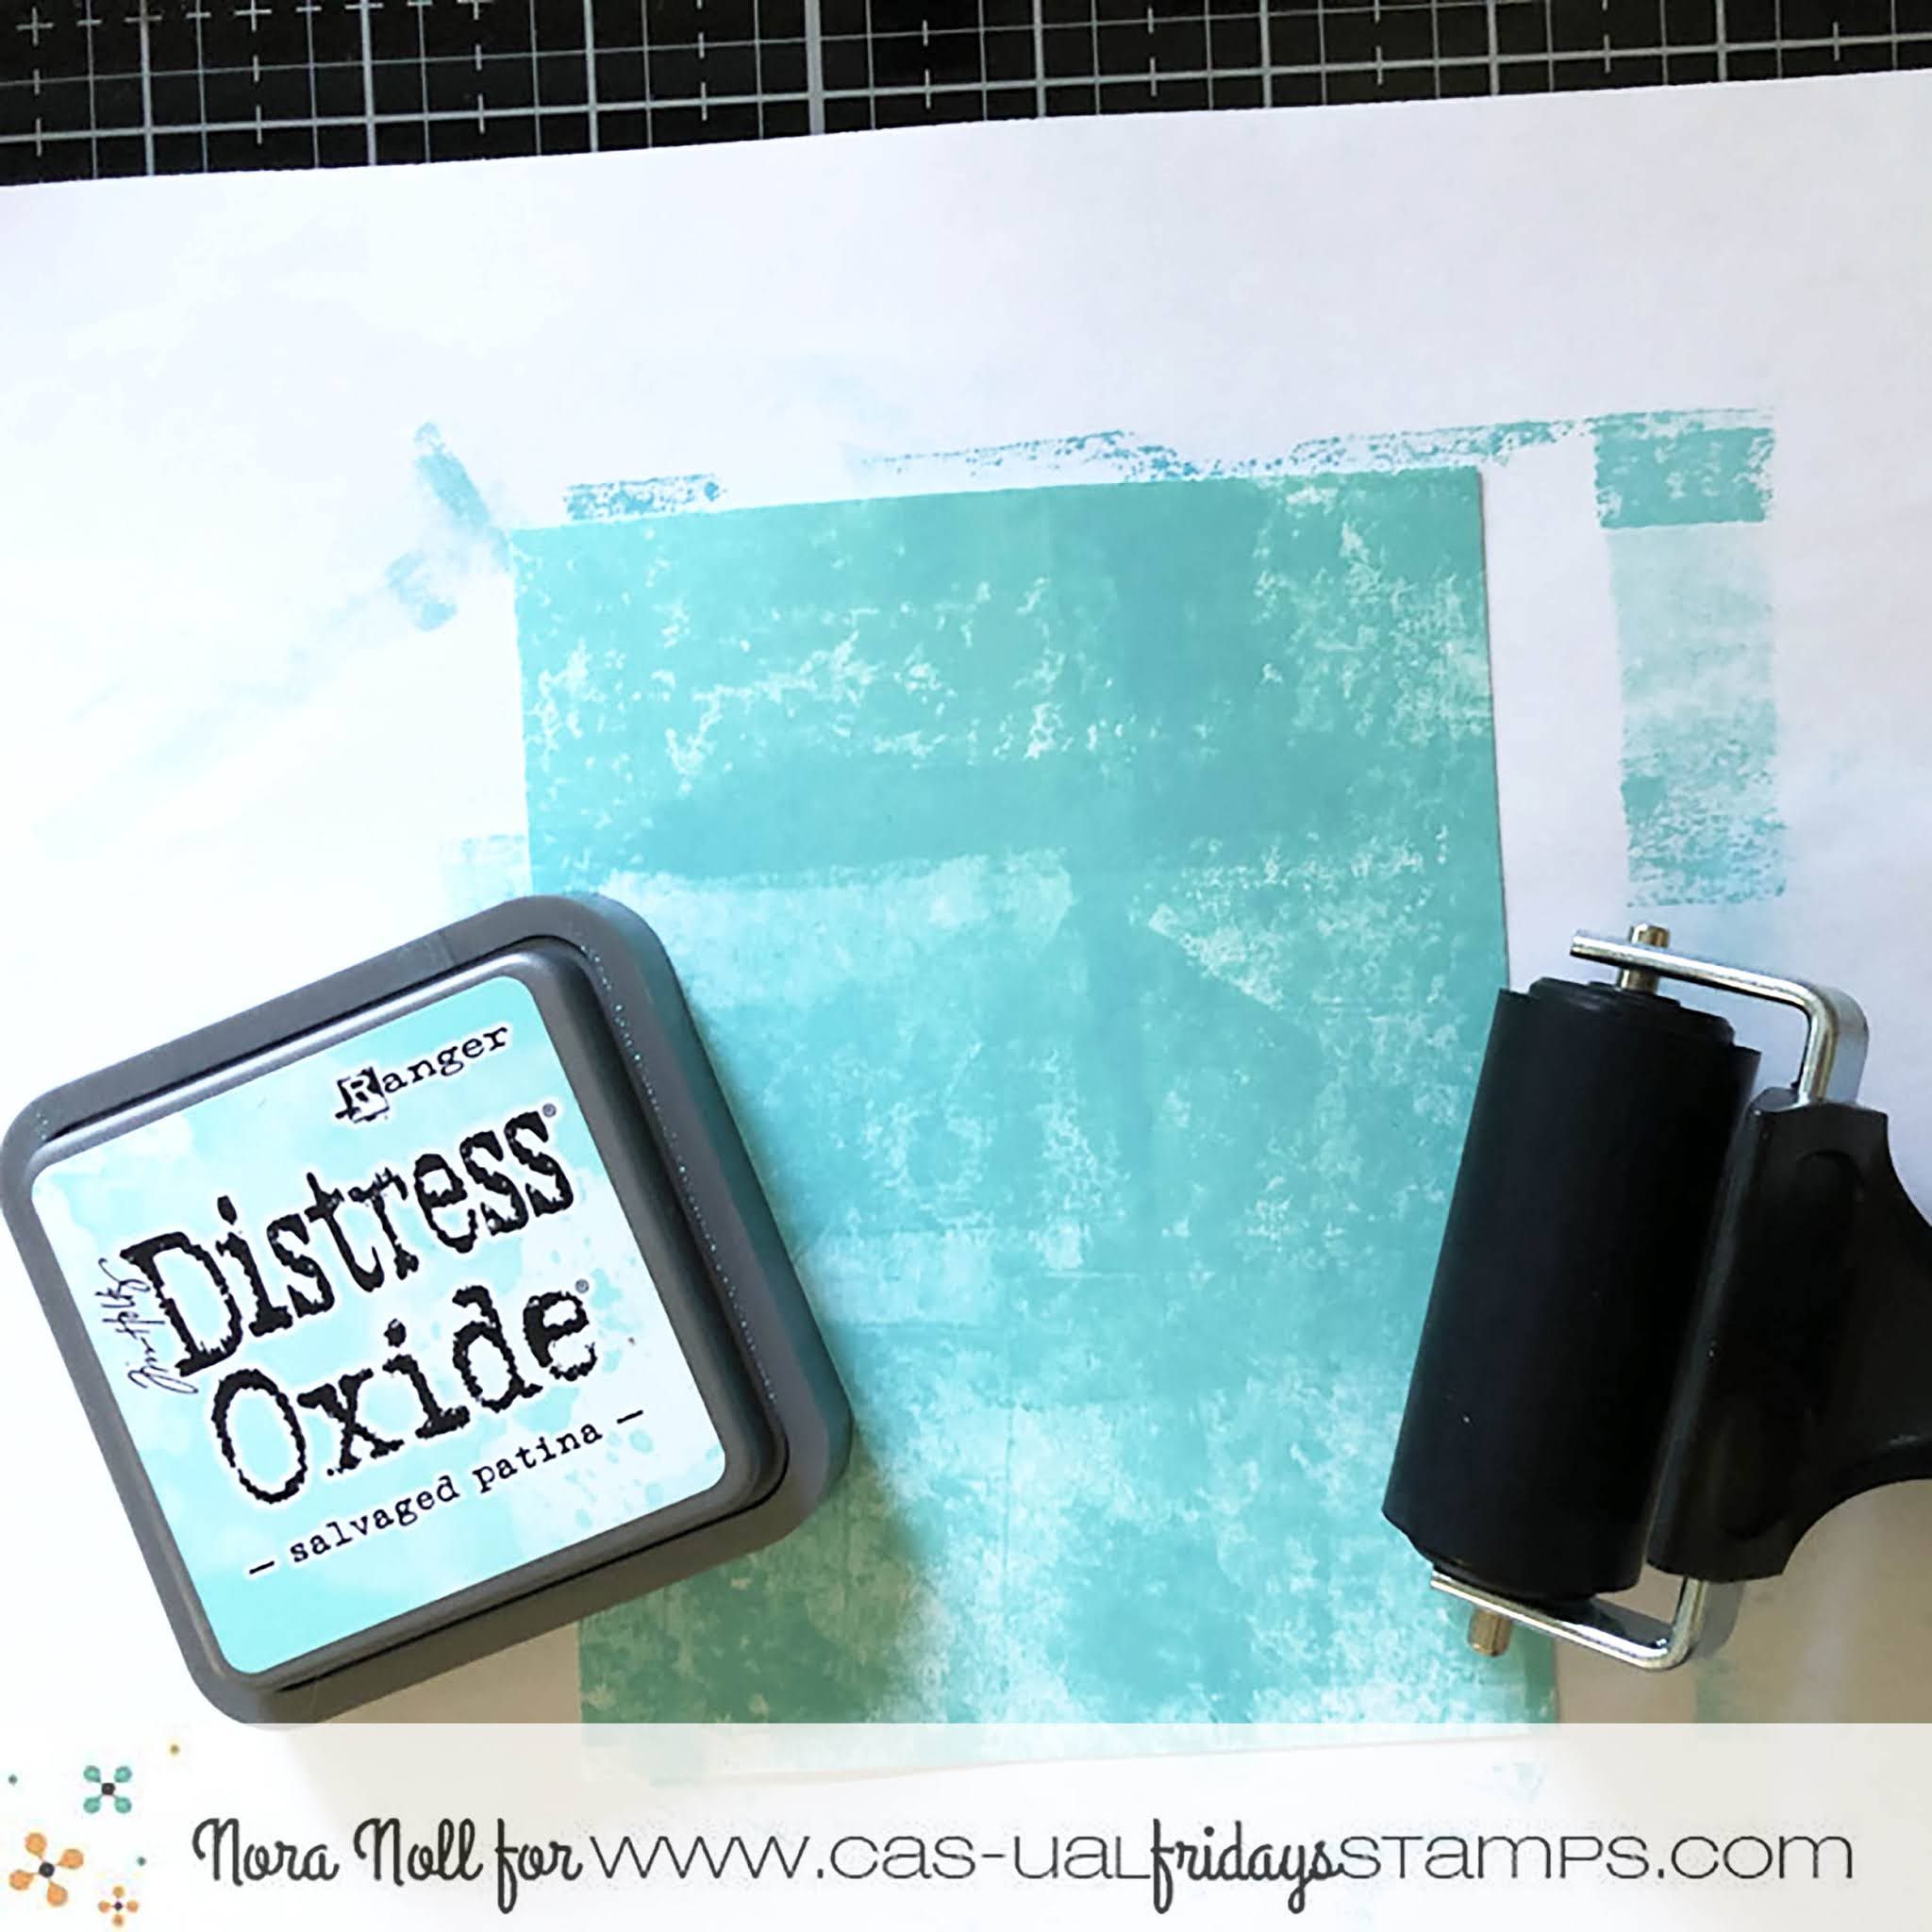
I started off my card by adding Distress Oxide Ink across a of 4 1/2" by 5 1/4," white piece of cardstock with an ink brayer. As you can see, I did not fully cover the cardstock as I knew I was going to be adding layers over this panel. Also, if you don't have a brayer, you can just drag the ink pad across the cardstock. I liked how the brayer looked so I chose to ink the panel up with that.
Next, I used some Nuvo paste and the Curtis Stencil to stencil on top of my inked panel.
I would urge you to let this dry but since I am impatient, I did not do so.
I used the Love Notes stamp set to stamp the xoxoxo sentiment randomly across the card front.
At first I tried to make everything straight but since I was doing this free hand with an acrylic block, only some of the sentiment are perfect. I didn't care as it adds to the look of the card.
I used a music note and the same colored Distress Oxide ink to stamp the notes randomly around my panel. These notes kind of blended in to the background but this was the look I was going for.
The last step I did before I set the panel aside was to flick Distress Stain in a few colors cross the front.
While the card front was drying, I worked on my flower. I used the 4 Petal Die set to die cut a bunch of petals out of white cardstock.
I was not sure how many I would need so I cut extra.
Please forgive the look of my leaf stamp below. It has seen a lot of love!!!
At first I colored the leaves in green using Copic markers. However, I didn't like how it looked with the background. Instead, I stamped a second set of leaves and used oxide ink with flicks of Distress Stain to color them in.
I added my leaves as shown, adhering two with foam adhesive. I then glued the petals on, using both the large and the small die cuts, with a liquid glue. I wanted to be able to play around with where I wanted the petals placed so using a liquid glue that dries slower was a must.
The last step to this card was to add some flower centers with lilac dimensional drops. I looked at white hydrangea photos to see what color the center actually is but didn't have what I wanted in my stash. Since I had fun with the leaves, I decided I could make the centers of the flower whatever color I wanted.
I love love love how this card came out and it was a TON of FUN to make. It looks like it took a ton of time but really it wasn't because it did not require me to be "perfect."
Want to go shopping? There are a lot of fabulous products in the CAS-Fridays Shop. Use my code NORASENTME to get an extra 15% off your total order!!
That is all from me today. Please be sure to stop back to the blog to see some other FABULOUS projects by the Design Team. Have a FABULOUS day!!